
User Guide


• HEALTH
— When you have full health this icon is
green.
As you gradually take
damage, your health icon changes from green to
red.
When you are getting close
to death, your controller will
pulse
if controller vibration is set to
On
in Option
mode
(page 6)
.
• RADAR
— In Single Player games, the radar indicates the direction of your enemies.
In Multiplayer games, it displays the location of your teammates, the loot,
the stash, tag areas and exit points.
• CROSSHAIRS
— Use this to aim weapons. When locked onto an enemy,
the crosshairs turn
red.
When locked onto a non-combatant or friendly,
they turn
green.
Head shots are the hardest to make; they’re also the deadliest.
• AMMO REMAINING
— The number on the left is ammo you have in reserve. Below
the gun icon you see how many bullets are left in your clip. Press the
Reload
(default s) button to reload ammo. Reload is automatic when you empty
the weapon AND you have reserve ammo.
• WEAPON HELD
— Press the
Gun Toggle
(default d) button to switch weapons.
• ACTION ICONS
— (not shown) These icons appear when you can take a special
action such as picking up a new weapon, kicking open a door or even grabbing
a human shield. Press the
Action
(default c) button to take action
(page 8).
• HINT POINTS
— (not shown) Walk into one of these for an explanation
of a game feature.
6
7
GETTING
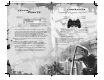
GAME SCREEN
INTO THE GAME
On the Title screen, press the w button
to begin.
CREATING A PROFILE
You must create a profile to save your
game progress through
25 TO LIFE
.
The profile contains your saved game
files, custom characters, option selections
and online identity. Any time you want
to play that profile you can select it
(or other profiles you have created)
before beginning play.
To create a profile name:
When prompted to create a profile,
select
OK
. Use the virtual keyboard
to enter a profile name. Make character
entries in the name field and save your
profile to the memory card.
•
Highlight a letter or number and press
the x button to enter it in the name
field. Press the c button to enter
a space.
•
Select
Delete
to remove letters or
numbers you’ve entered.
• Select
Enter
and
Yes
when prompted
to save your profile.
MAIN MENU
• SINGLE PLAYER (page 8) —
Get
a bloody taste of life on both sides
of the law, as a Criminal and a member
of Law Enforcement too. Select
a difficulty level before starting play.
• MULTIPLAYER ONLINE (pages 15–18)
—
Join the Criminals or Law Enforcement
and find out who rules in bloody wars,
robberies gone bad, adrenaline-
pumping police raids and intense
turf warfare with up to 16 players.
Customize your Criminals or Law
Enforcement character and get ready
to bleed.
• MULTIPLAYER LOCAL NETWORK
(page 18)
— Connect up to 16
PlayStation 2 systems via
a Local Area Network (LAN).
• OPTIONS
— Adjust game settings.
health
radar
crosshairs
ammo remaining
weapon held
SAVING GAME DATA
You will be prompted to save changes
to game options or online data. You
must be using a memory card with
at least 48KB of free memory space
in order to save game data.
PAUSE MENU
Press the w button to pause play and
view the Pause Menu
(screenshot, page 8)
.
Your primary and secondary objectives
are listed along with these options:
• CONTINUE
— Return to play.
• OPTIONS
— Adjust your aim and make
sound changes.
(See more options, below.)
• QUIT
— Return to the Main Menu.
OPTIONS
• BUTTON LAYOUT
— Select one
of four control configurations.
• ANALOG STICK SETTINGS
—
Southpaw
switches the actions
of the left and right analog sticks.
Ass Backwards
gives both analog
sticks camera/character control: the
left analog stick rotates the camera
4/3 and moves the character 1/2;
the right analog stick rotates the view
1/2 and moves the character 4/3.
• AIMING
— Select
Normal
or
Inverted
.
• VIBRATION
— Set the controller’s
vibration function to
Enabled/
Disabled
.
• LOOK SENSITIVITY
— Adjust camera
response time.
• LOOK SPEED
— Adjust how fast the
camera moves when you turn to look.
• STEREO MODE
— Set to correspond
to your TV speakers.
• SOUND
— Adjust sound effects volume.
• MUSIC
— Adjust music volume.
• BLOOD & GUTS
— Set the display of
carnage to
Enabled/Disabled
.
• DONE
— Save changes and exit the
game. Select
Yes
when prompted to
save any changes made to your profile.
ttl ps2 final gs 11/7/05 8:05 PM Page 6