
Installation Guide


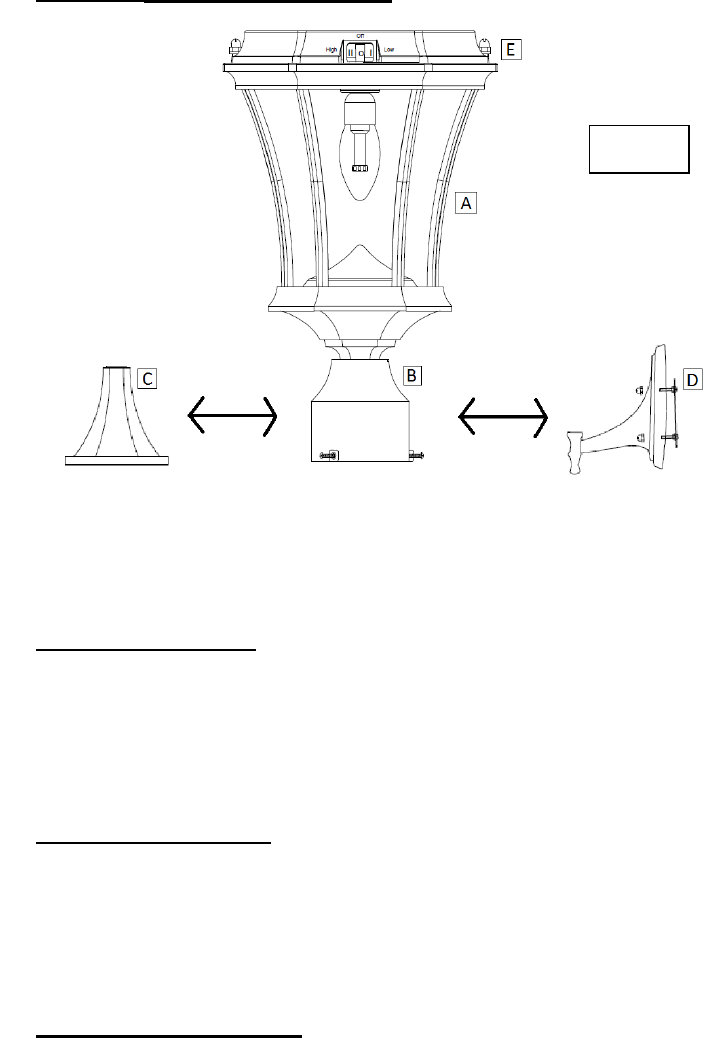
Assembly instructions (Fig. 1)
NOTE: The following steps are for reference only. Consult your local hardware store
for the best installation method for your particular surface.
GS-94P (Post Mount)
1. Use an electric drill to make four holes in the desired surface. Place
provided anchors into holes, place the base of the lamp (C) in line
with the holes and attach with the provided screws.
2. Screw part (A) into Part (C).
GS-94W (Wall Mount)
1. Use an electric drill to make two holes in the wall, place provided
anchors into holes, place the wall bracket in line with the holes and
attach with the provided screws.
2. Screw part (D) into Part (A).
GS-94F (3" Fitter Mount)
NOTE: If you are replacing an existing gas/electric post light, you
must consult a certified technician to disconnect them before
installation.
1. Screw Part (B) on top of the existing 3” post using the screws
provided.
2. Screw Part (A) into Part (B).
Fig. 1