
Installation Guide


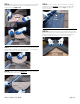


STEP 6 – Flip the template over and use it to find the angles for the left hip. Mark
the first angle for the left hip on the template. Use a straight edge to draw a line con
-
necting the mark to the template notch.
STEP 7 – Rotate the template around to the front roof plane. Align the first angle
to right hip. Mark a second angle on the template for the left hip. Use a straight edge to
draw a line connecting the second mark to the template notch.
STEP 8 – Align the template to the top left corner of the Cobra
®
Hip Vent this
time, and mark the two angles on the top of the vent.
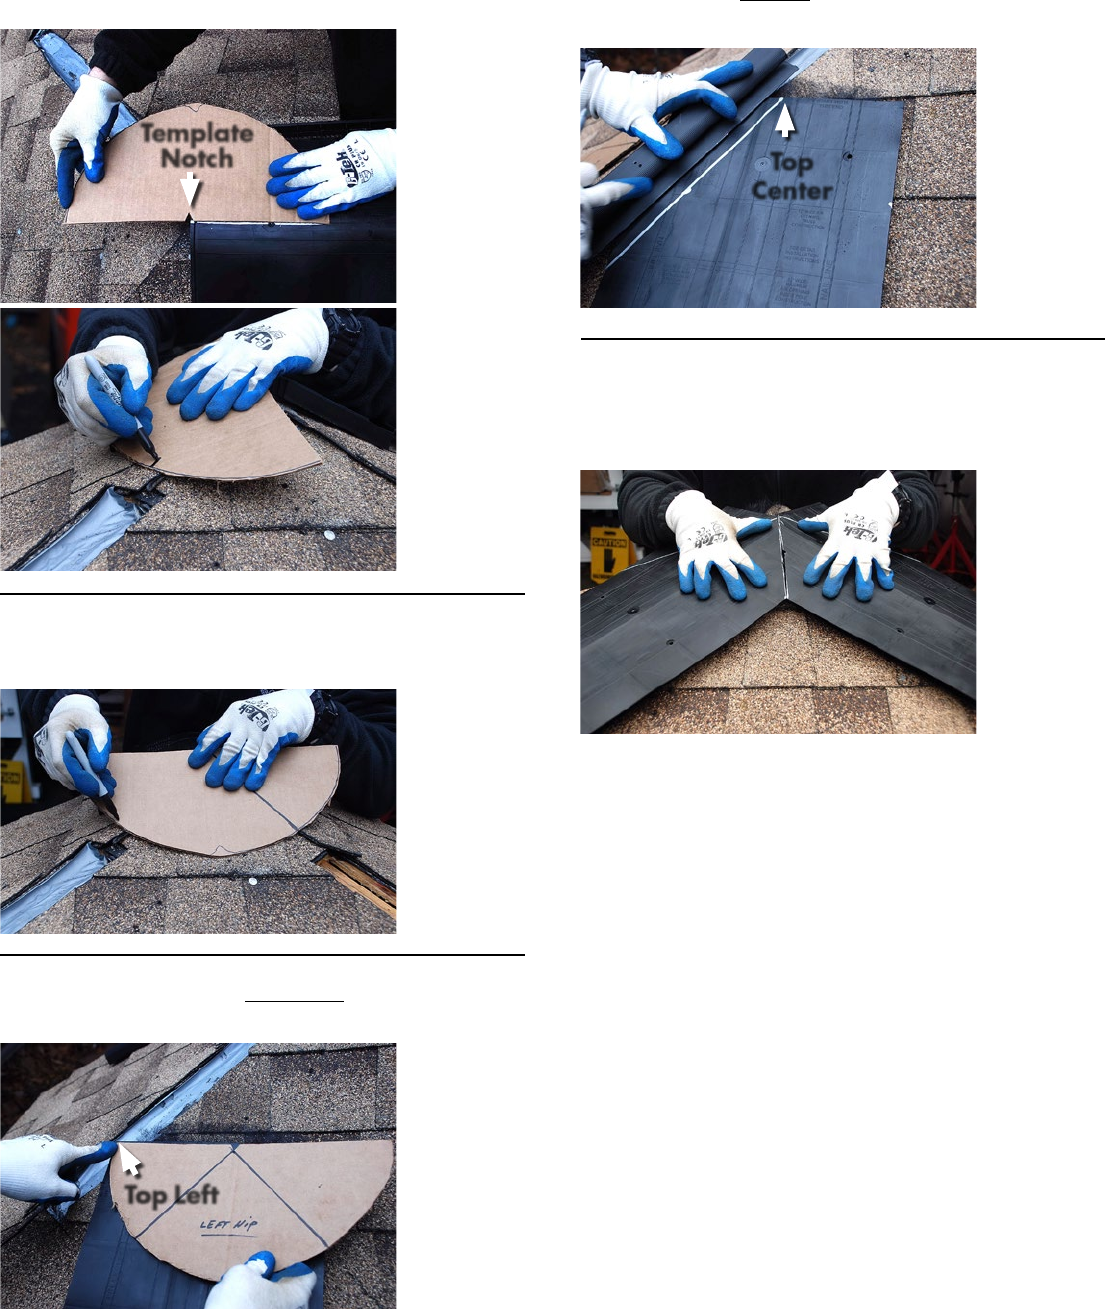
STEP 9 – Locate the top center of the Cobra
®
Hip Vent. Use a straight edge
to draw two lines from the top center through the two previously marked angles.
Carefully cut the vent along the two lines as shown in Step 5. The left hip vent
section is now complete.
STEP 10 – Snugly fit Cobra
®
Hip Vents together and with the ridge vent. Fasten
the hip vents into place using 1 ¾” (44 mm) coil nails through the pre-marked 6” (152
mm) increment nail gun targets. Use a 3” (76 mm) wide strip of WeatherWatch
®
or
StormGuard
®
Self-adhering Leak Barrier to cover any joints between vents.
©2015 GAF 8/15 #545 gaf.com
Template
Notch
Top Left
Top
Center