
Installation Guide


COBRA
®
HIP VENT TO RIDGE VENT MITER CUT INSTRUCTIONS
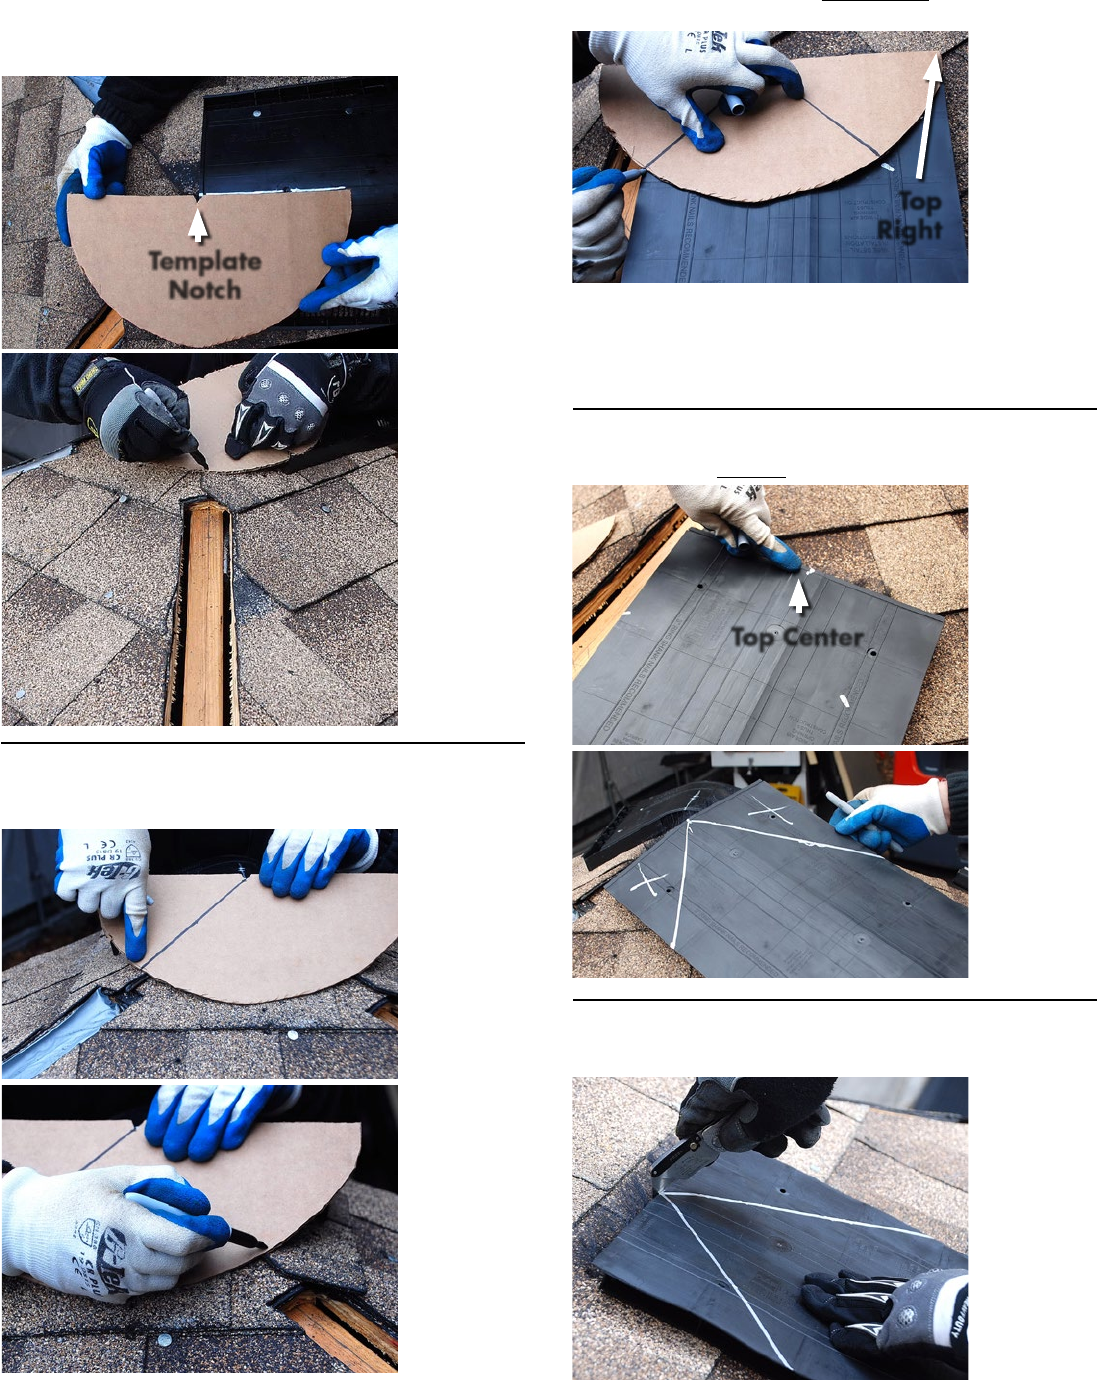
STEP 1 – Cut out the template from Cobra
®
Hip Vent box. On right side of ridge
vent, position template parallel to the ridge vent center line with the template notch
at end of the ridge vent. Mark the first angle for the right hip on the template. Use a
straight edge to draw a line connecting this mark to the template notch.
STEP 2 – Rotate the template around to the front roof plane. Align the first angle
to the left hip. Mark a second angle on template for the right hip. Use a straight edge to
draw a line connecting the second mark to the template notch.
STEP 3 – Align the template to the top right corner of the Cobra
®
Hip Vent
and mark the two angles on the top of the vent.
Note: The “Towards Peak” arrows embossed on the top surface of the vent should
always point towards the peak of the roof.
Helpful Hint! Write “Right Hip” on this side of the template to help avoid any
confusion when using the other side of the template for the left hip.
STEP 4 – Locate the top center of the Cobra
®
Hip Vent. Use a straight edge to
draw two lines from the top center through the two previously marked angles.
STEP 5 – Carefully cut the Cobra
®
Hip Vent along the two lines. The right hip vent
section is now complete.
Template
Notch
Top Center
Top
Right