
Installation guide


Table Of Contents
- A Mac utility is provided with G-RAID mini2 to select the RAID mode. Follow the directions below to configure G-RAID mini2 in fail-safe RAID 1 (mirroring) mode.
- NOTE: G-RAID mini ships from the factory in RAID 0 mode.
- /
- WARNING: Changing the RAID level will erase any data stored on G-RAID mini.
- A Windows utility is provided with G-RAID mini to select the RAID mode. Follow the directions below to configure G-RAID mini2 in fail-safe RAID 1 (mirroring) mode.
- NOTE: G-RAID mini2 ships from the factory in RAID 0 mode.
- /
- WARNING: Changing the RAID level will erase any data stored on G-RAID mini2.
G-RAID mini
2
Installation Guide
11. Formatting G-RAID mini
2
- Mac OS X
G-RAID mini
2
is initialized at the factory as a
single Mac OS X volume in RAID 0 mode. Power
on G-RAID mini
2
, wait 10 seconds, then power on
your Mac. G-RAID mini
2
will mount on the
desktop as shown below.
If it becomes necessary to re-initialize G-RAID
mini
2
for Mac OS X, follow the instructions below.
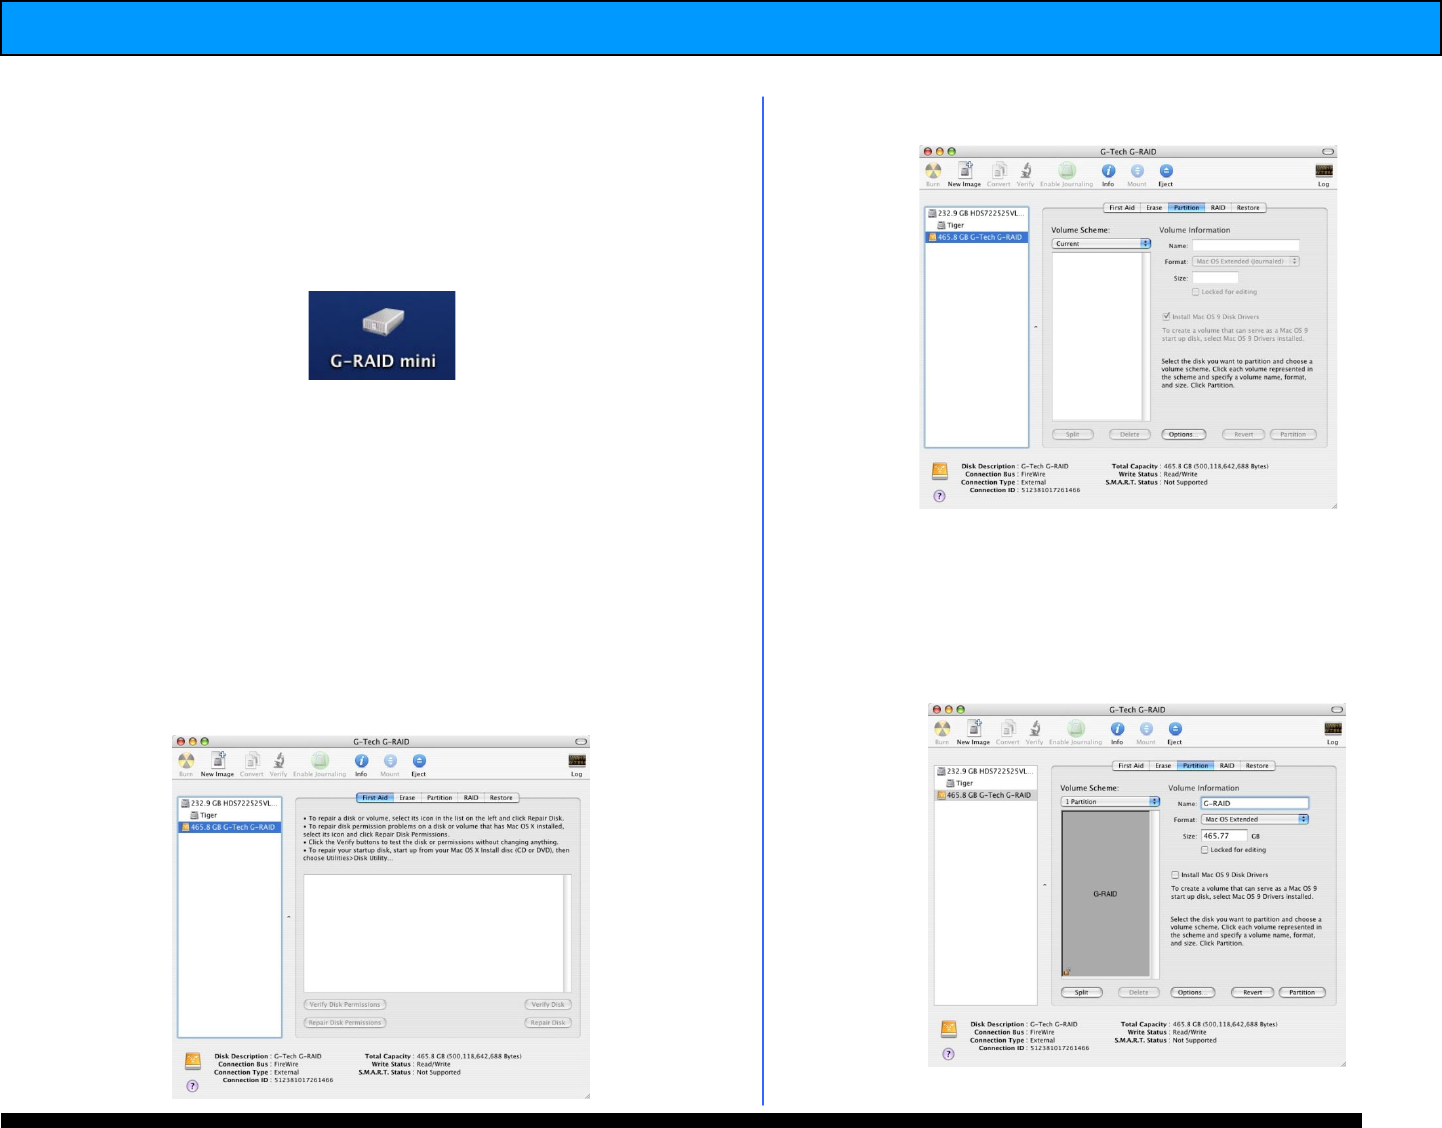
1. Open the Apple Disk Utility. The Apple Disk
Utility is in the Utilities Folder located in the
Applications Folder on the Macintosh HD. Select
G-RAID mini
2
by clicking on the entry in the left-
hand column as shown below. Information about
G-RAID mini
2
will be displayed at the bottom.
3. Select the Partition tab to view the partition
options as shown below.
4. Set the Volume Scheme: to 1 Partition.
Enter a Volume Name under Volume
Information (in this example “G-RAID mini
2
”)
and set Format to Mac OS Extended as shown
b e l o w.