
Installation guide


Table Of Contents
- A Mac utility is provided with G-RAID mini2 to select the RAID mode. Follow the directions below to configure G-RAID mini2 in fail-safe RAID 1 (mirroring) mode.
- NOTE: G-RAID mini ships from the factory in RAID 0 mode.
- /
- WARNING: Changing the RAID level will erase any data stored on G-RAID mini.
- A Windows utility is provided with G-RAID mini to select the RAID mode. Follow the directions below to configure G-RAID mini2 in fail-safe RAID 1 (mirroring) mode.
- NOTE: G-RAID mini2 ships from the factory in RAID 0 mode.
- /
- WARNING: Changing the RAID level will erase any data stored on G-RAID mini2.
G-RAID mini
2
Installation Guide
14. Cross-Platform Use
To setup your G-RAID mini
2
for use on both
Windows and Macintosh systems, use the Apple
Disk utility and format G-RAID mini
2
FAT32.
NOTE: Prior to setting up G-RAID mini
2
for Cross-Platform
use, make sure that the unit is configured in the desired
RAID mode.
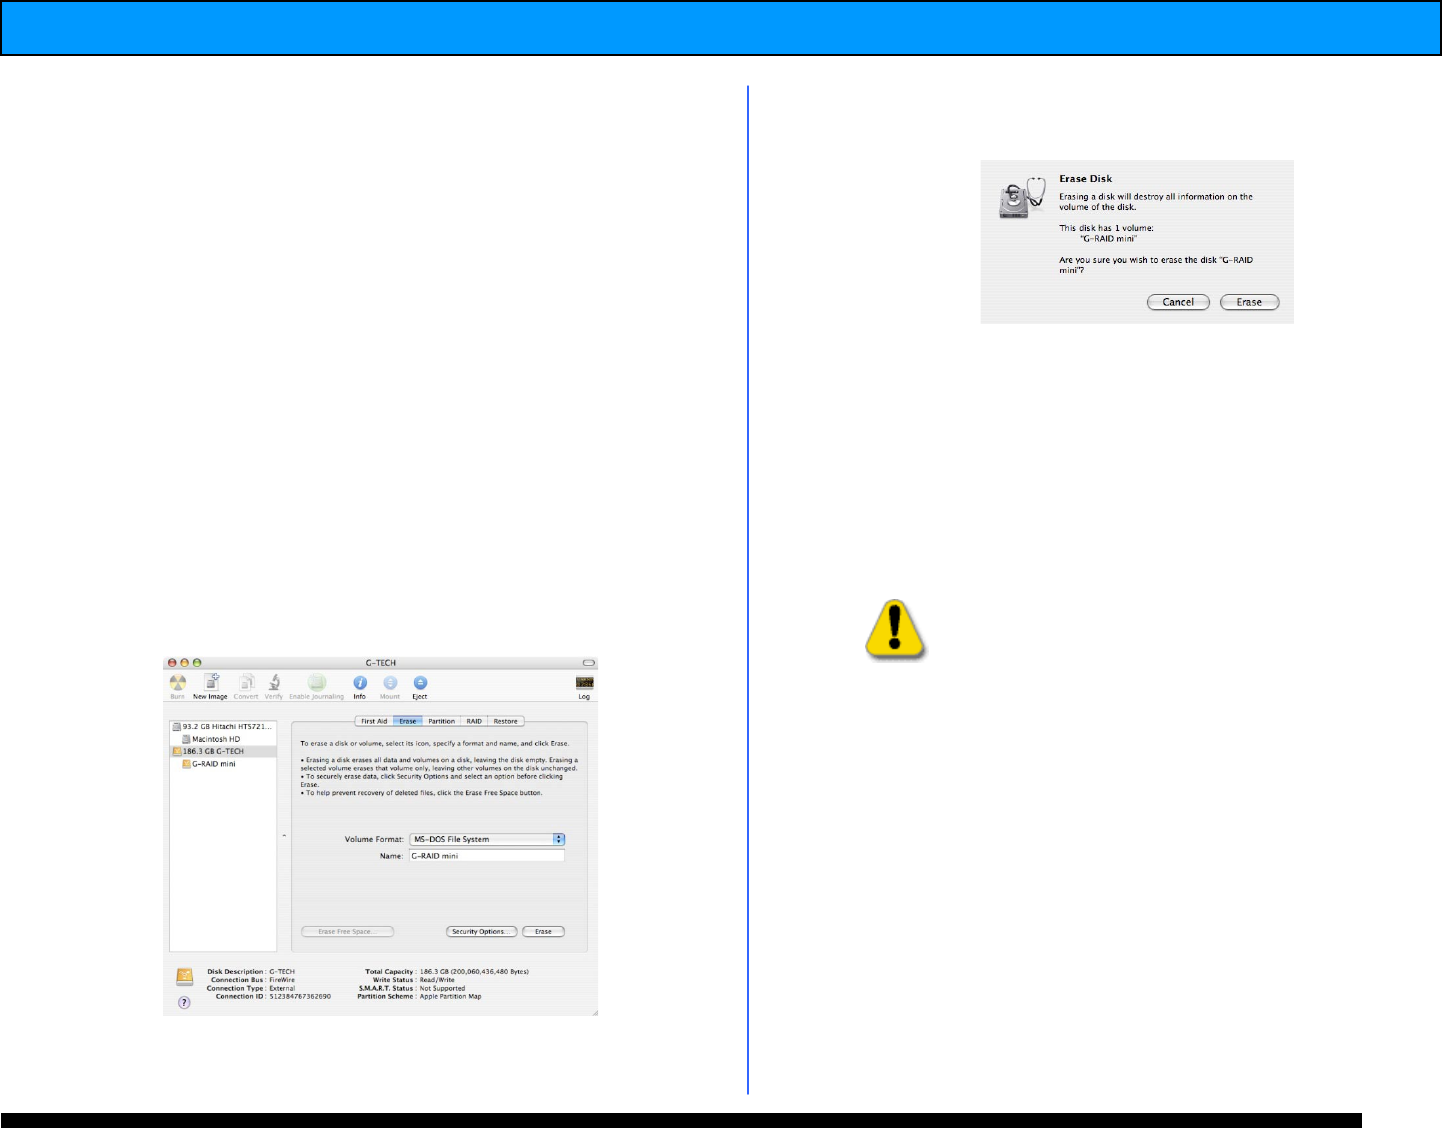
1. Open the Apple Disk Utility. (The Apple Disk
Utility is in the Utilities Folder located in the
Applications Folder on your system drive). A
window like the one below will appear.
2. Select the G-RAID mini
2
from the left-hand
column, then select the “Erase” button at the
top as shown. Select MS-DOS File System
from the drop down menu and Enter “G-RAID
mini
2
” in the Name field.
3. Click on the erase button and the following will
appear.
4. Click “Erase” and your drive will be formatted
to its full capacity as FAT32. With this format,
you will be able to READ/WRITE on both
windows (2000/XP) and MAC OS machines.
NOTE: You could format your drive on a Windows
machine FAT32, however Windows limits FAT32
partitions to 32GB in size.
WARNING:
THIS WILL ERASE ALL D A T A ON YOUR DRIVE.
NOTE: The 'MS-DOS File System' cannot write files over
4 GB. If you are working with files over 4 GB, you may
want to choose a software option like MacDrive.
MacDrive is Windows software that enables the Windows
OS to mount MAC formatted drives.
(www.macdrive.com)