
Installation guide


Table Of Contents
- A Mac utility is provided with G-RAID mini2 to select the RAID mode. Follow the directions below to configure G-RAID mini2 in fail-safe RAID 1 (mirroring) mode.
- NOTE: G-RAID mini ships from the factory in RAID 0 mode.
- /
- WARNING: Changing the RAID level will erase any data stored on G-RAID mini.
- A Windows utility is provided with G-RAID mini to select the RAID mode. Follow the directions below to configure G-RAID mini2 in fail-safe RAID 1 (mirroring) mode.
- NOTE: G-RAID mini2 ships from the factory in RAID 0 mode.
- /
- WARNING: Changing the RAID level will erase any data stored on G-RAID mini2.
G-RAID mini
2
Installation Guide
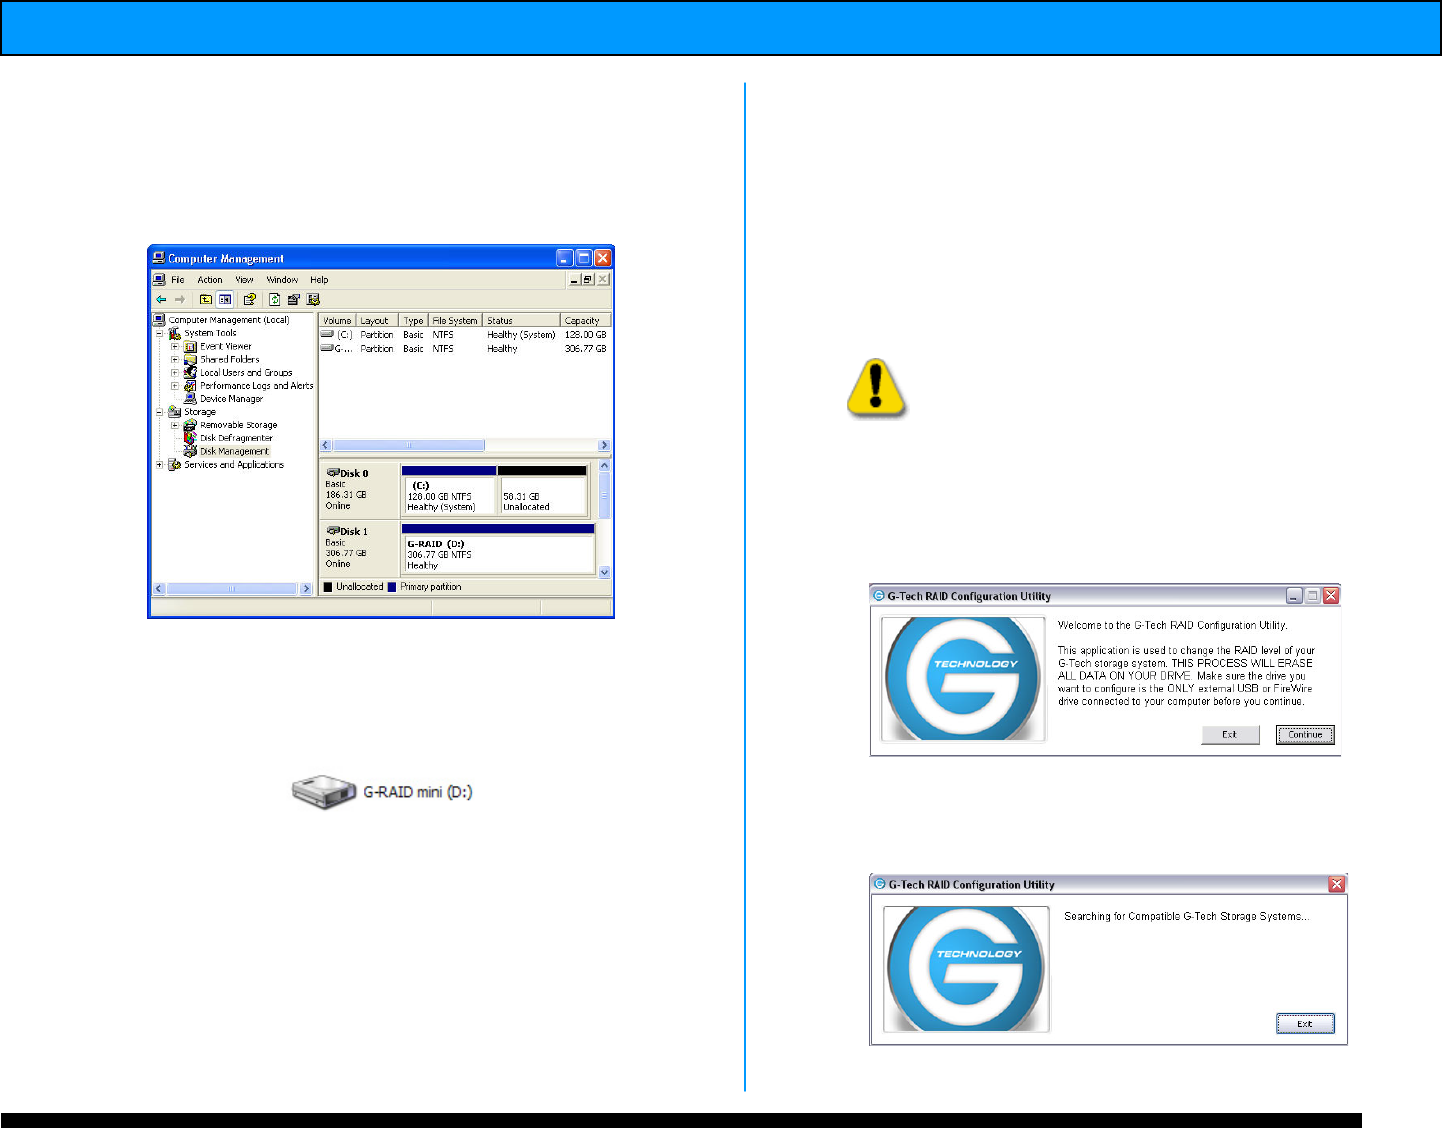
13. Windows will format the volume and then
display the following window. Disk 1 is now
identified as G-RAID mini (E:). Exit the Computer
Management console
14. G-RAID mini will now be displayed as an
available hard disk drive under My Computer as
shown below.
G-RAID mini is now set up for use!!
13. RAID 1 Mode – Windows
A Windows utility is provided with G-RAID mini to
select the RAID mode. Follow the directions below
to configure G-RAID mini
2
in fail-safe RAID 1
(mirroring) mode.
NOTE: G-RAID mini
2
ships from the factory in RAID 0
mode.
WARNING: Changing the RAID level will
erase any data stored on G-RAID mini
2
.
1. Launch the G-Tech Configurator utility located
on the CD that ships with the unit. The
following window will appear.
2. Click on the <Continue> button. The following
window will appear.
NOTE: The search process may take some time…