
Installation guide


Table Of Contents
- A Mac utility is provided with G-RAID mini2 to select the RAID mode. Follow the directions below to configure G-RAID mini2 in fail-safe RAID 1 (mirroring) mode.
- NOTE: G-RAID mini ships from the factory in RAID 0 mode.
- /
- WARNING: Changing the RAID level will erase any data stored on G-RAID mini.
- A Windows utility is provided with G-RAID mini to select the RAID mode. Follow the directions below to configure G-RAID mini2 in fail-safe RAID 1 (mirroring) mode.
- NOTE: G-RAID mini2 ships from the factory in RAID 0 mode.
- /
- WARNING: Changing the RAID level will erase any data stored on G-RAID mini2.
G-RAID mini
2
Installation Guide
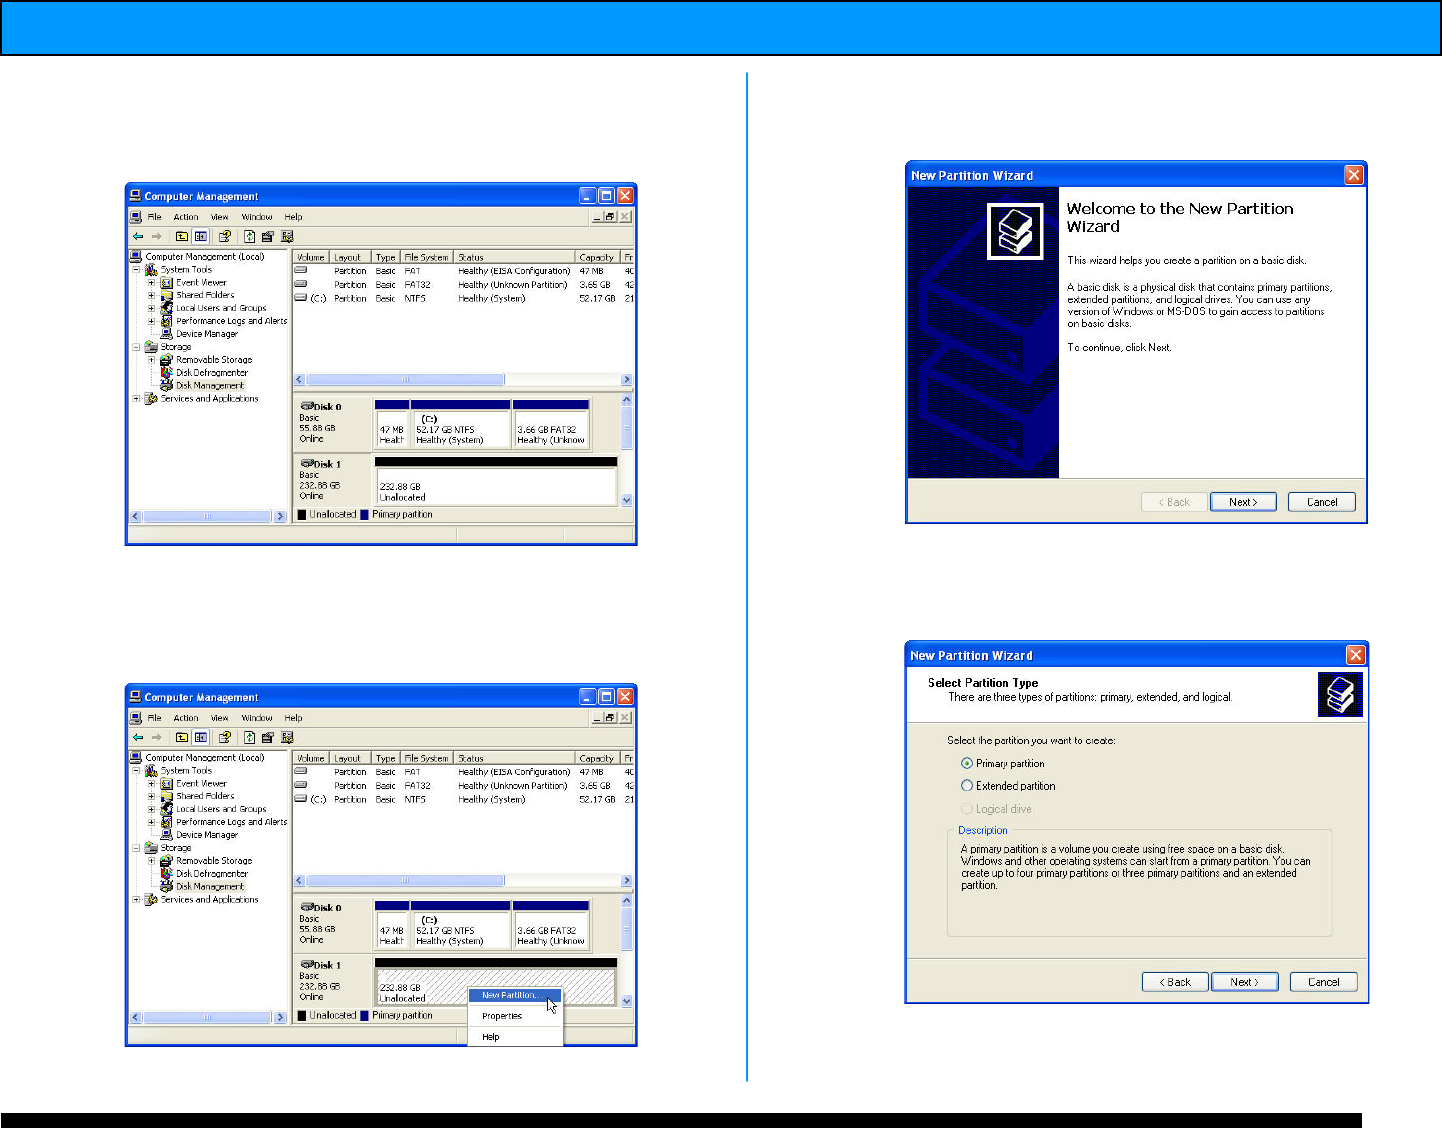
5. The following window will appear. G-RAID mini
(Disk 1) is now identified as Basic and Online.
6. Right-click on the Disk 1 “Unallocated” bar
entry and select New Partition… from the pull-
down menu as shown below.
7. The window shown below will appear. Click
on the <Next> button to continue.
8. The following window will appear. Click on the
<Next> button to continue.
9. The window shown below will appear. Click on
the <Next> button to continue. This will create