
Installation Instructions


3. INITIAL SETTINGS
3-12
3. The cursor is selecting [NO]; push the knob. Rotate the knob to select [YES] then
push the knob to show the following message.
4. Press the W (or X) key.
5. Remove the appropriate rubber cap of the cylinder to bleed air.
6. Press the W (or X) key.
7. Remove the appropriate rubber cap of the cylinder to bleed air.
8. Repeat steps 4-7 to bleed air completely.
Rudder test
Note: The rudder test can not be performed if the drive unit has not been selected.
1. Go back to the [DOCKSIDE SETUP] menu.
2. Rotate the knob to select [RUDDER TEST] then push the knob.
3. The cursor is selecting [NO]; push the knob. Rotate the knob to select [YES] then
push the knob to show the following messege.
4. Center the rudder then push the knob.
5. Confirm the direction that the rudder move with pressing the X key.
6. Release the X key.
7. Press the W (or X) key according to the direction that confirmed at step 5.
8. Turn the helm or press the W (or X) key hard-over to PORT/STBD then push the
knob.
9. Long press the W (or X) key hard-over to the opposite direction from step 8.
10.When the rudder is reached to hard limit, release the W (or X) key to display following
messsage.
Long-press the W (or X) key to turn hard-over in direction opposite that done in step 8
then select [YES]. If not, select [NO] and go back to step 8.
11.At the completion of the rudder test, one of the results shown below appears.
• RUDDER TEST COMPLETED.
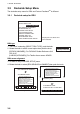
AIR BLEEDING
PUSH ARROW KEYS TO ENABLE
PUMPSET
PUSH MENU KEY WHEN DONE
USE WHEEL TO
CENTER RUDDER BEFORE
RUDDER TEST.
ARE YOU SURE?
YES ENTER NO MENU
HAS THE RUDDER REACHED
THE HARD LIMIT?
YES ENTER NO MENU