
User Guide

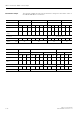


Table Of Contents
- 3 3RT1 contactors/ 3RH1 control relays
- 3.1 Specifications/regulations/approvals
- 3.2 Device description
- 3.3 Application and areas of use
- 3.3.1 3RT10 contactors with 3 main contacts for switching motors
- 3.3.2 3RT14 contactors with 3 main contacts for switching resistive loads (AC-1)
- 3.3.3 3RT12 Vacuum contactors
- 3.3.4 3RT13 and 3RT15 contactors with 4 main contacts
- 3.3.5 3RT16 capacitor contactors
- 3.3.6 Contactors with an extended operating range
- 3.3.7 3RH1 control relays
- 3.3.8 3RT10 contactor relays for switching motors (interface) and 3RH11 control relays for switching auxiliary circuits
- 3.3.9 3RA13 Contactor combinations for reversing
- 3.3.10 3RT14 Wye-delta combinations

3RT1 contactors/ 3RH1 control relays
SIRIUS System Manual
GWA 4NEB 430 0999-02 DS 01
3-17
3.2.2.3 Electronic coil
Designs The electronic coil comes in three different designs to choose from:
Electronic coil design 3RT1...-.N for PLC-output 24 V DC
There are 2 ways to control the contactor:
• using A1/A2 terminals
• using a PLC-output, 24 V DC
Control
Design for contactor type
3RT1...-.N for PLC-output 24 V DC 3RT10 / 14 Air-break contac-
tors
3RT12 Vacuum contactor
3RT1...-.P for PLC-output 24 V DC or PLC-relay output; with
Remaining lifetime indicator RLT
3RT10 / 14 Air-break contac-
tors
3RT1...-.Q with integrated AS-Interface-port;
with Remaining lifetime indicator RLT
Table 3-9: Electronic coil
Control using A1 / A2 terminals
The contactor is controlled in the conventional man-
ner by applying the control voltage to the A1/A2 ter-
minals from a switching contact
Note
The small sliding switch on the front left side of the
withdrawable coil needs to be in the "OFF" position
(this is the default setting from the factory). Other-
wise, the contactor cannot be activated at the A1/
A2 terminals.
Control using PLC
The contactor is controlled directly by the PLC with-
out a coupling device:
• with 24 V DC
• over PLC-control input (EN 61 131-2/Type 2)
• with current consumption ≤ 30 mA
• with an operational range of 17 to 30 V DC
The control voltage to energize the magnetic coil is
connected at A1/A2.
Note
The small sliding switch on the front left side of the
withdrawable coil needs to be set to the "ON" posi-
tion before use (the default setting from the factory
is“OFF”).
L1/L+
N/L-
+-
A1 A2
on
off
PLC
+
-
DC 24V
Sliding switch"OFF"
L1/L+
N/L-
+-
DC
A1 A2
24 V
GND
on
off
PLC
+
-
DC 24V
Sliding switch "ON"
PLC-Input
Plug 2-pole