
Operation Manual


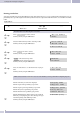


Selecting the configuration data server
Begin as follows:
a
M <> O <> O
»Menu« button
7.Administrator 1.Auto config
<>
O
Select »1.Auto config« to specify the server on which the confi
-
guration data are stored.
Confirm your entry using the »OK« button.
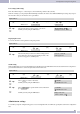
1.Auto config
2.Upgrade System
<>
O
Select »1.Config mode« to activate the server. The following ser
-
vers are available:
»1.Disable« (deactivating server access)
»2.TFTP«
»3.FTP«
»4.HTTP«
Confirm your entry using the »OK« button.
1.*Disabled
2.TFTP
<>
O
Select the activated server type and enter the IP address, user
name (»Login Name«) and the password (»Password«) for the
FTP server.
Confirm your entry using the »OK« button.
2.TFTP
3.FTP
4.HTTP
(Upgrading the telephone software
Begin as follows:
a
M <> O <> O
»Menu« button
7.Administrator 2.Upgrade system
The corresponding entries must be made for the following settings using the Web Configurator. These procedures
are then carried out in the functions that are described.
<>
O
Select »3.Status« to view the current software and the preset
time for the next automatic upgrade.
Confirm your entry using the »OK« button.
3.Status
4.Reset Time
M
Press the »Menu« button.
<>
O
Click »2.Upgrade via« to select the server on which the file to
upgrade is located.
»1.Disable« (deactivating server access)
»2.TFTP«
»3.FTP«
»4.HTTP.
Confirm your entry using the »OK« button>«
2.Upgrade via
3.Status
M
Press the »Menu« button.
<>
O
Select »1.Upgrade Now« to view the current software.
Confirm your entry using the »OK« button.
1.Upgrate Now
2.Upgrade via
<>
O
Select whether you wish to continue »Yes« or whether you
wish to quit the upgrade »No«.
Confirm your entry using the »OK« button.
1.Yes
2*No
Configuration using the telephone
31