P2WW-1860-01EN Upgrade User’s Guide
Index 1. Introduction................................................................................. 1 1.1. System Requirements............................................................................ 3 2. How to Install .............................................................................. 4 2.1. Installing ScanSnap Upgrade................................................................. 4 3. ScanSnap New Functions.......................................................... 9 3.1.
ii
1. Introduction Thank you for purchasing “ScanSnap Upgrade” product. So far ScanSnap has been going through from fi-4110EOX2, fi-5110EOX and fi-5110EOX2, applying new functions and additional bundle software. This is an extensional program for the customers who purchased ScanSnap fi-4110EOX2 and ScanSnap fi-5110EOX to realize the new functions that have been applied up to ScanSnap fi-5110EOX2 in your product.
How Trademarks and Product Names Are Indicated In This Manual References to operating systems (OS) are indicated as follows: Windows 98: Microsoft® Windows® 98 operating system Windows Me: Microsoft® Windows® Millennium Edition operating system Windows 2000: Microsoft® Windows® 2000 Professional operating system Windows XP: Microsoft® Windows® XP Professional operating system Microsoft® Windows® XP Home Edition operating system Where there is no distinction between the different versions of the above
Symbols Used In This Manual This manual uses the following symbols in explanations in addition to warning indications. This symbol alerts operators to particularly important information. Be sure to read this information. This symbol alerts operators to helpful advice regarding operation. Screen Examples in This Manual The screen examples in this manual are subject to change without notice in the interest of product improvement.
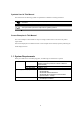
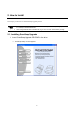
2. How to Install This chapter provides how to install ScanSnap Upgrade product. ● ● Confirm that ScanSnap Monitor (in case of fi-4110EOX2) or ScanSnap Manager (in case of fi-5110EOX) is installed beforehand. When using Windows 2000 or Windows XP, log on as a user with “Administrator” privilege. 2.1. Installing ScanSnap Upgrade 1. Insert “ScanSnap Upgrade CD-ROM” in the drive. Ö “ScanSnap Setup” screen appears.
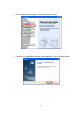
2. Click [Install Product] button in “ScanSnap Setup” screen. 3. “Welcome to InstallShield Wizard” screen appears. Then click [Next] button.
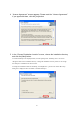
4. “License Agreement” screen appears. Please read the “License Agreement.” If you agree with them, click the [Yes] button. 5. In the “Choose Destination Location” screen, choose the installation directory and click the [Next] button. To install ScanSnap in the displayed folder, click the [Next] button. Normally, there is no need to change the folder in the installation directory. Change the installation directory if there is not enough free disk space available for the selected drive.
6. Select an installation option among “Typical (recommended)”, “Compact” and “Custom” in “Setup Type” screen and click [Next] button. The following programs are installed depending on the selection. ● Typical ScanSnap Manager (or ScanSnap Monitor), ScanSnap Organizer, CardMinder, PDF Thumbnail View are installed including respective manuals. ● Compact ScanSnap Manager is installed including the manual. ● Custom You can select the software and the manuals to install. 7.
8. After the installation is finished, the “InstallShield Wizard Complete” screen will be displayed. Then click the [Finish] button. To complete the installation, you have to restart your PC. The installation is completed. Uninstalling the programs ● “ScanSnap Upgrade” is installed as a part of the functions of “ScanSnap Monitor” for fi-4110EOX2 or “ScanSnap Manager” for fi-5110EOX. Therefore if you uninstall the ScanSnap Monitor / ScanSnap Manager, the programs are also deleted together.
3. ScanSnap New Functions This chapter provides the details of new functions added by the ScanSnap Upgrade. ● ● ● For the operation of the previous functions, refer to the manual or the operator’s guide attached the product. As this chapter explains the functions using the ScanSnap fi-5110EOX screen, the screen appeared on your computer may differ depending on the model.
Online Update “ScanSnap Icon” menu -[Help] / Can update the program to the latest version via the internet environment. 9 9 9: A function newly provided by the product. 8: A function already implemented. - : A function not available Other changes In case of fi-4110EOX2, it cannot start scanning while the “Scan and Save Settings” window is displayed on the monitor before the upgrade.
3.2. How to setup the functions Settings of the functions added by the update can be changed from the ScanSnap icon on the Windows task bar as before. 3.2.1. Menu Right-clicking the ScanSnap icon , the following menu appears. New New Setting... The “Scan and Save Settings” window appears. * Configures the ScanSnap settings. Carrier Sheet... See 3.2.2 The “Carrier Sheet Settings” window appears. * Configures the settings for Carrier Sheet. See 4.4 * It is only for fi-5110EOX.
3.2.2. Save and Scanning Settings When “Settings…” is selected, the following window appears... Tabs You can configure the save and scanning settings of the ScanSnap with the six tabs. The following describes the new setting items of each of the tabs. Descriptions on the manual use the windows on the ScanSnap fi-5110EOX for the explanations. Therefore the screen appeared may differ depending on the model.
[Save] tab New Rename file after scanning When checked, the “Save scanned image as” window appears. You can change the folder to save the scanned files, or rename files in this screen. ● ● The generated file is named automatically as specified in [Filename format…] in advance when it is saved. If there is no need to rename, click the [Save] button. When multiple files are generated with one scan, the serial numbers are appended after the file names. (=> File name + a serial number in the scanning.
[Scanning] tab Clicking [Option] button, the following window appears.
Allow automatic image deskew This setting automatically detects skewed documents and corrects them for the output data. Up to +-5 degrees of skews can be corrected. This function judges a document skew based on the characters on the document.
Continue scanning after current scanning is finished After scanning a batch of documents, a message confirming whether to continue scanning appears. To continue scanning load another batch of documents onto the scanner, and click the [Continue scanning] button. To finish scanning, click the [Finish Scanning] button. At the point where scanning ended, all the images scanned are consolidated into one file and generated. ● ● It is possible to continue scanning up to 1000 pages.
[File option] tab By clicking [Option] button, when PDF (*.pdf) format is specified, the following window appears.
Set a password for PDF file You can set a password for a PDF file created after scanning. It becomes impossible to open a password-protected file if you do not enter the password for that file. The enter password screen appears whenever the scanning is finished. Enter a password in two places (one place is for confirmation), and click the [OK] button. B If you click the [Cancel] button, the file is saved as a normal PDF file without a password.
[Paper size] tab New [Custom...] button With this function, you can register up to five customized document sizes at the [Paper size:] menu. Clicking this button displays the following setting window: 1. Click the [Add...] button. 2. The following screen appears.
Enter the document size : For fi-4110EOX2 Width Length 55 - 210mm (2.17 - 8.26 inch) 90 - 360mm (3.55 - 14.17 inch) Enter the name for the custom document size in [Name:]. B The entered name is displayed in [Paper size:]. 3. To complete the setting, click the [OK] button. B A new customized document size is registered. 4. Click [Close] to exit from the “Add or Remove Custom size.” 1.
[Compression] tab New Enable High Compression When saving, it compresses the generated image in higher rate. It decreases the file size even smaller compared to the ordinary compressions. ● ● This function compresses characters and backgrounds on the document separately. So using this function on the document which mostly contains text characters, the file size becomes smaller while keeping the quality of the characters as they are.
3.3. Saving Scan Settings You can save and assign names to the current settings in ScanSnap Monitor or ScanSnap Manager. With just a click of the ScanSnap icon, you can retrieve and use the saved settings easily. If you create different types of frequently used scan settings in advance, you can scan document easily without changing settings every each time. The following explains the operation procedure. 3.3.1. Saving Scan Settings 1. Right-click ScanSnap icon , and select “Settings...” 2.
3. When you have finished the settings, click the [Save Current Setting…] button. Ö The “Save as” window appears. 4. Enter a suitable name, and click the [OK] button. Ö The current setting with the entered name is created in “Current Setting”. 5. Click the [OK] button, and the “Scan and Save Settings” window closes. Ö A registration of new setting is completed. You can create a maximum of nine scan settings.
3.3.2. Scanning with a Saved Scan Setting 1. Click the ScanSnap icon . New Ö The list of saved settings appears. (The icon of the program that starts after scanning appears on the left of the setting name.) 2. Select the scan setting to use. Ö A check mark appears on the selected setting. 3. Load the document on the scanner. 4. Click the [SCAN] button on the scanner. Ö Scanning is carried out with the selected scan setting. The scan button(s) vary in form and name depending on the scanner models.
3.3.3. Renaming Scan Settings 1. Right-click the ScanSnap icon , and select "Settings...” . Ö The “Scan and Save Settings” window appears. 2. On [Current Setting], select the name of the setting you want to change. 3. Click the [Rename] button. Ö The [Save as] screen appears. 4. Enter a new name, and click the [OK] button.
You can also rename the setting from the “Settings Management” screen. Right-click the ScanSnap icon , and the “Settings Management” screen appears when you select it. Select the name you want to change, and click the [Rename] button.” 3.3.4. Deleting Scan Settings 1. Right-click the ScanSnap icon , and select “Settings...” Ö The “Scan and Save Settings” screen appears. 2. On [Current Setting], select the name of the setting you want to delete. 3. Click the [Delete] button.
You can also delete the setting from the “Settings Management” screen. Right-click the ScanSnap icon , and the “Settings Management” screen appears when you select it. Select the name you want to delete, and click the [Delete] button. 4. The confirmation dialog box appears. Click the [Yes] button.
3.4. Online Update In an effort to improve the usability and functionality of ScanSnap Manager/ScanSnap Monitor, program updates are carried out timely. From the ScanSnap icon menu, you can detect automatically whether the latest program is available and update the program. The latest program is released without notice. You are recommended to update your program regularly. When updating ScanSnap Manager, follow the instructions below.
If the program is already updated to the latest version, the message bellow appears. Click [OK] button to close the message. 3. Click [Yes] button. Ö The program is downloaded, and a confirmation message to start installation appears. 4. Click the [Install] button. When you click the [Info] button, Internet Explorer opens and information about the latest update for ScanSnap Manager appears. Ö Installation starts, and the “Welcome to InstallShield Wizard for ScanSnap Manager” window appears.
4. Carrier Sheet The Carrier Sheet is a sheet for loading document specifically designed for fi-5110EOX. The Carrier Sheet allows you to scan documents that cannot be scanned as it is; a document larger than A4 up to A3, B4 or 11 x 17 (single side) can be scanned by folding it in two, inserting it into the Carrier Sheet and scanning it in duplex mode.
4.1. Operation Flow This section describes the basic operation flow when scanning with the Carrier Sheet. 1. Insert the document in the Carrier Sheet. The loading method and ScanSnap Manager’s settings differ according to the documents to be scanned. Refer to “4.3. How to Set a Document” for details. 2. Set the Carrier Sheet onto the scanner. Place the top of the sheet with the black & white printed pattern downwards, and load the document in the direction of the arrow.
4.2. Scanning Different Document Types The table below summarizes the types of documents that can be scanned on this scanner. Media Paper commonly used in offices, Post card, Business card, Photograph, Clipping Up to127g/m2 (Up to 34lb), Up to 63.5g/m2 (Up to 17lb) * In case of folding in two A3 (297x420 mm) A4 (210x297 mm) A5 (148x210 mm) A6 (105x148 mm) B4 (257x364 mm) B5 (182x257 mm) B6 (128x182 mm) Post card (100x148 mm) Business card (90x55 mm, 55x90 mm) Letter (8.5x11in, 216x279.
4.3. Loading Documents with the Carrier Sheet This section explains Loading Documents with the Carrier Sheet. There are two scan modes, depending on the type of document to be scanned, in the Carrier Sheet settings. ● Create facing pages in one image: Scans a document larger than A4 size such as A3/B4/11 x 17., folded it in two, in duplex mode ,and outputs an image arranged in two-page spread and joined together.
4.3.1. “Create facing pages in one image” This mode is for scanning a document larger than A4 size, such as A3/B4/11 x 17. When you fold a document in two and scan it in duplex, an image with the both side image joined together is generated. (When you scan document smaller than A4 printed on both sides in this mode, you can also create a two-page spread image.) 1. Right-click “ScanSnap Manager” icon on the task bar, and select “Carrier Sheet...” 2.
5. Set the Carrier Sheet onto the scanner. ● ● Place the top of the sheet with the black & white printed pattern downwards, and load the document in the direction of the arrow. When you load the Carrier Sheet, adjust the side guides so that it will not skew. If you are using the Carrier Sheet for scanning, it is not possible to scan multiple sheets continuously. Load the sheets one by one and scan. 6.
In the “Carrier Sheet Settings” window, when “Automatic Detection” in “Output image size” is selected, the generated image size may be smaller than the document. (The smallest size big enough to include all the contents image is selected from among A3, B4 and 11 x 17) Example: If content printed as A4 size in the center of an A3 document is scanned, B it is generated in B4 size. To output an image that is the same size as the document size, set the document size in [Output image size].
4.3.2. “Create front and back images separately” This mode is for scanning documents such as photographs that you do not want to scratch, or clippings of information that are difficult to be loaded. 1. Right-click “ScanSnap Manager” icon on the task bar, and select “Carrier Sheet...” 2. On the “Carrier Sheet Settings” window, select “Create front and back images separately” on “Mode” and click the [OK] button. 3. Open the Carrier Sheet and place the document inside.
4. Load the Carrier Sheet onto the scanner. ● Place the top of the sheet with the black & white printed pattern downwards, and load the document in the direction of the arrow. ● Load the document so that the back side faces up. ● When you load the Carrier Sheet, adjust the side guides so that the document inside will not skew. If you are using the Carrier Sheet for scanning, it is not possible to scan multiple sheets continuously. Load the sheets one by one and scan. 5.
If the following symptoms are observed, place a piece of white paper behind the document. ● The scanned document cannot be generated in a suitable size (when [Automatic Detection] is selected) ● A shadow appears on the edges of the document. ● Black lines appear around the document that is clipped into a special shape.
4.4. Changing Carrier Sheet Settings The Carrier Sheet settings are configured in the “Carrier Sheet Settings” screen. “Carrier Sheet Settings” screen is found in the menu of the “ScanSnap Manager icon” on the task bar. Right-click the icon, and when the menu appears, select “Carrier Sheet...” B “Carrier Sheet Settings” window appears. Change the Carrier Sheet The image of settings here [Mode] appears A brief explanation for [Mode] appears Enables the settings, and closes the windows.
Mode Specifies the scanning method when you use the Carrier Sheet for scanning. These are the following two modes. ● Create facing pages in one image Scans a document folded in two in duplex mode and outputs an image of facing pages joining the front and back images together. This mode is for scanning a document larger than A4 size, such as A3/B4/11 x 17. When scanning in [Create facing pages in one image] mode, select [Duplex Scan] on the [Scanning] settings of [ScanSnap Manager“.
Output Image Size Specifies an image size when generating a scanned image. You can select it from the following document sizes. Mode: “Create facing pages in one image” Automatic Detection A3 (297x420mm) B4 (257x364mm) 11 x 17(11 x 17in, 279.4x431.8mm) - Mode: “Create front and back images separately” Automatic Detection Carrier Sheet size (216x297mm) A4 (210x297mm) A5 (148x210mm) A6 (105x148mm) Post Card (100x148mm) B5 (182x257mm) B6 (128x182mm) Letter (8.5x11in, 216x279.
[Add custom size] button You can create up to five custom sizes. When you click the button, the following settings screen appears. 1. Click the [Add] button 2. The following screen appears. Enter the document sizes. You can set within these ranges: Width: 50.8 - 216 mm (2 - 8.5 in.), Length: 50.8 - 297 mm (3 - 11.69 in.) Enter a name you want to display in [Name:]. B The entered name is displayed on [Add or Remove Custom sizes]. 3.
< To delete custom size documents> 1. On the [Add or Remove custom sizes] screen, select the document size you want to delete, and click the [Delete] button. 2. When the confirmation screen appears, click the [Yes] button. 3. On the [Add or Remove custom sizes] screen, check that the document size is deleted, and click the [Close] button. < To change settings > 1. On the [Add or Remove custom sizes] screen, select the setting of the document size you want to change, and click the [Change] button. 2.
4.5. Cleaning Carrier Sheet While using the Carrier Sheet continuously, dirt and dust may stick onto the surface or the interior. When you use the Carrier Sheet continuously, please clean it regularly as that may be the cause of scanning error. 4.5.1. Cleaning method Use a dry soft cloth or a soft cloth slightly moistened with Cleaner F1 (sold separately) or a mild detergent to lightly wipe off the dirt and dust from the surface and the interior of the Carrier Sheet.
4.6. Purchasing the Carrier Sheet If the “Carrier Sheet” bundled in this product cannot be used for scanning due to damage or wear- and-tear, you can purchase just the Carrier Sheet separately. As a guideline, it is recommended to replace the Carrier Sheet every 500 scans. However, it differs according to usage conditions. If scratches and dirt are conspicuous, please replace the Carrier Sheet accordingly.
5. Applications included This product includes the following software. ● CardMinder V2.0 (the latest version) An application for managing business card image data scanned by the ScanSnap as a database using the OCR technology. ● PDF Thumbnail View An application for viewing the PDF files with thumbnail on Explorer. ● ScanSnap Organizer An application for displaying and sorting image files scanned by ScanSnap. This chapter describes how to use the PDF Thumbnail View.
5.1.1. Start the PDF Thumbnail View PDF Thumbnail View is disabled as a default. First, enable this function following the procedure below. 1. Click on the Start menu and select [Programs] → [PDF Thumbnail View] and then [Configuration Tool]. Ö The [PDF Thumbnail View Function Settings] screen is displayed. 2. Select the [Enable] check box to enable the function, and Click [OK] button 3. The confirmation dialog box appears. Click the [OK] button. Ö “PDF Thumbnail View Function Settings” is enabled.
3. Select [Thumbnails] from the [View] menu. Ö The thumbnails of the PDF files are displayed. ● ● ● ● ● The thumbnails of PDF files are refreshed every time the folder is opened. Images of the PDF files are temporarily displayed on the upper left side of the screen when refreshing the thumbnails. When there is a large quantity of PDF files saved in one folder, it may take some time to display the thumbnails. The first page of a PDF file document is displayed as a thumbnail.
About Support Service If you have any inquiry about this product, please contact the nearest FUJITSU office listed in “FUJITSU Offices list” included in this package. Since it is practically impossible for Fujitsu staff to be aware of every detail of your daily scanning operation, please understand that our staff may sometimes be unable to answer your question immediately.
ScanSnap Upgrade User’s Guide P2WW-1860-01EN Date of issuance: January, 2005 Issuance responsibility: PFU LIMITED ● ● ● The contents of this manual are subject to change without notice in the interest of product improvement. PFU LIMITED assumes no liability for incidental or consequential damages arising from the use of this manual, and any claims by a third party. Copying of the contents of this manual in whole or in part and copying of the scanner application is forbidden under the copyright law.