
user manual
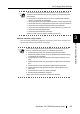
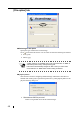
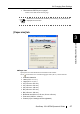
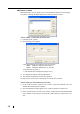
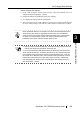
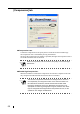
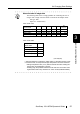
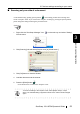
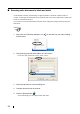
Table Of Contents
- Regulatory Information
- Note, Liability
- Preface
- Safety Precautions
- Chapter 1 Before You Start Using Your Scanner
- Chapter 2 Connecting ScanSnap
- Chapter 3 Basic Scanner Operations
- Chapter 4 Uninstalling ScanSnap
- Chapter 5 Troubleshooting
- Chapter 6 Daily Care
- Chapter 7 Replacing Consumables
- Appendix A Installation Specifications
- Index
- Repairs
48
■ [Custom...] button
With this funciton, you can register up to 5 customized document sizes at the [Paper
size:] menu. Clicking this button displays the following setting window:
‘
<When adding a customized document size>
1) Click the [Add...] button.
2) The following screen appears.
- Enter the document size within the range given below:
Width: 50.8mm to 216 mm (2 in. to 8.5 in.)
Height: 50.8mm to 360mm (2 in. to 14.17in.)
- Enter the name in [Name:].
⇒ The entered name is displayed in [Paper size:].
3) To complete the setting, click the [OK] button.
4) The customized document size will be registered.
Click [Close] to exit from the "Add or Remove Custom sizes" window.
<When deleting a customized document size>
1) In the "Add or Remove Custom sizes" window, select the document size to be
deleted and click the [Remove] button.
2) The confirmation messsage appears twice. Click [Yes] button in either case.
3) In the "Add or Remove Custom sizes" window, confirm that the selected document
size is deleted. Click [Close] to exit from the "Add or Remove Custom sizes" win-
dow.