P3PC-1132-07ENZ0 5000N Operator's Guide
CONTENTS INTRODUCTION............................................................................. v ■ Regulatory Information ......................................................... v ■ Note, Liability ........................................................................ vi ■ Safety Precautions ................................................................ x Chapter 1 Overview of fi-5000N ............................................... 1 1.1 Overview................................................
3.7 Pull Mode User Authentication Settings ........................ 21 3.8 Push Mode Automatic Logout Time Settings ................ 23 3.9 Host Connection Time-out............................................... 24 3.10 Displaying Device Information ....................................... 25 3.11 Initialization of fi-5000N................................................... 26 Chapter 4 Installing and Setting Driver................................. 27 4.1 Installing FUJITSU TWAIN 32 Scanner Driver........
Chapter 6 User Authentication .............................................. 69 6.1 Fingerprint Registration................................................... 70 6.2 User Authentication by Fingerprint ................................ 74 6.3 User Authentication by PIN ............................................ 75 6.4 Changing the User’s PIN.................................................. 76 Chapter 7 Daily Care............................................................... 77 7.
iv
INTRODUCTION Thank you for purchasing the fi-5000N. This document describes how to handle fi-5000N and basic operation methods. Before you start using it, be sure to thoroughly read this manual to ensure a correct use. ■Regulatory Information FCC Declaration This equipment has been tested and found to comply with the limits for a Class B digital device, pursuant to Part 15 of the FCC Rules.
Bescheinigung des Herstellers / Importeurs Für den fi-5000N wird folgendes bescheinigt: • In Übereinsstimmung mit den Bestimmungen der EN45014(CE) funkentstört • Maschinenlärminformationsverordnung 3. GPSGV: Der höchste Schalldruckpegel beträgt 70 dB (A) oder weniger, gemäß EN ISO 7779. ■Note, Liability BEFORE USING THIS PRODUCT, PLEASE READ THIS MANUAL CAREFULLY.
The Authentication Data may be categorized as personal data and may be subject to various data protection and privacy laws. You are responsible for ensuring all use is in compliance with all such applicable laws. THE RELIABILITY OF THE FINGERPRINT AUTHENTICATION TECHNOLOGY AND THE MEASURES USED TO PROTECT THE AUTHENTICATION DATA, SUCH AS ENCRYPTION, ARE NOT GUARANTEED ALWAYS TO BE EFFECTIVE AND ACCURATE, OR WITHOUT ERROR. YOU USE THE FINGERPRINT TECHNOLOGY AUTHENTICATION AT YOUR OWN RISK.
Manufacturer PFU LIMITED International Sales Dept., Imaging Business Division, Products Group Solid Square East Tower, 580 Horikawa-cho, Saiwai-ku, Kawasaki-shi Kanagawa 212-8563, Japan Phone: (81-44) 540-4538 All Rights Reserved, Copyright© PFU LIMITED 2004-2009 About Maintenance The user must not perform repairs on this device. Contact the store where you purchased it or an authorized FUJITSU Image Scanner service provider to have repairs done on this product.
Screen Examples In This Manual The screen examples in this manual are subject to change without notice in the interest of product improvement. If the actual displayed screen differs from the screen examples in this manual, operate by following the actual displayed screen while referring to the User's Manual of the device application you are using.
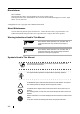
■Safety Precautions WARNING Do not damage the AC cable. A damaged AC cable may cause fire or electric shock. Do not place heavy objects on AC cables, or pull, bend, twist, heat, damage or modify AC cables. Do not use damaged AC cables or power plugs, or install any cables or power plugs to loose wall sockets. Use only specified AC cables and connector cables. Use only specified AC cables and connector cables. Failure to use the correct cables might cause electric shock and/or equipment failure.
Turn the device OFF if it is damaged. If the device is damaged for any reason, turn the device off and unplug the power cable. Contact the store where you purchased the device. Do not put liquids inside the device. Do not insert or drop metal objects in/on to the device. Do not splash or allow the device to get wet. If foreign objects (water, small metal objects, liquids, etc.) get inside the device, immediately turn off the device and disconnect the power plug from the power outlet.
CAUTION Do not install the device on unstable surfaces. Make sure that the device is installed on a flat, level surface and that none of its parts extend beyond the surface top, such as a desk or table. Do not install the device on unstable surfaces. Install the device on a level surface that is free of vibration to prevent it from falling. Install the device on a strong surface that will support the weight of the device and other devices. Do not place heavy objects or stand on top of the device.
Disconnect the power plug from the power outlet when the device is not used for a long period of time. When the device is not going to be used for a long period of time, be sure to disconnect the power plug from the power outlet. Do not install the device in direct sunlight. Do not install the device under direct sunlight or near heating apparatus. Doing so might cause excessive heat to build up inside the device, which can cause device trouble or even fire.
xiv
Chapter 1 1 Overview of fi-5000N 1.1 Overview ............................................................................................................. 2 1.2 Features .............................................................................................................. 3 1.3 Examples of Operation ......................................................................................
1.1 Overview The function of the fi-5000N is to connect a fi-series scanner to a computer through the network. This framework is shown in the diagram below. This framework is referred to as the fi-5000N system hereinafter. Scanner fi-5000N Network Computer This device connected to a fi-series scanner through the USB interface, can transmit scanned images to a computer over networks.
1.2 Features 1.2 Features 1. Simple and secure operator identification with fingerprint authentication With the fingerprint authentication technology, the user can be easily identified by a touch of a finger. There is no need for special hardware or personal identification numbers that in the majority of cases. 2. High-speed scanning and transmission of data via network 3. By leveraging your current system, you can set up a distributed system easily.
1.3 Examples of Operation There are two ways to perform scanning documents using fi-5000N. 1. Pull mode scanning Computer with scanning application scan the documents from the scanner on the network and capture the image data. This is called Pull mode because the image data is pulled from the scanner to the computer via the network. In this mode, you can specify if user authentication process is enabled.
1.3 Examples of Operation Two types of users are assumed for the fi-5000N: Administrator and the operator of the fi-5000N. The following are expected for each type of user to perform: ■ Administrator 1 The Administrator is in the position to manage the fi-5000N, the scanner and the operator.
6
Chapter 2 Names and Functions of Parts 2 2.1 Names of Parts ................................................................................................... 8 2.2 Keyboard...........................................................................................................
2.1 Names of Parts This section describes the device’s parts. ■ Front Sticker Cover Message Display LED ES C 7 4 ID 8 1 5 9 SE 0 T 2 6 . Security Cable Slot 3 Finger Guide Fingerprint Sensor Keyboard Part Name 8 Finger Sensor Function Cover Protects the Keyboard. Sticker Correct placement of finger is described. Message Display Displays the settings and status of the fi-5000N. Keyboard It is used for settings and PIN entry.
2.1 Names of Parts ■ Rear 2 DC Inlet Network Connector USB Connector Names and Functions of Parts Part Name Power Switch Function DC Inlet Used for connecting the AC cable. Power Switch Used for turning ON/OFF the fi-5000N. Network Connector Used for connecting a network cable (LAN). USB Connector Used for connecting a USB cable from a scanner.
2.2 Keyboard The following illustration shows the keyboard located under the white cover. ESC SET ID 8 9 4 5 6 1 2 3 0 ENT .
Chapter 3 Installing the fi-5000N 3 3.1 Installing the Scanner ...................................................................................... 12 3.2 Installing the fi-5000N ...................................................................................... 12 3.3 fi-5000N's Settings and Connecting to the Network ..................................... 14 3.4 Changing the Language Setting ..................................................................... 18 3.
3.1 Installing the Scanner Install the scanner following the installation requirements described in your fi-series scanner manual. 3.2 Installing the fi-5000N 1. Place the fi-5000N at its installation site. Install this product near the scanner. Install it in a place that does not affect the operation or maintenance of the scanner. 2. Connect the AC adapter. ATTENTION Use only the AC adapter and AC cable provided by the manufacturer. 1. Connect the AC cable to the AC adapter. 2.
3.2 Installing the fi-5000N 3. Connect the USB cable to the USB connector. 3 Be sure to use the USB cable provided with the scanner. Correct operation with commercially available cables is not guaranteed. 4. Connect the other end of the USB interface cable to the scanner. ATTENTION The message "Scanner is disconnected" is displayed on the Message Display of fi-5000N if the scanner is not connected properly, or if the power of the scanner is turned off.
3.3 fi-5000N's Settings and Connecting to the Network 1. Turn on the power of the scanner and fi-5000N. Refer to the scanner manual for details on turning on the power of the scanner. Turn on the fi-5000N by pressing the "|" of the power switch located at the back of the fi5000N. Power OFF ATTENTION Power ON To change the language setting, refer to "3.4 Changing the Language Setting" (page 18) 2.
3.3 fi-5000N's Settings and Connecting to the Network 3. Open the cover and press the [SET] key. The following settings screen appears. Setup Register Finger Change PIN Code Show Network Config 4. With the [L] key, select "Administrator Setup", and press the [ENT] key. The screen to enter the Administrator's PIN (personal identification number) appears. PIN:_ Cancel:[ESC] 3 5. Enter the Administrator PIN (the default setting is "5000"), and press the [ENT] key.
ATTENTION Certain DNS servers and DHCP servers, which do not support DNS update, may cause host name resolution problems when DHCP is specified in IP address settings with fi-5000N. If you experience such problems, consult with your network administrator and take one of the following measures for fi-5000N and PC: For fi-5000N, 1) Change to DNS server and DHCP server which support DNS update. 2) Set the IP address lease time longer in DHCP server settings. 3) Use static IP method.
3.3 fi-5000N's Settings and Connecting to the Network 12. Press the [K] or [L] key to select one from among "Auto Negotiation", "100BASE-TX Full", "100BASE-TX Half", "10BASE-TX Full" and "10BASE-TX Half", and press the [ENT] key. Usually "Auto Negotiation" is selected. The following network settings confirmation screen appears when you press the [ENT] key. If the hub to connect fi-5000N does not support Auto negotiation, select the supported Speed/Duplex setting. ATTENTION IP :XXX.XXX.XXX MASK:XXX.XXX.
3.4 Changing the Language Setting You can choose the language for the Message Display from English, Japanese, French, German, Italian and Spanish. (The default setting is English.) To change the language setting, follow the procedure below. 1. Open the cover and press the [SET] key. The following settings screen appears. Setup Register Finger Change PIN Code Show Network Config 2. With the [L] key, select "Administrator Setup", and press the [ENT] key.
3.5 Automatic Turning Backlight Off Settings 3.5 Automatic Turning Backlight Off Settings You can configure the Message Display’s backlight to be turned off automatically if no operation is performed for 5 minutes. (The default setting is "Auto off".) 1. Open the fi-5000N’s cover and press the [SET] key. The following settings screen appears. Setup Register Finger Change PIN Code Show Network Config 2. With the [L] key, select "Administrator Setup", and press the [ENT] key.
3.6 Beep Sound Configuration The beep that sounds each time an operation is done, can be set on or off. (The default setting is "Beep".) 1. Open the fi-5000N’s cover and press the [SET] key. The following settings screen appears. Setup Register Finger Change PIN Code Show Network Config 2. With the [L] key, select "Administrator Setup", and press the [ENT] key. The screen to enter the Administrator's PIN (personal identification number) appears. PIN:_ Cancel:[ESC] 3.
3.7 Pull Mode User Authentication Settings 3.7 Pull Mode User Authentication Settings You can set the user authentication function on or off, when performing a "Pull" mode scanning. User authentication function is enabled as the default setting. HINT To configure the "pull" mode user authentication, follow the procedure below. 1. Open the fi-5000N’s cover and press the [SET] key. The following settings screen appears. Setup Register Finger Change PIN Code Show Network Config 2.
4. With the [L] key, select "Pull Mode Authentic.", and press the [ENT] key. The following screen appears. "Pull" mode authentication: Authenticate Not authenticate 5. To perform user authentication, select "Authenticate"; if authentication is unnecessary, select "Not authenticate" and then press the [ENT] key. The following screen appears. "Pull" mode authentication setting changed With this, the "Pull" mode user authentication setting is done. The setting will take effect from the next scanning.
3.8 Push Mode Automatic Logout Time Settings 3.8 Push Mode Automatic Logout Time Settings This setting applies only to Push mode scanning. After performing a scanning, if no other operations are done after a certain period of time, the current user will be logged out automatically. You can specify this waiting time by following the procedure below. The default time limit for an automatic logout is 0 second. 1. Open the fi-5000N’s cover and press the [SET] key. The following settings screen appears.
3.9 Host Connection Time-out When a login is performed with authentication by fingerprint or PIN, the fi-5000N waits a certain period of time for a connection response from the host computer. You can specify this waiting time by following the procedure below. If there is no response from the host computer during the specified waiting time, "Host Connection failure due to time-out" message will appear on the Message Display. The default waiting time for the host’s connection response is 3 seconds. 1.
3.10 Displaying Device Information 3.10 Displaying Device Information With the procedure below, the following information can be displayed in the Message Display: • The network setting status • The network name of fi-5000N • The firmware version • The status of the connected scanner 1. Open the fi-5000N’s cover and press the [SET] key. The following settings screen appears.
3.11 Initialization of fi-5000N To reset the settings of the fi-5000N to the factory default, follow the procedure below. ATTENTION Initialization will delete all uses information, and the settings are reset to default. Prior to performing initialization, back up the user information by referring to "5.4 Managing User Information of fi-5000N" (page 52). Note down the network setting information to restore them. 1. Turn on the power of the fi-5000N. 2. Open the cover and press the [SET] key.
Chapter 4 Installing and Setting Driver In order to scan documents from the scanner connected to fi-5000N, it is necessary to install the scanner driver and the application software onto the PC. There are two types of scanner drivers and applications: Scanner Driver: Application: FUJITSU TWAIN 32 Scanner Driver ScandAll 21 (For FUJITSU TWAIN 32) FUJITSU ISIS Scanner Driver QuickScan Pro™ (For FUJITSU ISIS) Install the appropriate scanner driver for the application you will use.
4.1 Installing FUJITSU TWAIN 32 Scanner Driver ■ Preparation Before starting the installation, check the following contents. • Prepare the Setup CD-ROM. • Uninstall any older versions of FUJITSU TWAIN 32 driver if already installed. ATTENTION • Please dowload the latest version of the scanner driver from our website. • To uninstall previous versions, uninstall [Scanner Utility for Microsoft Windows] from [Add/Remove Programs] of the Control Panel.
4.1 Installing FUJITSU TWAIN 32 Scanner Driver 3. Click [INSTALL PRODUCTS]. 4. Click [TWAIN Driver] on the window below. 4 6. Follow the instructions on the window to install the application. fi-5000N Operator’s Guide 29 Installing and Setting Driver 5. Select a language used for installation on [Choose Setup Language] window and click [OK].
7. When the [InstallShield Wizard Complete] window appears, click [Finish]. ⇒ Your PC will be restarted. Do not remove the Setup CD-ROM until your PC has completely restarted. ATTENTION To complete the installation successfully, you must restart your PC. Installation of the scanner driver is completed. HINT 30 In order to use the scanner, it is also necessary to have an application that complies with the TWAIN standard. Use "ScandAll 21" bundled with the fi-5000N. To install ScandAll 21, refer to "4.
4.2 Installing ScandAll 21 4.2 Installing ScandAll 21 "ScandAll 21" is an image capturing software that complies with the TWAIN standard. The FUJITSU TWAIN 32 scanner driver enables you to capture images with a FUJITSU image scanner fi-series product. ATTENTION • Even if you find ScandAll 21 bundled with the scanner, use ScandAll 21 that comes with this product. • When using Windows 2000 or Windows XP, log on as a user with "Administrator" privileges (privileges of the administrator of your PC). 1.
4. Select a language used for installation on [Choose Setup Language] window and click [OK]. 5. Install the application following the instructions on the window. 6. When the [InstallShield Wizard Complete] window appears, click [Finish]. ATTENTION 32 For finishing the installation, it may be necessary to restart your PC. Follow the instructions on the window.
4.3 Installing FUJITSU ISIS Scanner Driver 4.3 Installing FUJITSU ISIS Scanner Driver ■ Preparation Before starting the installation, prepare the Setup CD-ROM ATTENTION Please dowload the latest version of the scanner driver from our website. ■ Installing Windows XP screenshots are used in this section as examples. The windows and operations may slightly vary depending on your OS. HINT 4 Installing and Setting Driver 1. Turn on the power of the PC, and log on to Windows.
3. Click [INSTALL PRODUCTS]. 4. Click [ISIS Driver] on the window below. 5. Select a language used for installation on [Choose Setup Language] window and click [OK]. 6. Follow the instructions on the window to install the application.
4.3 Installing FUJITSU ISIS Scanner Driver 7. When the [Setup Complete] window appears, click [Finish]. ⇒ Your PC will be restarted. Do not remove the Setup CD-ROM until your PC has completely restarted. Installation of the scanner driver is completed. HINT fi-5000N Operator’s Guide 35 4 Installing and Setting Driver In order to use the scanner, it is also necessary to have an application that complies with the ISIS standard. you can install "QuickScan Pro™" bundled with the scanner.
4.4 Configuring Scanning Application Before performing a scanning operation, select the scanner from the scanning application. The following describes how to select the scanner with respect to the FUJITSU TWAIN32 scanner driver and the FUJITSU ISIS scanner driver. The selection method may differ from the description below according to the scanning application being used. Refer to the manual or the help file of the scanning application being used.
4.4 Configuring Scanning Application HINT For details on scanning documents and configuring the scanning application, refer to the "Operator's Guide", "FUJITSU TWAIN32 Scanner Driver Installation Guide", or "ScandAll 21" help supplied with the scanner. ■ For FUJITSU ISIS Scanner Driver This description uses the scanning application "QuickScan Pro™" as an example. 1. Start the application. From the [Start] menu, select [All Programs] J [QuickScan] J [QuickScan]. 2.
ATTENTION HINT 38 The scanner to be used must be specified as "Favorite" on "Select Scanner" tab of "fi-5000N Configuration Tool". Scanner specified as "Favorite" appears in the "Select Source" dialog box. When Pull mode scanning is enabled, user authentication is required. Perform user authentication with fingerprint or PIN. (To change the settings, refer to "3.
4.5 Uninstalling the Scanner Driver and Scanning Application 4.5 Uninstalling the Scanner Driver and Scanning Application Follow the procedure below to uninstall the scanner driver and scanning application described in this manual. 1. Start up your PC. Log on as a user with Administrator privileges. 2. Exit all currently running programs. 3. Select [Control Panel] - [Add or remove Programs] from the [Start] menu.
40
Chapter 5 Installing and setting the fi-5000N Software To control a fi-5000N connected to the network from your PC, and to scan with the scanner connected to the fi-5000N, install the "fi-5000N Software" on: • The PC of fi-5000N’s Administrator • The PCs used by the scanner’s users This chapter describes the installation and operation procedures of the fi-5000N Software. 5 5.1 Installing fi-5000N Software.............................................................................42 5.
5.1 Installing fi-5000N Software ■ Preparation Before starting the installation, check the following contents. • Prepare the Setup CD-ROM ■ System Requirements The system requirements for the fi-5000N is as follow.
5.1 Installing fi-5000N Software 2. Insert the Setup CD-ROM into the CD drive. ⇒ appears. ATTENTION This screen may not appear when the "Autoplay" setting of your PC is OFF. In this case, run "Install.exe" in this CD-ROM directly from the "Explorer" or "My Computer". 3. Click [INSTALL PRODUCTS]. 5 fi-5000N Operator’s Guide Installing and setting the fi-5000N Software 4. Click [fi-5000N Software] on the window below.
5. Select a language used for installation on [Choose Setup Language] window and click [OK]. 6. Follow the instructions on the window to install the application. 7. When the [InstallShield Wizard Complete] window appears, click [Finish]. Installation of the fi-5000N Software is completed. ATTENTION • If Windows XP Service Pack 2 is installed, the [Windows Security Alert] dialog box may appear after the installation of fi-5000N Software is complete.
5.2 fi-5000N Software Overview 5.2 fi-5000N Software Overview ■ Starting fi-5000N Configuration Tool To start the fi-5000N software, from the [Start] menu, select [All Programs] J [fi-5000N Software] J [fi-5000N Configuration Tool]. ■ [Select Scanner] Tab (Main Screen) This screen (in which the [Select Scanner] tab is selected) is the main screen. All kinds of administrative settings of fi-5000N can be done from this screen.
Name of Item 46 Function [Delete] button Deletes the selected fi-5000N from the list. (An fi-5000N cannot be deleted if it is in the same subnet as your PC.) [User Config.] button Registers/changes/deletes user information of the selected fi5000N. Can be used only by the Operating Administrator. The Administrator PIN is necessary. [Admin.] button Changes the name of the selected fi-5000N, network settings, and Administrator PIN. Also, user information can be backed up and restored.
5.2 fi-5000N Software Overview ■ [Launch Option] Tab The scanning application to be started when the button on the scanner ([Scan] or [Send To]) is pressed, can be configured from this screen. Name of Item Function Selects the button to be configured from among "Scan", and "Send To 1 Send To 9". You must set the following "Target", "Argument" and "Start In", otherwise no application will start up. Target: Specifies the file name of the application to be started.
■ [Advance] Tab When receiving image data, the trigger port number for the fi-5000N, may conflict with other applications. This setting is used to change the trigger port number on the PC. Name of Item Function Trigger port (PC): Used to specify a trigger port number on the PC. [Default] button: Resets to the default number. ATTENTION When changing the trigger port number on the PC, you must also change the trigger port on the fi-5000N. Refer to "5.5 fi-5000N Administrator Settings" (page 57).
5.3 Adding and Deleting fi-5000N 5.3 Adding and Deleting fi-5000N When a fi-5000N is in the same subnet as the PC, it is automatically recognized and displayed in the List View. However, when it is in other subnet, add or delete with the following procedure. ■ Adding fi-5000N 1. Click the [Add] button on the main screen of fi-5000N Configuration Tool. 5 2. Specify the IP address or host name of the fi-5000N to be added.
ATTENTION Certain DNS servers and DHCP servers, which do not support DNS update, may cause host name resolution problems when DHCP is specified in IP address settings with fi-5000N. If you experience such problems, consult with your network administrator and take one of the following measures for fi-5000N and PC: For fi-5000N, 1) Change to DNS server and DHCP server which support DNS update. 2) Set the IP address lease time longer in DHCP server settings. 3) Use static IP method.
5.3 Adding and Deleting fi-5000N ■ Deleting fi-5000N 1. Select the fi-5000N you want to delete from the List View of the main screen of fi5000N Configuration Tool. 2. Click the [Delete] button. 3. Click [Yes] when the confirmation message appears. 5 Installing and setting the fi-5000N Software HINT You cannot delete the fi-5000N which is in the same subnet as your PC.
5.4 Managing User Information of fi-5000N You can register, change or delete the information of users on the fi-5000N using the user configuration function. To use this function, the Administrator PIN is required. ■ How to Start 1. Select fi-5000N from the List View on the main screen on fi-5000N Configuration Tool, and click the [User Config.] button. 2. The following screen appears. Enter the Administrator PIN, and click the [OK] button. HINT 52 The default Administrator PIN is "5000".
5.4 Managing User Information of fi-5000N ⇒The following screen appears. List View The user names registered in fi-5000N are displayed in a list. The following settings can be configured. ■ Registering Users 5 Register a new user onto the fi-5000N with the following procedure. 2. Enter the "User name", "New PIN", and "Host name/IP address", and click the [Enter] button. User Name Enter the user name up to 16 characters. You cannot leave it blank. New PIN Fill in the User PIN up to 6 digits.
⇒ The registering process runs. It is possible to register a maximum of 32 users. HINT ■ Changing User Information You can change the information of registered users with the following procedure. 1. Select (click) the user name you want to change from the List View. 2. Change either the "New PIN" or the "Host name/IP address" when the user name selected in the "User Name:" column is displayed, and click the [Enter] button. HINT New PIN Fill in the User PIN up to 6 digits. You cannot leave it blank.
5.4 Managing User Information of fi-5000N ■ Deleting Users You can delete the information of registered users with the following procedure. 1. Select (click) the user name you want to delete from the List View. 2. Click the [Delete] button. 3. Click [Yes] when the confirmation message appears. ■ Backing up User Information 1. Click the [Backup] button. 2. Specify the destination and the file name and click the [Save] button when the following screen appears.
■ Restoring User Information 1. Click the [Restore] button. 2. Specify the files created at the backup procedure, and click the [Open] button. 3. The screen for password verification appears. Enter the password set during backup. 4. Click the [OK] button. ⇒ The user information is restored from the backup file.
5.5 fi-5000N Administrator Settings 5.5 fi-5000N Administrator Settings The administrator can confirm or change the device information of fi-5000N using the administrator configuration function. To use this function, the Administrator PIN is required. ■ How to Start 1. Select an fi-5000N from the List View on the main screen on fi-5000N Configuration Tool, and click the [Admin.] button. 5 HINT The default Administrator PIN is "5000".
⇒The following screen appears. The following settings can be configured. ■ Changing the fi-5000N unit name The currently selected name of fi-5000N is displayed in "Name:" To change, follow the procedure below. 1. Select the "Change fi-5000N configuration" check box. 2. Enter a name in the edit box. Enter up to 20 characters. 3. Click the [Apply] button. ■ Changing the Trigger Port on the fi-5000N The currently selected trigger port number for the fi-5000N is displayed.
5.5 fi-5000N Administrator Settings ■ Changing the Administrator PIN You can change the PIN of the administrator. To change, follow the procedure below. 1. Select the "Change PIN:" check box. 2. Enter a new PIN into the edit box. To confirm, enter the PIN again. Enter numerals up to 6 digits. 3. Click the [Apply] button. HINT The administrator PIN is required to use administrator functions of fi-5000N and fi-5000N Software. This PIN can be changed from fi-5000N.
5.6 Managing Scanner Information With the scanner information management function, you can display the information of the scanner connected to an fi-5000N, reset the consumables counter, configure the power saving mode, and adjust the offset setting. ■ How to Start Select an fi-5000N from the List View on the main screen on fi-5000N Configuration Tool, and click the [Scanner Info.] button. ⇒The following screen appears. To change the settings at the [Device Set] tab, the Administrator PIN is required.
5.6 Managing Scanner Information ■ [Device Info] Tab The list of the scanner functions is displayed in this screen. The displayed items may differ depending on the scanner. The displayed items are only the hardware functions, which may not be the same with the values that can be specified during scanning mentioned earlier. The functions that can be achieved by the software are not displayed. Also, this tab does not appear if the scanner is in use or not connected.
■ [Device Set] Tab You can display and configure the hardware settings and maintenance information of the scanner. However, there may be items that cannot be displayed or configured (appears dimmed) depending on the scanner. The changed setting is reflected in the scanner after clicking the [OK] button. This tab does not appear when the scanner is in use or not connected. If the tab does not appear, exit the application that the scanner is using or check the connection, and then display the tab.
5.6 Managing Scanner Information Also, messages such as the following may appear while using the scanner. If this message appears, follow the instructions below to replace the consumables. After clicking the [Ignore] button, this message will disappear and scanning will continue. Please replace the consumable as soon as possible. This message appears again after certain number of scans. If you do not wish this message to be displayed, select the [This message not display again] check box.
About Offset and Scale Adjustment If you click the [Offset] button, the following window appears. You can change the offset amount of the start position, and the magnification of the sub-scan in this window. [Offset Setting] Fine adjustments can be done if the document position is different from the actual scanning position. Generally, there is no need to adjust the setting as it is adjusted to an optimum value at the factory. *The setting range differs depending on the scanner.
5.7 Settings of [Launch Option] 5.7 Settings of [Launch Option] Set the argument specified in the [Launch Option] tab according to the specifications of the application to be started. Note that all the examples in this manual assume the usage of [ScandAll 21] bundled with this product. From the [Launch Option] tab, you can configure the application to start when a button on the scanner ([Scan]/[Send to]) is pressed.
Example 1: When the [Scan] button is pressed, "ScandAll 21" starts up, performs the scanning operation and displays the scanned image. Name of Item Setting Button: [Scan] Target: C:\Program Files\ScandAll 21\FImage.exe (*) Argument: /SHOWUI:09/ScanToView Start in: C:\Program Files\ScandAll 21\ (*) Example 2: When the [Send to] button is pressed, "ScandAll 21" starts up, performs the scanning operation and saves the scanned images.
5.7 Settings of [Launch Option] ATTENTION The following settings are required on ScandAll 21. 1. From the [Start] menu, select [All Programs] J [Scanner Utility for Microsoft Windows] J [ScandAll 21], and start ScandAll 21.
5.8 Uninstalling the fi-5000N Software Follow the procedure below to uninstall the fi-5000N Software. 1. Start up your PC. When using Windows 2000 or Windows XP, log in as a user with "Administrator" rights. 2. Exit all currently running programs. 3. Select [Control Panel] - [Add or Remove Programs] from the [Start] menu. ⇒ This displays the "Add or Remove Programs" screen which displays a list of the currently installed applications. 4. Select "fi-5000N Software". 5. Click the [Change/Remove] button.
Chapter 6 6 User Authentication 6.1 Fingerprint Registration .................................................................................. 70 6.2 User Authentication by Fingerprint ................................................................ 74 6.3 User Authentication by PIN ............................................................................. 75 6.4 Changing the User’s PIN .................................................................................
6.1 Fingerprint Registration For user authentication, register each user’s fingerprint information on this product. However, injured users and users with difficulties in registering fingerprints can be authenticated by using a PIN (personal identification number). Register users' fingerprints following the procedure below. 1. Open the Cover. ES C 7 4 ID 8 1 5 9 SE 0 T 2 6 .
6.1 Fingerprint Registration ATTENTION The fi-5000N’s Administrator must register the user in advance. The user name registered by the Administrator in the fi-5000N Software will be displayed. For details, refer to "5.4 Managing User Information of fi5000N" (page 52) 4. Press the [K] or [L] key to select a user from the list of registered users, and press the [ENT] key. User Authentication You can also select the registered user by entering user ID number: HINT 1.
If the PIN matches, the following screen appears. Confirm the correct finger placement by looking at the sticker inside of the cover. For the details, please refer to "APPENDIX Using User Authentication by Fingerprint." Press [ENT] key, then the following screen appears and the registration of the fingerprint starts. Look at the sticker inside of cover for finger placement OK:[ENT] Registration: Place your finger on the sensor 6. Place the finger to register on the fingerprint sensor.
6.1 Fingerprint Registration 10.When the 2nd verification process has been completed, the following message appears. Second Verification is successful 6 Then the message indicating that the fingerprint data is being saved is displayed. Next, the finishing registration message appears. Registration is successful OK:[ENT] Press [ENT] key to finish the registration. fi-5000N Operator’s Guide 73 User Authentication Saving fingerprint data...
6.2 User Authentication by Fingerprint To change from the logout status to the status when the scanner can start scanning (login), fingerprint authentication must be done. (Also, PIN authentication is equipped as an alternative to an injured users or users with difficulties in fingerprint authentication.) 1. When "Place your finger on the sensor" is displayed on the fi-5000N Message Display (this indicates the "Logout" status), place on the fingerprint sensor the finger that has been registered.
6.3 User Authentication by PIN 6.3 User Authentication by PIN PIN authentication is equipped as an alternative to injured users or users with difficulties in fingerprint authentication. 1. When "Place your finger on the sensor" is displayed on the fi-5000N Message Display (this indicates the "Logout" status), open the cover and press the [ID] key. The "Select User" screen appears as follows. User Authentication Select User 1(user's name) 2(user's name) 3(user's name) 2.
6.4 Changing the User’s PIN The initial user’s PIN value is set by the Administrator during the user registration. However the user is able to change his/her own PIN. Change the user's PIN following the procedure below. 1. When "Place your finger on the sensor" is displayed on the fi-5000N Message Display (this indicates the "Logout" status), open the cover and press the [SET] key. The following settings screen appears. Setup Register Finger Change PIN Code Show Network Config 2.
Chapter 7 Daily Care 7 This chapter describes how to clean the fi-5000N. Before you clean the fi-5000N, turn off its power and unplug the AC adapter from the outlet. 7.1 Cleaning Materials............................................................................................ 78 7.2 Parts to Clean and Cleaning Method ..............................................................
7.1 Cleaning Materials Cleaning Materials Parts Number Cleaner F1 PA03950-0352 (*1) Lint-free dry cloth Commercially available Remarks 1 bottle Moisten the cloth with this fluid and wipe the scanner clean.(*2) Do not use it for cleaning printed characters, logos and marking areas. *1) It may take long before the cleaner vaporizes if a large quantity is used. When cleaning the scanner parts, dampen a cloth with modest quantities of the cleaner.
7.2 Parts to Clean and Cleaning Method 7.2 Parts to Clean and Cleaning Method Part to clean Cleaning Method Remarks Cover Wipe the Cover with a lint-free dry cloth. Fingerprint Sensor Wipe the Fingerprint Sensor gently with a dry lint-free cloth. Cleaning the Fingerprint Sensor The sensor might not function correctly in the following situations. Clean the sensor surface on a regular basis. • Sensor surface is dirty with dust or any other dirt • Sensor surface is wet.
80
Chapter 8 Troubleshooting 8 8.1 Error Messages and Remedies ....................................................................... 82 8.2 Troubleshooting ............................................................................................... 88 8.3 Items to Check Before Asking for Repair ...................................................... 90 8.4 Checking Labels on the fi-5000N ....................................................................
8.1 Error Messages and Remedies If an error occurs in fi-5000N, a temporary error or device alarm message will appear on the Message Display. Temporary errors are errors that can be resolved by the user, while device alarms are malfunctions errors that require recovery work by support engineers. ■ Temporary Errors If the same message still appears after following the contents listed below, contact the store where you purchased the scanner or an authorized FUJITSU scanner service provider.
8.1 Error Messages and Remedies Message Position your finger a little lower Position your finger a little higher Position your finger a little more right Remedies Check the following: Did you placed your finger in the correct position on the sensor? * Refer to "APPENDIX Using User Authentication by Fingerprint" (page 1). Position your finger a little more left Unable to capture fingerprint. Place finger on sensor correctly • Verify that you are placing your finger in the correct position.
Message 84 Remedies Host connection failure due to time-out Check the following: • fi-5000N is connected via network to the PC specified by the logged-in user. • The PC specified by the logged-in user is running. • fi-5000N Software is installed on the PC specified by the logged-in user. • If Windows XP Service Pack 2 or later is installed in your computer, check if "fi-5000N Event Module" is added to [Programs and Services:] on the [Exceptions] tab of [Windows Firewall] and its checkbox is marked.
8.1 Error Messages and Remedies Message Remedies Scanner's ADF paper chute or the hopper has no document on it. Confirm that document are loaded correctly on the ADF paper chute or on the hopper. Press [ENT] key on fi-5000N keyboard. If the PC which is to receive the scanned data is showing an error message, follow the instructions. Multifeed error Multifeed occurred during scanning operation. Remove the document in the scanner's document feeding path and correct the multifeed conditions.
■ fi-5000N Device Alarms If one of the following messages are shown on fi-5000N Message display, it is likely that fi-5000N has hardware problem. In this case, turn off the fi-5000N power and turn it on again. If the same device alarm occurs, contact the store where you purchased fi-5000N or an authorized FUJITSU scanner service provider.
8.1 Error Messages and Remedies ■ Scanner Device Alarms If one of the following messages are shown on fi-5000N Message display, it is likely that the scanner has hardware problem. In this case, turn off the scanner and fi-5000N power and turn them on again. If the same device alarm occurs, contact the store where you purchased the scanner or an authorized FUJITSU scanner service provider. No.
8.2 Troubleshooting Before you ask for repair service, check the following first. If you cannot solve the problem even after checking the following items, contact the store where you purchased the fi-5000N, or contact an authorized FUJITSU scanner service provider. Symptom fi-5000N cannot be turned on.
8.2 Troubleshooting Check this item Scanning does not start when the [Scan] or [Send to] button is pressed. Is the scanner showing an error code? (Does "U" or "E" appear on the Function Number display of the scanner?) Note down the displayed message, and take the appropriate action subject to the displayed message. Does any error message appear on the fi-5000N? Take the appropriate action subject to the displayed message. Turn off the fi-5000N and reconnect the USB cable.
8.3 Items to Check Before Asking for Repair Collect the following information before you contact the dealer where you bought the scanner or an authorized FUJITSU scanner service provider. Item to check 90 Example Remarks Model fi-5000N For details on the model name refer to "8.4 Checking Labels on the fi-5000N" (page 91)". Serial number 000001 For details on the serial number refer to "8.4 Checking Labels on the fi-5000N" (page 91)".
8.4 Checking Labels on the fi-5000N 8.4 Checking Labels on the fi-5000N The following illustrations are samples of the product labels of the fi-5000N. MODEL fi-5000N PART NO. PA03368-B*** SER. NO. ****** DATE 2004-11 16V 0.5A 1.0kg 8 MADE IN JAPAN Troubleshooting Label A (Example): Compliance of the device with specifications is shown. Label B (Example): Information on the device is shown. MODEL fi-5000N PART NO. PA03368-B*** SER. NO. ****** DATE 2004-11 16V 0.5A 1.
92
Chapter 9 Specifications This chapter lists the fi-5000N specifications. 9 9.1 Basic Specifications ........................................................................................ 94 9.2 Installation Specifications ............................................................................... 95 9.3 External Dimensions........................................................................................ 96 9.4 fi-5000N Software Specifications ................................................
9.1 Basic Specifications Item Message Display 94 Specification Type Monochrome with backlight (LCD display) Panel size 20 characters × 4 lines Language English, German, French, Italian, Spanish, Japanese Keyboard [ID], [SET], [ESC], [ENT ], [L], [K], [.], Numeric key (0~9) Total: 17 keys Fingerprint Sensor Static capacity method Resolution: 500 dpi (256 × 300 pixels) Finger (Detection) Sensor Type: Infrared light photo-reflector Memory Flash ROM 2 MB RAM 32 MB Scanner Interface USB 2.
9.2 Installation Specifications 9.2 Installation Specifications Item Dimensions Weight Specification Depth Width Height 176 mm (6.93 in) 125 mm (4.92 in) 62 mm (2.44 in) 1.0kg (2.
9.3 External Dimensions (6.93 in.) The following shows the external dimensions of the fi-5000N: (2.44 in.) (4.92 in.
9.4 fi-5000N Software Specifications 9.4 fi-5000N Software Specifications Software specifications for the fi-5000N are listed as below. Item Specification Number of scanners that can be connected 32 or less Number of registered users Up to 32 users Trigger port 10002 (2000 to 60000) ATTENTION When 33 or more scanners are connected, all devices may not be detected accurately.
98
APPENDIX Using User Authentication by Fingerprint ■ How to place your finger on the sensor Pay attention to the following points when performing fingerprint registration or authentication. • For reliability, align your finger such that the virtual line connecting the white positioning marks on the both sides of the fingerprint sensor crosses the base of your fingernail, and press your finger to the sensor. To confirm the correct way to place your finger, click here to view the movie.
The following finger conditions may cause a registration or authentication failure. ATTENTION • The skin of finger gets rough or is extremely dry. • The finger surface is wounded or has suffered an abrasion so that the fingerprint mark becomes thin. • The fingerprint has been changed due to a rapid gain or loss of weight. Washing, wiping, or using a different finger may improve the situation.
■ Removing Finger Guide For the ease of fingerprint registration by letting you place your finger correctly, the Finger Guide is installed on the fi-5000N fingerprint sensor area. When you get accustomed to placing the finger correctly on the fingerprint sensor, you can remove the Finger Guide. To remove the Finger Guide, follow the instructions below. 1) Hold both sides of the Finger Guide. 2) Squeeze the guide lightly to detach its pins. 3) Lift the guide up and remove it from the fi-5000N.
AP-4
INDEX A FUJITSU ISIS AC adapter .............................................. 12 AC cable ................................................. 12 Add button ............................................... 45 Adding fi-5000N FUJITSU TWAIN32 Cover ......................................................... 8 D Admin. button .......................................... 46 Administrator Settings ............................. 57 Advance Tab ........................................... 48 Ambient condition ...
H Host Connection Time-out ............................ 63 Power Saving Settings ...................... 24 Power Switch ............................................. 9 ............................................ 4, 21 Pull mode I Pull mode user authentication ................. 21 .......................................... 4, 21 ID key ...................................................... 10 Push mode Initialization of fi-5000N ...........................
T Trigger port ............................................. 48 Turn on the power ................................... 14 U Uninstalling fi-5000NSoftware ................................. 68 the Scanner Driver and Scanning Application .............................. 39 USB cable ............................................... 13 USB Connector ......................................... 9 User Authentication by PIN ..................... 75 User Config. button ...........................
fi-5000N Operator’s Guide P3PC-1132-07ENZ0 Date of issuance: August, 2009 Issuance responsibility: PFU LIMITED Copying of the contents of this manual in whole or in part and copying of the scanner application is forbidden under the copyright law. z The contents of this manual are subject to change without notice. z PFU LIMITED. is not liable whatsoever for any damages resulting from use of this scanner and procedures described in this manual, profit loss due to defects, and any claims by a third party.