
Operating Manual
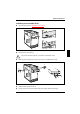
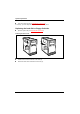
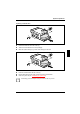
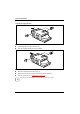
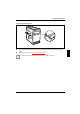
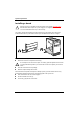
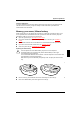

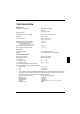
Table Of Contents
- Title
- Contents
- Introduction
- Important notes
- Preparation for use and operation
- Troubleshooting and tips
- Installing new software
- Power-on indicator remains dark after you have switched on your device
- The screen stays blank
- Flickering or drifting stripes on the monitor screen
- No mouse pointer displayed on the screen
- The floppy disk cannot be read or written
- Time and/or date is not correct
- Error messages on the screen
- Restoring the hard disk contents
- Tips
- System expansions
- Technical data
- Index

System expansions
34
A26361-K515-Z100-1-7619
Changing the floppy disk drive
1
2
1
²
Remove the four screws (1).
²
Pull the floppy disk drive out of the carrier (2).
²
Take the new floppy disk drive out of its packaging.
1
2
2
²
Slide the floppy disk drive into the drive carrier (1).
²
Fasten the hard disk drive with the screws (2).
²
Plug the data and the power supply connectors into the hard disk drive.
²
Close the system unit (see "Assembling the system unit").
i
If necessary, you must adapt the entry for the drive in the Setup menu.