
User Manual
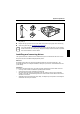
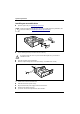
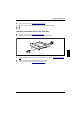
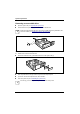
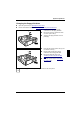
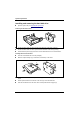
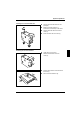
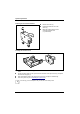

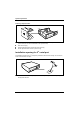
Table Of Contents
- Title
- Contents
- Introduction
- Important notes
- Transporting the PC
- Cleaning the PC
- Preparation for use and operation
- Unpacking and checking the delivery
- Preparing the PC for use
- Setting up the PC
- Connecting devices
- Connecting the PC to the line voltage
- Unlocking/locking the system unit
- Switching the PC on and off
- Indicators on the system unit
- Keyboard
- Working with floppy disks
- Settings in BIOS Setup
- Property and data protection
- Troubleshooting and tips
- System expansions
- Technical data
- Index

System expansions
A26361-K520-Z100-4-7619
41
Installing/removing a chipcard reader
Open the system unit (see "Opening the system unit").
Installing a chipcard reader
Remove the protector panel at the front of the carrier.
Push the chipcard reader board into the guide rail of the carrier with the component's side
toward the panel.
Fix the board with the screw.
3
1
2
Fix the cable on the chipcard reader (1) and on the connector for the chipcard reader on the
system board (see the Technical Manual of the system board).
Lift the chipcard reader into the system unit (2).
Push the chipcard reader in the direction of the arrow (3) until it clicks into position. Press
downward and toward the drive cage while doing so.
i
With the chipcard reader connected, no devices may be connected to serial port 2.