
User Manual
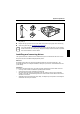
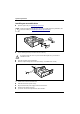
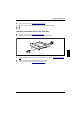
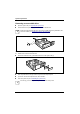
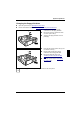
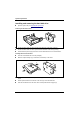
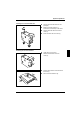
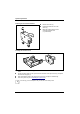

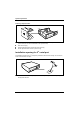
Table Of Contents
- Title
- Contents
- Introduction
- Important notes
- Transporting the PC
- Cleaning the PC
- Preparation for use and operation
- Unpacking and checking the delivery
- Preparing the PC for use
- Setting up the PC
- Connecting devices
- Connecting the PC to the line voltage
- Unlocking/locking the system unit
- Switching the PC on and off
- Indicators on the system unit
- Keyboard
- Working with floppy disks
- Settings in BIOS Setup
- Property and data protection
- Troubleshooting and tips
- System expansions
- Technical data
- Index

System expansions
34
A26361-K520-Z100-4-7619
Installing an accessible drive
Open the system unit (see "Opening the system unit").
i
Should the chipcard reader get in the way of the accessible drive during installation, then
remove the reader (see "Installing/removing a chipcard reader
").
A
B
1
2
Pry the plastic drive cover (A) out of the front cover.
Pry the shielding plate (B) on left-hand side out of the bay.
!
Do not throw away the covers. If you remove the drive again later, you will have to
reinstall the covers.
Take the new drive out of its packaging.
Make the required settings on the drive (if necessary, on installed drives as well).
2
1
A
B
A = Position of the screw for the upper drive
B = Position of the screw for the lower drive
Slide the drive into the system unit (1).
Plug the data and the power supply connectors into the drive.
Fasten the drive with the screw (2).
If you have removed the chipcard reader, then reinstall it.