
User's Manual


96
Multimedia
Shooting settings menu for videos
The following settings can be made by pressing
M
in the video
viewfinder screen.
Setting Item Description
White Balance Adjusts coloring to match the surrounding light source.
Video Duration Automatically ends recording after the preset time
elapses.
Audio Sets whether or not to record audio when recording
video.
Light Switches the light on/off.
Video Size Specifies the resolution (image size).
Advanced
Video
Quality
Specifies the photo quality. Setting a higher photo
quality results in a
larger image file size.
Audio
Encoder
Specifies
AAC or AMR codec.
View Finder Sets whether to take shots in landscape/portrait mode,
or whether to automatically switch between the
landscape and portrait mode.
Auto View Displays the video you shot after it is saved.
Anti-Shaking Applies the camera shake correction function.
About Checks the video recording version and restrictions in
use.
Taking pictures
Still pictures and video you take are automatically saved on the
microSD card. Insert the Micro SD card onto your FOMA terminal. For
details on the microSD card, see P. 70.
Shooting still pictures
1
→
"Camera"
2
Display the subject on the viewfinder screen
●
When focus is set to "Auto" or "Object Tracking", tap the position
or subject you want to focus on. When the subject is in focus, the
focus frame changes color to green.
●
When focus is set to "Face" and the faces of two or more people
have been detected, tap the face of the person you want to focus
on.
3
Tap
The shutter sound sounds.
The confirmation screen is displayed if the "Auto View" checkbox is
selected in the shooting settings menu.
Note
●
You can also lock focus by pressing
dD
halfway down.
●
You can adjust the brightness by pressing
eE
/
fF
.
■
Still picture confirmation screen option menu
The following operations can be performed by pressing
M
.
Item Description
Set Picture Sets the still picture you shot as wallpaper or the icon
(face shot) of a contact.
To MediaFolder Checks the still picture you shot in the media folder.
Details Displays the file information of the still picture you
shot.
Geo Tag Tags the still picture to indicate the exact location
where it was taken. When a still picture has a Geo Tag
attached, the location where it was taken can be
checked on a map.
Auto Fix Automatically performs digital correction on the still
picture you shot.
97
Multimedia
Continued on next page
Shooting video
1
→
"Camcorder"
2
Display the subject in the viewfinder screen, and
tap "REC" to start recording
The recording start sound sounds.
3
Tap "STOP" to end recording
The recording end sound sounds.
The confirmation screen is displayed if the "Auto View" checkbox is
selected in the shooting settings menu.
Note
●
You can adjust the brightness by pressing
eE
/
fF
.
■
Video confirmation screen option menu
The following operations can be performed by pressing
M
.
Item Description
To MediaFolder Checks the video you recorded in the media folder.
Details Displays the file information of the video you
recorded.
Media Folder
Images shot with the camera or downloaded and saved to the microSD
card can be displayed and played back, or edited easily. Images can
also be tagged for sorting into categories, and the face detection
function can be used to make a personal album.
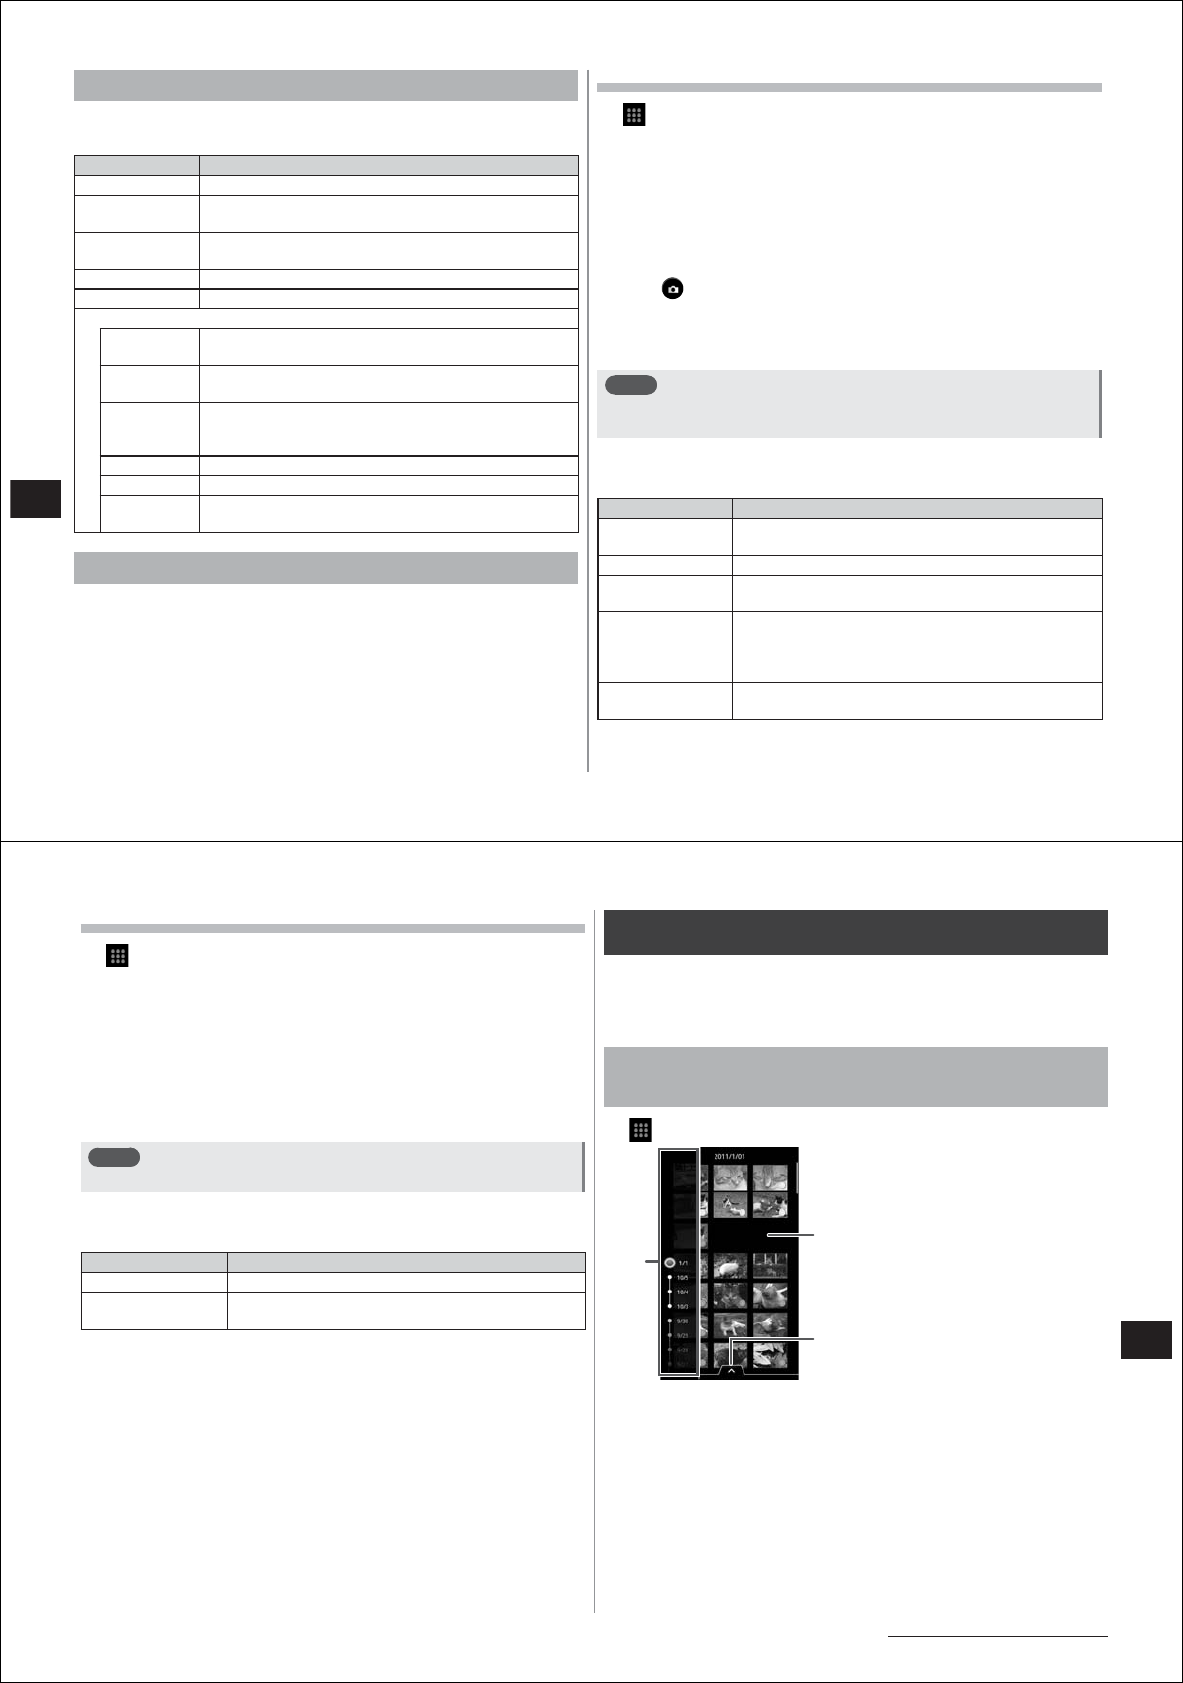
Opening the media folder to display/play back
images
1
→
"Media Folder"
②
③
①
①
Index bar
②
Scroll up and down to select an
image
③
Tap to display the category tab
2
Display the category tab, and tap "All"/"Photo"/
"Video"/"People"/"Tag"
3
Specify the date on the index bar
●
The index bar is displayed when a screen border is tapped in the
portrait display mode. It is always displayed at the bottom of the
screen in the landscape display mode.
●
The index bar is not displayed when "People" is selected at step 2.
●
The index bar for individual tags is displayed when "Tag" is
selected at step 2.