
User's Manual


22
Before Using the FOMA Terminal
Note
●
When handling the docomo UIM card, take care not to touch or
damage the IC part of the card. Also, note that the docomo UIM
card sometimes breaks if you exert unnecessary force in trying to
attach or remove it.
Security codes of the docomo UIM card
The docomo UIM card has two security codes, namely PIN1 and PIN2.
Both of them are set "0000" at the subscription. They can be changed
by yoursel
f (P. 64).
Differences in docomo UIM cards
The differences between the FOMA card (blue) and docomo UIM card
(green/white) are as follows.
Item
FOMA Card
(blue)
docomo UIM card
(green/white)
Number of telephone number
digits that can be registered to
contacts on the docomo UIM card
Max. 20 Max. 40
WORLD WING Not available Available
WORLD WING
WORLD WING is DOCOMO's FOMA international roaming service that
allows you to make and receive calls with the same phone number
overseas by attaching the docomo UIM card (green/white) into the
FOMA termin
al compatible with the service.
●
If you subscribed to FOMA services on or after September 1, 2005,
separate subscription is not required. If you declined to use WORLD
WING at subscription to FOMA services or you have canceled it, you
need to make an application again.
●
If you subscribed to FOMA services on or before August 31, 2005 and
have not yet made an application to WORLD WING, you need to
make an application.
●
There are some unavailable charging plans.
●
When your docomo UIM card (green/white) is lost or stolen overseas,
promptly contact DOCOMO and conduct the procedure for canceling
use of the docomo service. For inquiries, see the "docomo
Information Center" on the last page of this manual. Note that
transmission/calling charges after the docomo UIM card is lost or
stolen are incurred to the subscriber.
About the battery pack
Attaching/removing the battery pack
●
Before removing the battery pack, turn your FOMA terminal off.
●
Use the Battery Pack T03 exclusively for this FOMA terminal.
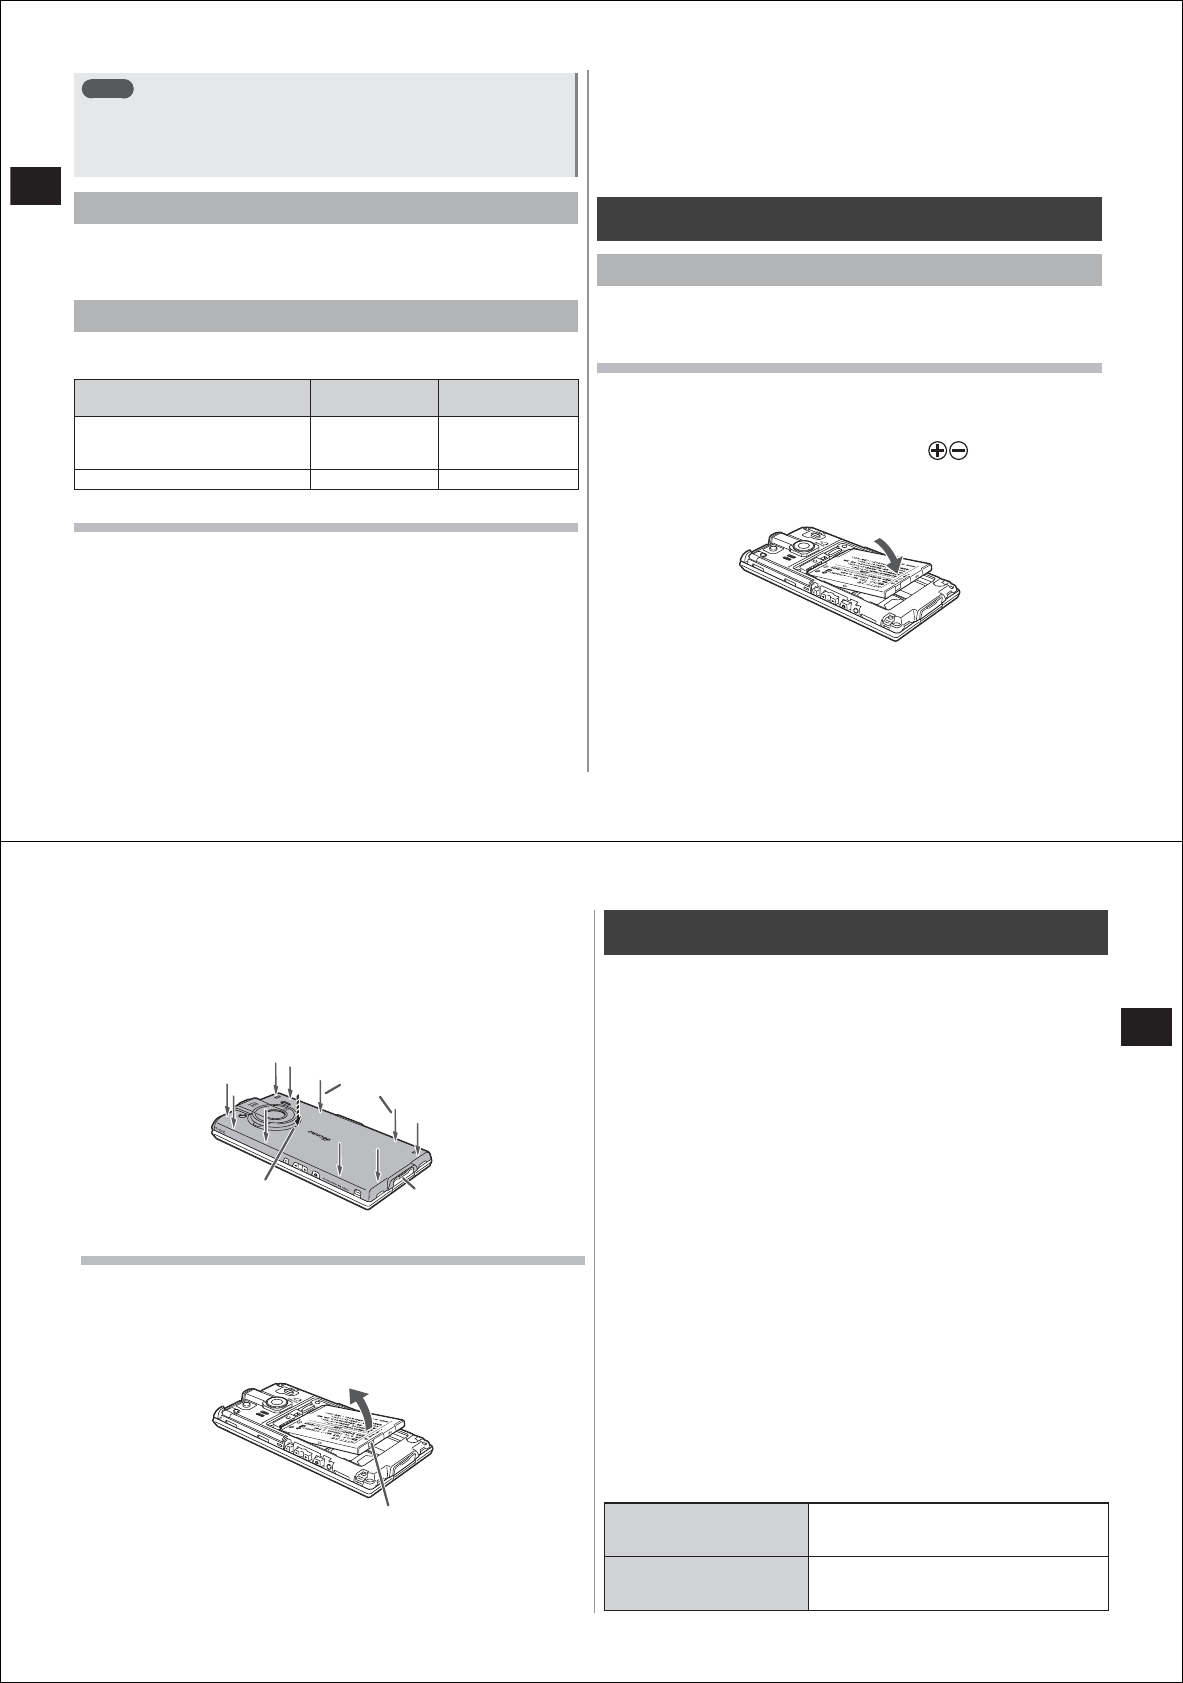
Attaching the battery pack
1
Remove the back cover (P. 15)
2
Attach the battery pack
●
With the side of the battery pack with the marks facing up,
align the metal terminals on the battery pack with the metal
terminals on your FOMA terminal, and attach the battery pack in
the direction of the arrow.
3
Check the orientation of the back cover and attach
it so that it fits onto the body
23
Before Using the FOMA Terminal
4
Firmly press each of the 10 clasps on the outside of
the back cover one at a time, and last of all firmly
press the clasp on the inside
●
To maintain waterproof performance, attach the back cover
securely while making sure that there are no parts of the cover
rising off from your FOMA terminal.
* See "Waterproof Properties" (P. 13).
Removing the battery pack
1
Remove the back cover (P. 15)
2
Remove the battery pack
●
Lift up the battery pack by using the removal clasp to remove the
pack.
How to charge the battery pack
When you purchase your FOMA terminal, the battery pack is not fully
charged. Be sure to charge the battery pack before use.
■
Precautions during charging
●
Be sure to attach the battery pack on your FOMA terminal to charge it.
●
If you charge the battery pack while using your FOMA terminal, it
might take time for charging to complete or charging might not
complete. Als
o, if functions that consume large current, such as data
communications or calls, are used continuously
, the battery pack
might continue to lose power or run out of power even while it is being
charged.
●
During charging, your FOMA terminal or AC adapter might heat up.
This, however, is not a malfunction. Charging is sometimes stopped
temporarily for safety's sake when your FOMA terminal heats up.
Stop
use of your FOMA terminal immediately if it becomes extremely hot.
●
In the following cases, a charging error occurs and the notification
LED flashes (red).
・
When the charging voltage is too high
・
When the battery pack overcharges/overdischarges
・
When charging does not complete even after 5 hours
When a charging error occurs, currently activated functions are
deactivated, and key operations are
limited. Either remove the
charger
, or remove the battery pack.
■
Approximate charging times
These times were calculated when this FOMA terminal was turned off
and the battery pack was charged in a completely run down state. The
approximate charging times increase if the battery pack is charged with
your FOMA terminal turned on or it is charged at a low temperature.
FOMA AC Adapter 01/02
(sold separately)
FOMA charging microUSB adapter T01:
approx. 200 minutes
Desktop holder: approx. 160 minutes
FOMA DC Adapter 01/02
(sold separately)
FOMA charging microUSB adapter T01:
approx. 200 minutes
Desktop holder: approx. 160 minutes
Clasp on
the inside (1)
Clasps on
the outside (10)
External connector
terminal cover
Removal clasp