
Operation Manual

PAG.
23
rev 1.1
ENGLISH
INSTALLATION
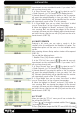
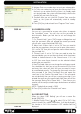
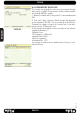
you can edit the Transponder’s data like frequency, polarity and
Symbol Rate. In this window, the search of the channels of the TP
can be done selecting the “Search” option and pressing [OK].
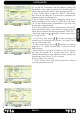
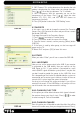
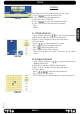
3. Press [Green] button to open the “Add TP” menu (OSD
35). Here you can add a new TP and setup its parameters like
frequency, polarity and Symbol Rate.
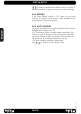
4. Press [Yellow] button will open a dialog box asking you to
confi rm the deletion of the current TP (OSD 36). If you select
“Yes” all the related channels will be deleted. If you select “No”
the operation will be cancelled.
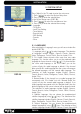
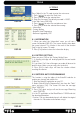
5. Press the key [Blue] to make a searching of the selected TP.
When selecting this option a new window will appear, here you
will be able to confi gure the following parameters (OSD 37):
- Searching mode: use [
] order to make a normal search
or a search by PID.
- On “FTA Only” item, press [ ] to select scanning of all
channels or just scanning of free channels. If you select “Yes” it
will scan free channels only.
- On “Scan Channel” item, press [ ] to select the scanning
range from TV + Radio Channels, only TV channels or only
Radio channels.
- Network Search: If you select this option as “No”, the receiver
will search the selected TP. In case you select “Yes”, the NIT
(Network Identifi cation) will be identifi ed and the receiver will
automatically search all the TP of this network.
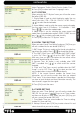
6. Press [OK] to start scanning.
7. On the “TP Scan” item, press [Exit] to cancel the scanning
and saving the found channels.
OSD 35
OSD 36
OSD 37
OSD 34