
Operation Manual


PAG.
20
rev 1.1
ENGLISH
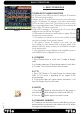
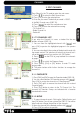
4. INSTALLATION
Press [Menu] in the TV mode to enter the main menu.
1. Press [
] to select the Installation item.
2. Press [OK] to enter the selected item.
3. Enter the password. The default password is “0000”.
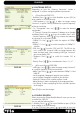
In the Installation menu (OSD 23):
4. Press [
] to select the wanted menu item.
5. Press [OK] to enter the selected item among.
- Antenna Connection
- Satellite List
- Antenna Setup
- Single Satellite Search
- Multi Satellite Search
- TP List
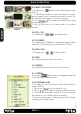
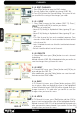
4.1. ANTENNA CONNECTION
When you enter the “Antenna connection” menu you can see a
window like the one beside (OSD 24).
LNB: Press the arrows [ ] on the remote to select the
“Motorized Antenna” option in case you have an installation
with an engine. If you do not have an engine, choose “Fixed
Antenna”.
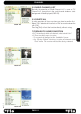
4.2. SATELLITE LIST
When you enter the “Satellite List” menu you can see a window
like the one beside (OSD 25):
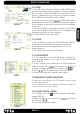
1. Move through the satellite list using [ ] and mark/
unmark the satellites that you want pressing [OK]
2. Press [Red] button to enter edit satellite menu (OSD 26).
You can edit the satellite’s name and its longitude. Once you
have edited the satellite, select “Save” option and confi rm with
[Yellow] button. If you prefer to exit without saving the changes
press [Blue] button.
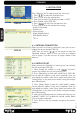
3. Press [Green] button to open the “Add satellite” window.
You can edit the satellite’s name and its longitude. Once you
have edited the satellite, select “Save” option and confi rm with
[Yellow] button. If you prefer to exit without saving the changes
press [Blue] button.
4. After pressing [Blue] button you will be asked “Are you sure
to delete?”. Select “Yes” to delete the marked satellite. Select
“No” to cancel the operation.
5. Press [Exit] to save the changes and go to the previous
window.
CHANNEL
OSD 23
OSD 24
OSD 25
OSD 26