
User Manual
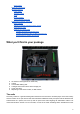
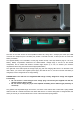

The back of the radio shows the JR-compatible module slot, along with a JR-style jack trainer port, USB
connector and earphone jack. The battery bay houses a microSD card slot, a serial port and of course the
battery connection.
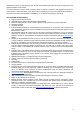
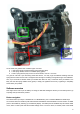
The supplied battery is a 6-cell NiMH, but the plug will also accept a JST-style balance plug for a 2s Li-Po
battery. Battery compartment dimensions are 108x31x28mm. Voltage range is 5.5-13V for the internal
components, but be aware that external modules might require up to 12V, so observe your module's
requirements when using one and choose the appropriate battery.
The right side of the radio sports the charger input plug, with the charging LED next to it on the back of the
radio. When you connect the supplied power supply the LED will turn on, and shut off when the battery is
charged (2-3 hours charge time for an empty battery).
PLEASE NOTE: The radio has an integrated Ni-MH charge circuitry designed to charge the supplied
6-cell battery.
● Do not connect a smart charger to the charge plug. It should only be supplied with 12V DC,
polarity however doesn't matter.
● Do not use the charge plug if you have replaced the battery with a different type (chemistry or
cell count).
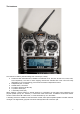
The gimbals have adjustable length and tension, and each of the vertical axes is fitted with a spring disable
feature as well as a ratchet and brake. This means that there is no need to swap parts to change modes, and
that if you want to you can have either both or none of the vertical axes spring-loaded.
5