
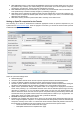
User Manual


channel's output cover a range of say +50 to +80% over the pot's throw. Then, set the Adjust GV1 source to
CH12.
A few interaction examples
The power of the system now comes from the combination of the different features. Custom switches can be
used to create conditions that will trigger audio playback, for example using custom switch "CS1|d|>x Alt 10" as
trigger for "Play Value Alt" would result in the altitude being announced every time it has changed by 10m/ft.
"CS2 a<x Spd 35" triggering "Play Track lowspd" would play the lowspd.wav file on the SD card, that could be
recorded to say "Low Speed" when GPS speed got under 35km/h. If you have several parameters you want to
have announced sequentially on request, you could set several Play Value Custom Functions all triggered by
the SHdown momentary switch as shown above. A press of this switch will then trigger playback of all the
parameters one after the other.
But as we know that custom switches can be used anywhere a switch is definable, nothing prevents you from
reusing that same CS2 to trigger automatic flaps deployment once speed got below 35km/h. That's right,
anything can be used to affect anything.
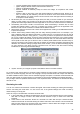
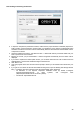
Introduction to OpenTX companion
As we have briefly mentioned, OpenTX comes with a computer-based counterpart that runs on Windows, Mac
OS and Linux, OpenTX companion.
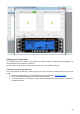
This software will allow you to backup, edit and share your radio's settings. It can also simulate both a model's
setup and the radio's own interface on the computer, so it's a great tool to try things even without a radio. When
you have one, it can speed up new model setups significantly thanks to the PC interface that's not limited to a
small screen and a few buttons.
Basic concepts
OpenTX companion handles 2 main tasks:
● Managing radio settings and models
● Downloading new radio firmwares, and transferring them to the radio.
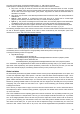
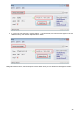
An important thing to understand is how things are stored on the radio. We will regularly talk of 2 different types
of memories, Flash and EEPROM.
● Flash is the memory where the radio's firmware or "operating system" resides. "Flashing the radio"
means replacing the firmware, which you would usually do either to upgrade to a newer version or to
change language. Models and settings are not affected when flashing the firmware. On the Taranis,
flashing is done with the radio OFF. So turn the radio off, then plug it to the computer's USB port.
● EEPROM is the separate settings/model memory. Reading it allows backing up and editing in OpenTX
companion, writing it sends the result of the edits back to the radio. On the Taranis, this is done with the
radio ON. Turn it on, dismiss any warnings in order to get to the main views, then plug the USB cable.
You will see two USB drives appear, one is the SD card, and one is the EEPROM virtual drive.
OpenTX companion will thus handle 2 different types of files. Firmware files, that can be downloaded from the
Preferences dialog, which are non-editable and can just be transferred to/from the radio, and EEPROM files for
which OpenTX companion provides an editor that allows to change anything in the same way that would be
done on the radio itself.
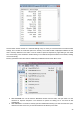
When creating (File->New) or opening (either by dragging it onto the main window or via the File->Open menu
command) an EEPROM file, a document window will appear. Several of those windows can be open at the
same time, allowing you to copy models or settings between files. Trying to open a firmware file the same way
will throw an error saying the file is invalid - this doesn't mean that the firmware is invalid, but simply that it is not
a settings file.
31