
Installation Manual

5
REV_A0
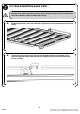
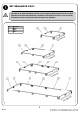
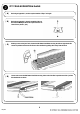
FIT YOUR EXPEDITION RAILS Cont...
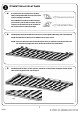
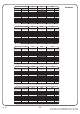
Referring to the images below, insert one Joiner Piece assembly into the "U" Channel of the End Slat from
Step 2D as shown. Depending on your Rack requirements (refer to Appendix A), slide either zero, one, two
or three Joiner Piece assemblies into each side of the Rack. Depending on the length of your Rack, you
may need to insert some of the Joiner Pieces before completing Step 2H due to the Rack joiner pieces that
sit in the "U" Channel.
()
E
(
F
)
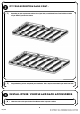
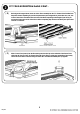
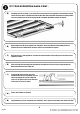
Slide a Corner Piece (Item 6) into the Slat making sure that the Lip on the underside of the Corner Piece
slides into the Top Lip of the "U" Channel. Once the Corner Piece is all the way into the Rear Slat, loosely
secure the Corner Piece to the Slat using one of the M6 x 12 Button Head Bolts (Item 4) supplied.