
Hard Drive Pro User Manual


21
GB
5
5.4.2 Creating a new SYNC folder
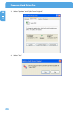
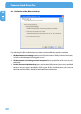
1. Open the Freecom Personal Media Suite and select the tab "Freecom SYNC". Click on
"Select folder" and select a folder on your Freecom Hard Drive Pro.
2. Alternatively, you can create a new SYNC folder on your Freecom Hard Drive Pro using
the "Select folder" function by clicking on "Create new folder", naming the folder (e.g.
"SYNC") and selecting it.
3. Click on "Complete" so that the new folder is created. Then opens the Freecom SYNC
folder.
Important: The selected folder may not contain any les or folders!
5.4.3 Opening the SYNC folder
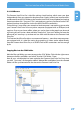
1. Open the Freecom Personal Media Suite and select the tab "Freecom SYNC".
2. Click on "Open folder" in order to open the SYNC folder.
3. If the Freecom Personal Media Suite is already open and has been started minimised
in the taskbar, you can also open the SYNC folder through a right-click on the taskbar
symbol of the Freecom Personal Media Suite.
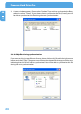
5.4.4 Adding les into the SYNC folder
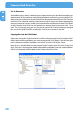
1. Open the SYNC folder.
2. Pull the respective les or folders in the SYNC folder using the drag&drop function.
3. Alternatively, you can also right-click on the le(s) or folder(s) and select the SYNC
folder in the context menu under "Send to ...". Your les/folders are now copied into
the SYNC folder.
5.4.5 Changing the SYNC folder
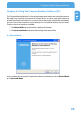
1. Open the Freecom Personal Media Suite and click on the tab "Freecom SYNC".
2. Click on "Change folder" to select a new folder for data synchronization.
Important: The selected folder may not contain any les or folders!
5.4.6 Deleting the SYNC folder
1. Open the Freecom Personal Media Suite and click on the tab "Freecom SYNC".
2. Click on "Delete folder" in order to delete the active SYNC folder.
ATTENTION: All les in the folder are irrevocably deleted!
The User Interface of the Freecom Personal Media Suite