
Installation Sheet


3
Farmhouse Drop-In Sinks
2
33.. PPrreeppaarree tthhee CCoouunntteerrttoopp
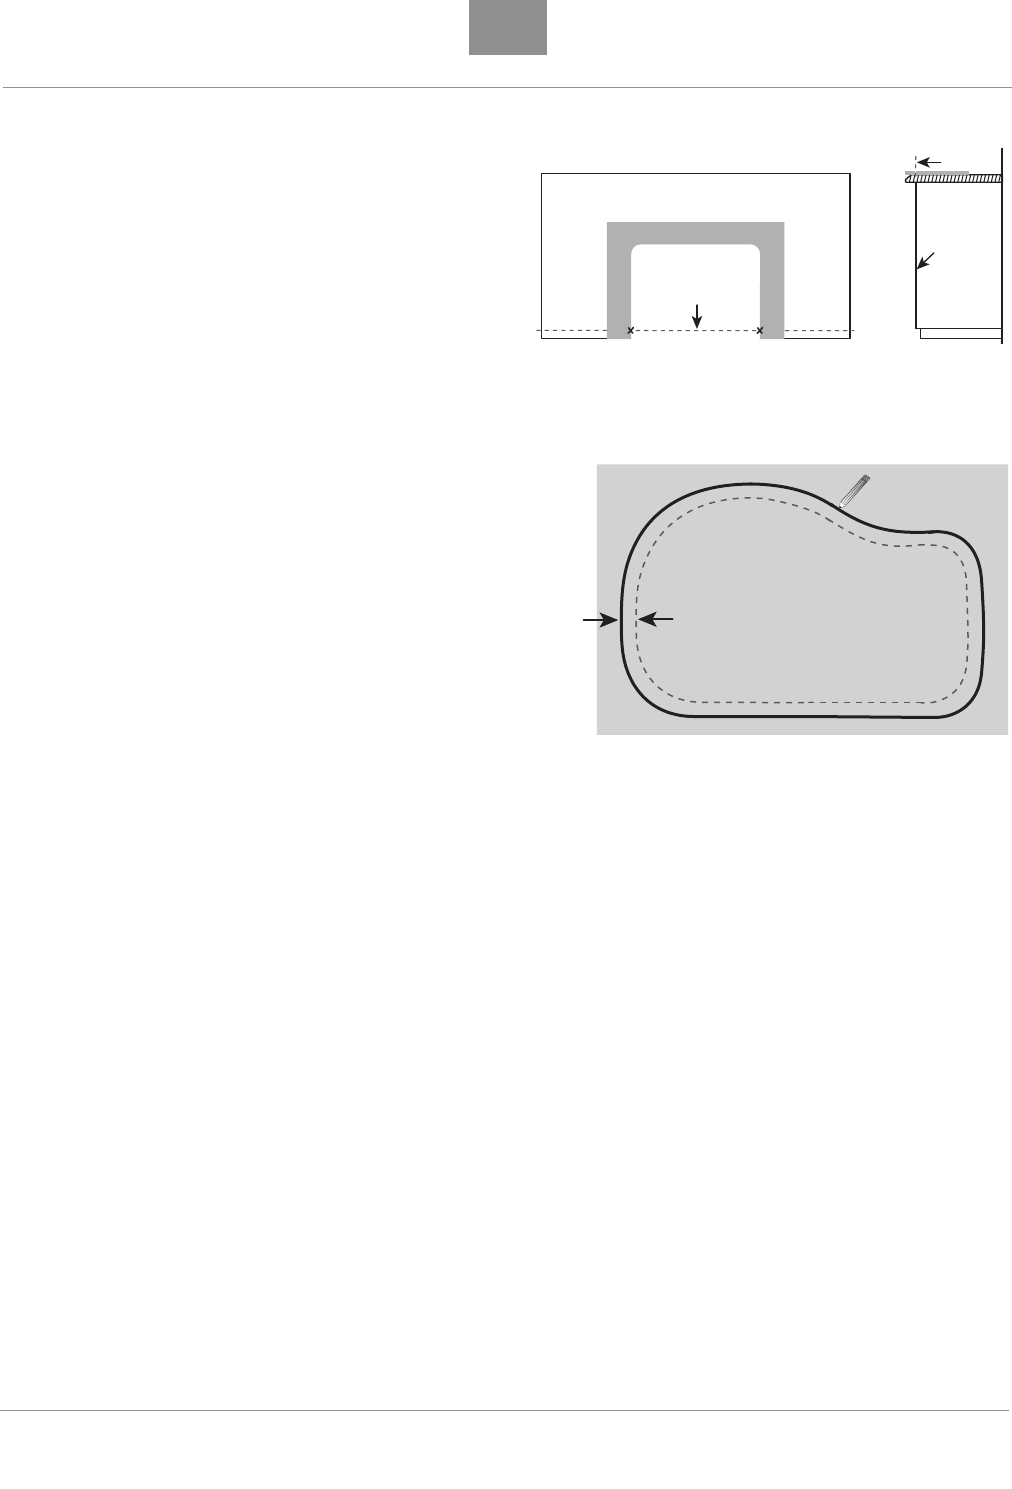
Position the countertop on the base cabinetry. Locate the template
laterally to center the cut-out for the sink within the sink base cabinet
unit. Then locate the template “front-to-back” so that the alignment
marks are in-line with the front face of adjacent cabinetry. Trace the
template onto the countertop. Remove the countertop, and then cut-out
the sink opening. Check fit and finish of the cut-out relative to the sink,
and adjust if necessary.
44.. PPrreeppaarree tthhee SSiinnkk
44aa.. DDrriillll HHoolleess ffoorr FFaauucceett aanndd FFiittttiinnggss ((iiff nneecceessssaarryy))
PPlleeaassee eexxeerrcciissee ccaauuttiioonn wwiitthh rreessppeecctt ttoo tthhee pprreessccrriibbeedd nneexxtt sstteeppss.. FFaaiilluurree
ttoo ffoollllooww tthheessee iinnssttrruuccttiioonnss mmaayy ddaammaaggee tthhee ssiinnkk..
1. The sink should be resting on the floor or a work bench at this point.
The sink should be supported from the underside of the sink bowl or
basin. The sink should not be installed into the countertop when
following next steps.
2. Apply masking tape to the top surface of the sink ledge.
3. The underside of the fireclay sink ledge has been prepared with an
undercut for faucet and fitting holes. Determine the position of the
holes required for the faucet and fittings that you have selected.
4. Transfer the center position of each hole that has been selected.
Measure the location of each hole relative to the back edge of the
sink rim, and the lateral edge of the sink rim. Mark the center of the hole onto the masking tape.
5. Measure twice to confirm position.
6. Position a center punch on the mark that has been transferred, and strike with a hammer (this operation is intended to penetrate the
surface glaze so that drilling of a locating hole is easier).
7. Drill a pilot (locating) hole
ffrroomm tthhee ttoopp ssuurrffaaccee
using a No. 8 masonry drill.
8. Enlarge the hole to the required size by striking the pilot hole location with a center punch and hammer. (Alternatively, the hole may
be prepared by drilling with a 1 3/8” diameter diamond hole saw).
44bb.. IInnssttaallll SSiinnkk SSttrraaiinneerrss
We recommend installing the sink strainers at this point in the installation process. The installation process is much simpler with the sink
accessible from all sides.
44cc.. IInnssttaallll FFaauucceett aanndd FFiittttiinnggss
We also recommend installing the faucet and any deck mounted fittings at this point in the installation process. The installation process
is much simpler with the sink accessible from all sides.
55.. IInnssttaallll tthhee SSiinnkk
5a. Place the countertop into position.
5b. Carefully place the sink into position on the wooden support frame, and shim the sink to level if necessary.
5c. Apply a bead of translucent silicone between the sink rim and the countertop. Clean up excess silicone with a solvent and clean wiper.
5d. Connect drain assembly and supply fittings.
Front of base cabinetry.
TOP VIEW
SIDE VIEW
Front of base
cabinetry.
Alignment
m
ark.
Countertop
Template
Sink rim width
+ 1/4”
Trace around sink.
Template cut out line.