
Installation Sheet


2
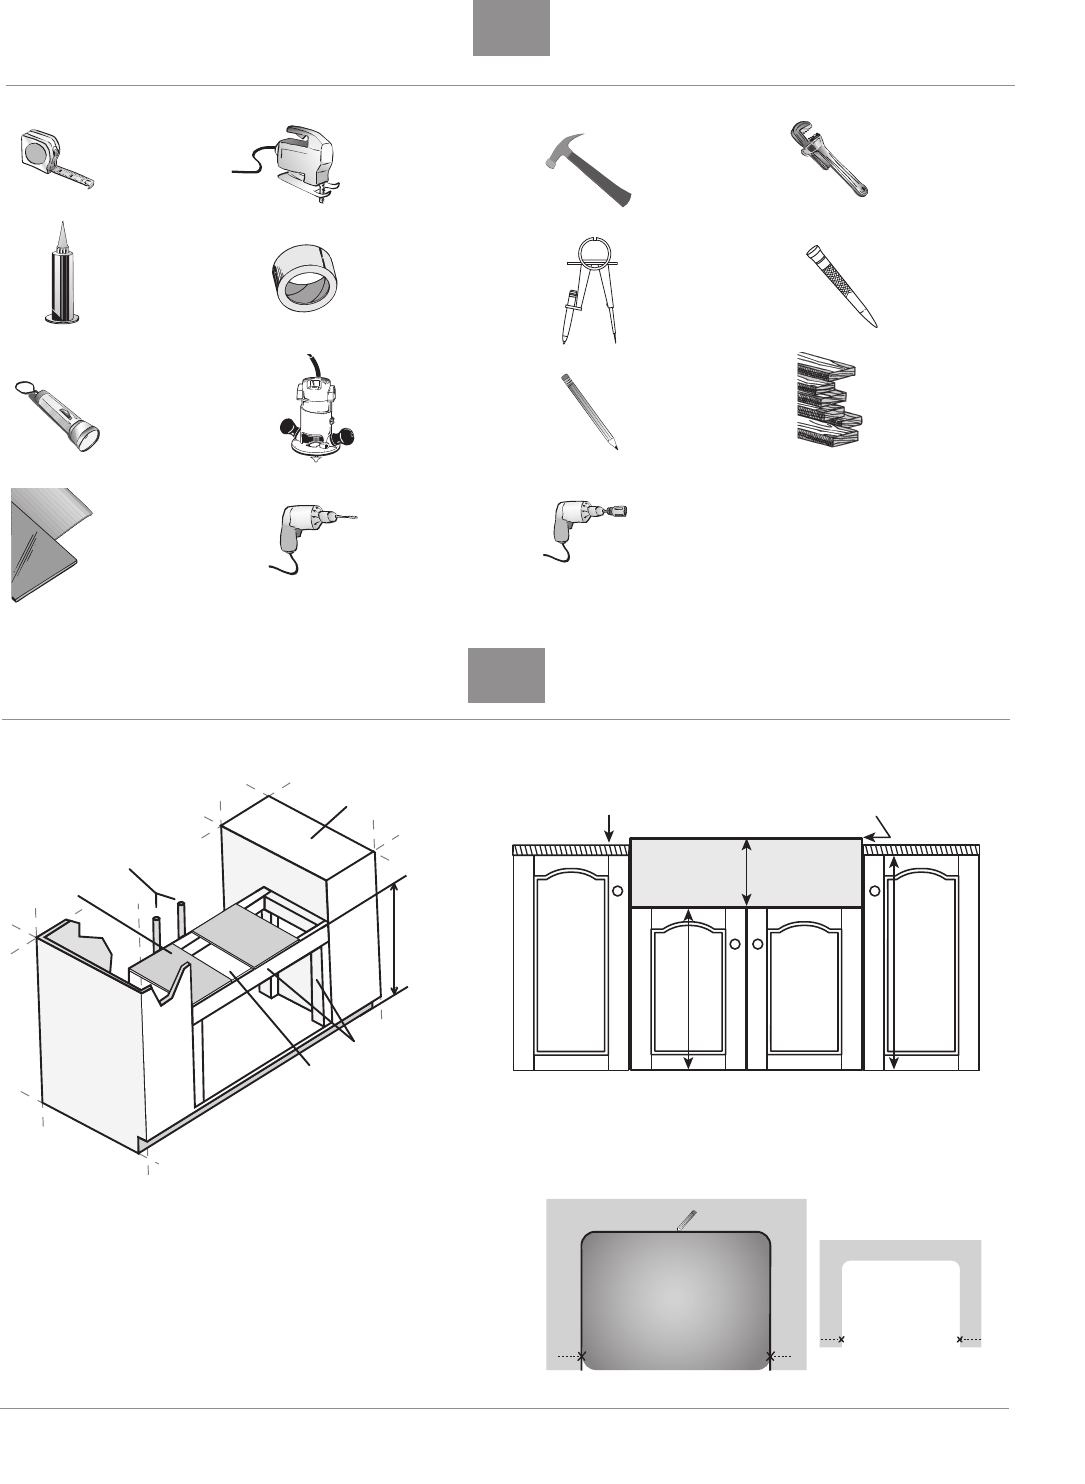
Tools Required
Compass
with
pencil
Tape measure
Keyhole or saber saw
Drill with a #8 masonry
drill. (if required for
faucet holes)
Pencil / Crayon
Flashlight
Hammer
Center punch
Cardboard or
masonite sheet
for template
Router and
sink trim bit
Pipe wrench
Clear silicone
Masking tape
Construction
Materials
(2 x 4 and
1/2” Plywood)
Drill with 1 3/8” diamond
hole saw (if required for
faucet holes)
1
11.. BBuuiilldd aa SSuuppppoorrtt FFrraammee
in the sink base cabinet unit at a dimension “A” above the floor.
22.. PPrreeppaarree tthhee TTeemmppllaattee
Lay the sink upside down on a piece of cardboard. Align the front of the
sink with the front edge of the cardboard. Trace around the perimeter of
the sink. Remove the sink. Draw an alignment mark at the end of the front
radius on both sides. This mark will be used to align the template with
base cabinetry when cutting out the countertop.
Water Supply
Cabinet
Approx. 7" gap to
allow for drain fittings
2" x4" Wood
Support Frame
DIMENSION “A”
1/2" Plywood
H
A
B
A = B + C + D - H
D = space from
top of countertop
to top of sink
C = Countertop
thickness
Farmhouse Drop-In Sinks
2
Create alignment marks here.
Trace around sink.