
Operation Manual

Frama Matrix F22
26
4.5. Fitting the ink jet cassette
4.5.1. Fitting/changing the ink jet cassette
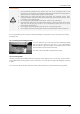
Your Frama Matrix franking system uses a double ink jet cassette to frank your mail items. The ink
jet cassette also contains the printing head.
You must therefore handle the ink jet cassette very carefully.
Information
1. Do not frank mail items thicker than 10 mm. You risk allowing the printing head to touch
the surface of the mail item and thus smearing the franked mark. You should therefore
always use Frama Matrix franking labels for thick letters and packets.
2. Make sure that no sharp objects, such as staples, etc., can damage the sensitive surface of
the printing head during franking.
3. Do not use very absorbent or fibrous envelopes which could prevent a cleanly printed
mark. This could invalidate your franking.
4. The use of coloured envelopes which offer insufficient contrast with the franking mark is
not permitted.
5. After a certain time the printing head is sealed to prevent the individual nozzles from
drying. Do not, therefore, switch the franking system off immediately, but wait until the
print head is sealed, or use the Log Off key.
6. Please run a print head test and clean the print head using the Nozzle Cleaning function
should you have the impression that there are lines missing from the franked mark.
7. Do not touch the gold contact surfaces in the ink jet cassette. Grease and perspiration on
your skin can leave a film which could results in “messy” print marks.
Please observe the latest installation date (see date printed on ink jet cassette) when you fit your
cassette.
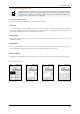
Call up the Change Ink Jet Cassette function:
1. Press “i” in one of the start menus
2. Press the Printer Settings key
3. Press the Change Ink Jet Cassette key
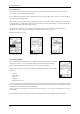
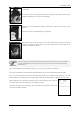
Open the printer cover and remove the ink jet cassette (except for first
installation) by squeezing the grip surfaces together and pulling the cassette
forwards out of the machine. Dispose of empty cassettes in accordance with
current regulations.