
Operation Manual


Frama Matrix F22
20
4.2.3. Selecting a cost centre
You must enter a PIN for each cost centre before you can work with your franking system. Unless
you have defined new PINs, the PIN for Cost Centre 1 is 1, that for Cost Centre 2 is 2 and so on. This
allows the postage costs to be assigned automatically to the appropriate cost centre.
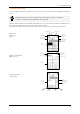
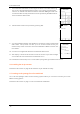
Press 1 and then the OK key to select Cost Centre 1, for instance. The cost centre name will then be
displayed and you can now enter the PIN (1). Press OK. The franking screen will be opened and you
can frank mail. All franked items will be assigned to this cost centre in respect of value and number.
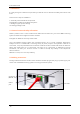
The Select Cost Centre function can be called up from any Start menu again by pressing the CC
key.
4.2.4. Changing the cost centre PIN
The cost centres are protected by a PIN by default. In the as-delivered state of the franking system,
the PIN is the same as the cost centre number. The PIN can have up to 4 digits.
Proceed as follows to change the PIN for the current cost centre:
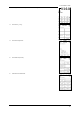
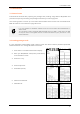
Press the Change PINs key.
Enter the old PIN. Press OK to confirm.
Enter the new PIN. Press OK to confirm.
Enter the new PIN again and confirm your input by pressing OK.
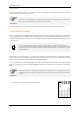
You have access to all cost centres in Admin mode (see from page 41).
4.2.5. Changing the cost centre name
Your Frama Matrix franking system offers you the option of assigning an individual name to each
cost centre. It is supplied by default to the Select Cost Centre screen and simplifies your work.
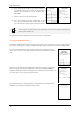
Press the Change PIN key (in Setup 1).
Select Change CC Name and enter the name of the cost centre using the text input screen.
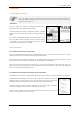
4.2.6. Deleting counter readings of current cost centre
You can delete the counter readings for the current cost centre in the Setup 1
menu.
Confirm deletion by pressing ENTER.