
User Manual
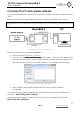


3D FPV camera The BlackBird 2
User manual
14
2016
fpv3dcam.com
«BACK». After a wait until the red LED goes out - this means that the camera
remembers the settings you made - they are stored in memory for use and after
Power Off or a power failure, you will not have to adjust them again.
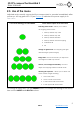
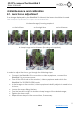
4.5. Selection the exposure mode
The BlackBird 2 allows you to do ‹in picture› light metering in one of four options:
The entire frame
Frame center
The bottom half of the frame
The top half of the frame
In order to set the desired setting of light metering with the button «MENU» you need
to navigate to the menu «Selecting the exposure». Use the «NEXT» and «BACK»
buttons to set the desired metering parameter.
Note: when using the BlackBird 2 in a FPV system, the light metering must be set to
«The bottom half of the frame» in order to eliminate the ‹black land› phenomenon.
4.6. Factory settings
To reset the camera to factory settings, you must:
Connect to the camera the power source and the monitor/video glasses
Wait until the image on the monitor screen/video glasses
Press the «MENU» button and hold (about 3-4 seconds), should light up red(14)
and green(13) LEDs.
To release the «MENU» button and wait for when goes out the red(14) led
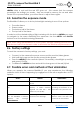
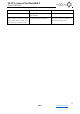
4.7. Possible errors and methods of their elimination
When you operate the camera BlackBird 2 you may experience the following
problems. Most of them happening by negligence of the user or application to FPV
systems.
errors
reason
elimination
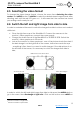
Green screen, whole or half
Touch the data bus of one of the
sensors
Reconnect power
LEDs don't burn when you turn
on
Failed software the FPGA or
memory. A failed software
upgrade use Mini USB – USB
cable is of poor quality
Repeat the process of
updating the firmware of the
FPGA with a PC (see item 2.4)
The camera is connected to
PC, but BlackBird 2 Assistant
displays the message
«DISCONNECT»
The fouling of the Mini USB
connector or its damage.
Using a brush and isopropyl
alcohol clean the Mini USB
connector of the camera.