
Product Info

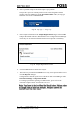

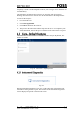


Table Of Contents
- 1 Safety
- 2 Introduction
- 3 Installation
- 4 Operating Instructions
- 4.1 Start-up
- 4.2 Analysis Procedure
- 4.3 Care - Default Features
- 4.4 Care View - Advanced Settings
- 4.4.1 Instrument Diagnostics
- 4.4.2 Advanced Diagnostics
- 4.4.3 Instrument Information
- 4.4.4 User Manual
- 4.4.5 FossConnect Synchronisation
- 4.4.6 Settings
- 4.4.7 Local Configurator
- 4.4.8 Data Maintenance
- 4.4.9 Instrument Calibration
- 4.4.10 Remote Support
- 4.4.11 Export Logs
- 4.4.12 Change PIN Code
- 4.4.13 Manual Sample Transfer
- 4.4.14 Lamp Change
- 4.4.15 Automate Sample Transfer
- 4.4.16 Help
- 4.5 Check Samples
- 4.6 Instrument Calibration
- 5 Maintenance
- 6 Troubleshooting
- 7 Parts, Accessories and Consumables
- 8 Technical Specifications

1. Choose the appropriate cup for the sample. Carefully prepare your sample and
fill the sample cup completely. Sample types that tend to form voids if simply
poured in should be compressed using the back of a spoon.
2. Place the filled sample cup in the sample compartment and close the lid.
Fig. 27
3. Click the Product icon and select the product you would like to analyse.
Fig. 28
Products are installed and configured in FossManager (please refer to the
Installation Manual for details).