
User Guide


FontLab 4
486
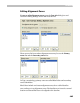
OtherBlues includes up to 5 bottom alignment zones.
To add a new alignment zone, press the
button below the list.
To edit the position of the zone, select the zone you want to edit in the
list and edit it in the edit fields below the list.
To remove an alignment zone, select the zone you want to remove
from the list and press the
button below that list.
You can see a preview of the zones by switching on the Alignment
Zones layer with the View > Show Layer > Alignment zones command.
When zones are visible on screen, you can preview changes you make to
the zones by pressing the Apply button in the FontInfo dialog box.
You can edit zones in the Glyph window, using the edit tool. Make
sure they are not locked by the View > Lock layers > Alignment zones
command.
Press the
button to automatically calculate alignment
zones in the Primary zones list box.
How FontLab Calculates Alignment Zones
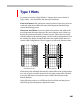
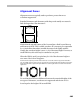
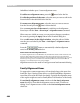
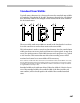
To calculate alignment zones in the BlueValues list, FontLab finds characters with overshoots and
characters that are flat in the position of the overshoot. Then it measures the top and bottom
vertical positions of these characters and detects a zone. Examples of such characters are: ‘o’ and ‘x’,
‘O’ and ‘H’, ‘p’ and ‘g’, and so on. FontLab tries to find many different characters from different
languages, so it is usually able to locate some examples.
Alignment zones are also used in TrueType manual and automatic hinting.
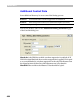
Family Alignment Zones
To support the common appearance of fonts that belong to the same font
family the Type 1 hinting system allows so-called FamilyBlues, alignment
zones that are used in the whole font family. Typically the alignment zones
of the regular weight are used as Family Blues in all members of the family.
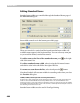
To set family alignment zones switch on the Set family alignment
zones check box. Then edit the alignment zones as usual. To return to
editing “local” alignment zones switch on the Set local alignment zones
check box.