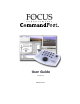
User Guide Version 2.
CommandPost FOCUS WARRANTY STATEMENT • FOCUS Enhancements, Inc. warrants this product against defects in materials and work-manship for a period of ONE (1) YEAR from the date of original purchase. • If you discover a defect, FOCUS Enhancements, Inc. will, at its sole option, repair or exchange the product at no charge to you, provided you contact FOCUS Enhancements, Inc. Technical Support to obtain a Return Material Authorization (RMA) Number and instructions on where and how to obtain repair.
Focus Enhancements FOCUS WARRANTY STATEMENT (CONT’D) • Some states do not allow the inclusion or limitation of incidental or consequential damages or limitations on how long an implied warranty lasts, so the above limitation or exclusion may not apply to you. This warranty gives you specific legal rights, and you may have other rights which vary from state to state. • Product specifications and information are subject to change without notice.
CommandPost IMPORTANT SAFEGUARDS Installation Read all instructions. Save them for future reference. Adhere to all warnings on the serial number label and in the operating instructions. Follow all operating and use instructions. Power cords should be routed so they are not likely to be pinched by items placed on them or against them. Pay particular attention to cords near the plugs, convenience receptacles, and the point where they exit from the appliance.
Focus Enhancements Adjust only those controls that are covered by the operating instructions as improper adjustment of other controls might result in damage and will often require extensive work by a qualified technician to restore the unit to its normal operation. For repair or warranty service in the United States and Canada, please contact FOCUS Enhancements and request a Return Authorization (RA) number. See “Returning a Damaged or Failed CommandPost Unit” at the beginning of this document.
Focus Enhancements
CommandPost
CONTENTS 1 GETTING STARTED . . . . . . . . . . . . . . . . . . . . . . . . . . . . . . . . 1 Requirements . . . . . . . . . . . . . . . . . . . . . . . . . . . . . . . . . . . . . . . . . . 2 Package Contents . . . . . . . . . . . . . . . . . . . . . . . . . . . . . . . . . . . . . . 3 Getting Acquainted . . . . . . . . . . . . . . . . . . . . . . . . . . . . . . . . . . . . . . 3 USB Connector . . . . . . . . . . . . . . . . . . . . . . . . . . . . . . . . . . . . . 5 Other Controller Features . . . . . .
CHAPTER 1 GETTING STARTED Welcome to CommandPost™, and thank you for buying FOCUS Enhancements products. CommandPost consists of controller hardware and software that give you unprecedented control while working with multimedia applications.
Chapter 1 Getting Started REQUIREMENTS Basic Requirements • FOCUS Enhancements CommandPost controller hardware • Standard USB cable (provided in package) • Monitor and display card capable of 800 x 600 dpi resolution Macintosh Requirements • PowerPC Macintosh with built in USB port or PCI USB card CommandPost does not work with a USB serial adapter • Mac OS version 8.6 or later • Minimum 10 MBs of available system memory to run the CommandPost application.
CommandPost Package Contents PACKAGE CONTENTS Your CommandPost package should contain the following items. If anything is missing, contact the supplier where you purchased the unit for replacements.
Chapter 1 Getting Started Button Cluster You can program any or all of these 15 buttons using the CommandPost application. A button, when pressed, can perform one function, or a series of functions. Some or all of the buttons may also carry out some custom functions in certain applications. Check the FOCUS Enhancements website for more information (http:// www.FOCUSinfo.com) Takebar The take bar works similar to a take bar on a video mixer.
CommandPost Getting Acquainted Shuttle Wheel Perhaps the most common use of a shuttle wheel is to scroll through video frames. Rotating the shuttle wheel to the right scrolls the program forward: rotating to the left scrolls backward. The distance you turn the shuttle wheel in either direction determines the playback speed. The shuttle wheel may also carry out some custom functions in certain applications. Check the FOCUS Enhancements website for more information (http:// www.FOCUSinfo.
Chapter 1 Getting Started To help you get started quickly, CommandPost comes with a series of pre-programmed keysets for the most popular multimedia applications. You can use the keysets as is, or adapt them to your particular needs. In addition, you can create your own keysets for any application that uses keyboard shortcuts. Templates The CommandPost package contains two plastic templates you can use to overlay the controller components.
CommandPost Installation 1. Connect the square end of the USB cable to the USB connector on the rear panel of your CommandPost controller. 2. Connect the rectangular end of the USB cable to your computer’s USB port. Note You can use CommandPost with a USB hub so long as the hub provides power to the controller unit. Software Installation The CommandPost CD contains software for both Macintosh and Windows. You can install the software on either or both platforms.
Chapter 1 Getting Started c. Open this and select either the CommandPost 2.0 folder (this installs English, French, Spanish and Italian versions of the CommandPost software) or CommandPost 2.0 Japanese (this installs the Japanese version of the CommandPost software). d. Once you have selected the version which is relevant to your region, select setup.exe, and click OK. 3. Follow the on-screen instructions to install your software.
Chapter 1 Getting Started 10 CommandPost
CHAPTER 2 USING COMMANDPOST This chapter explains how to: • Use the CommandPost controller hardware. • Create new keysets and change the functions assigned to existing ones. BASIC CONTROLLER OPERATION When you first start your computer with the controller attached after installation, CommandPost asks you to carry out a calibration. Follow the on-screen instructions. This process coordinates the joystick to your computer’s on-screen pointer as well as the T-Bar.
Chapter 2 Using CommandPost With the controller active, use the joystick in much the same way you use your mouse—that is, move the joystick in a particular direction and the pointer tracks the movement. STARTING COMMANDPOST To start CommandPost, locate its folder on your desktop, open the folder, then double-click the application icon.(It is not necessary to launch the CommandPost application to use CommandPost. The application is for programming purposes only).
CommandPost Window Components Figure 1: Macintosh and Windows Interfaces Keyset Name Menu Function Name Box Controller Options Trigger/ Functions List Keyboard Options Keystroke Entry Box The Macintosh and Windows versions have subtle differences. They are discussed in the following sections.
Chapter 2 Using CommandPost KEYSET NAME MENU This menu contains the names of all keysets available on your system. Choose the keyset you want to view and/or edit from this menu. Initially, the menu contains only the names of the keysets provided with the CommandPost package. You can add keyset names to this list by creating new keysets. All keysets are stored in specific location so that the application can locate them easily.
CommandPost Window Components CONTROLLER OPTIONS This part of the window contains a miniature image of the CommandPost controller. You use these images to program the various components (buttons, takebar, and jog/shuttle wheel) to do the functions you want. To learn about this component, see “Adjusting System Volume” beginning on page 35. Note that this component is not available in the Windows version. Note The joystick is not programmable.You can change the image by clicking its various components.
Chapter 2 Using CommandPost a picture of the Takebar and its specific options. Likewise, click the Jog/Shuttle Knob to display its image. Windows Takebar Macintosh Takebar Return Icon Windows Jog & Shuttle Controls Macintosh Jog & Shuttle Controls Return Icon—Click this icon on any image to return to the original Controller Options image.
CommandPost Window Components TRIGGER/FUNCTIONS LIST Contains a list of all controller components (or, triggers) and the name of the function assigned to each for the currently selected keyset. When you select an item in this list, CommandPost: • Highlights the corresponding component in the Controller Options section. • Displays the corresponding function name in the Function Name Box. • Displays the keystrokes assigned to this function in the Keystroke Entry Box.
Chapter 2 Using CommandPost WORKING WITH KEYSETS A keyset is a collection of functions assigned to CommandPost for use with an application. CommandPost has a small software component that loads automatically at system startup and operates in the background to monitor your activity. This component checks to see if you have designated “CommandPost applications” running. If so, the component automatically selects the CommandPost keyset that corresponds to that application and loads it for you.
CommandPost Working with Keysets CREATING NEW KEYSETS To create a new keyset on a Macintosh: 1. Choose File|New Keyset (Cmmd+N) to display the New Keyset Name dialog 1 2 3 2. Enter a name for the keyset in the New Keyset Name text box. The name you enter must match, exactly, the name of the application with which it is associated. In the above example, the keyset name is entered as Adobe Premiere 5.1 because that is the exact name of the application on the hard disk.
Chapter 2 Using CommandPost To create a new keyset Windows: 1. Choose File|New Keyset (Cntrl+N) to display the New Keyset Name dialog 1 3 2 2. Enter a name for the keyset in the New Keyset Name text box. Tip To ensure that keyset and application names match, copy the application name as it appears in the Windows tool bar exactly to the New Keyset Name dialog.
CommandPost Working with Keysets If the names do not match exactly, CommandPost cannot locate the keyset when you launch the application. As a result, the functions defined in the keyset won’t be available when using the application. If you enter the name of an existing keyset, CommandPost notifies you that you cannot duplicate the name. 3. After entering a valid name, click Create to create the new keyset. 4. Create the functions you want for the keyset.
Chapter 2 Using CommandPost When you choose a keyset from the Keyset Name menu, CommandPost loads that keyset into the application. You can then view and/or edit the keyset as you desire. The Keyset Name menu contains the names of all keysets currently available to the CommandPost application. To save the modifications you make to a keyset, choose File|Save Keyset (Macintosh Cmmd+S; Windows Ctrl+S).
CommandPost Basic Programming Remember, to use a keyset with a specific application, the name must match, exactly, the name of the application on your hard disk. DELETING KEYSETS To delete an existing keyset: 1. Select the keyset you want to delete in the Keyset Name menu. 2. Choose File|Delete Keyset (Windows Ctrl+D). 3. When the confirmation message appears, click Delete to remove the keyset, or click Cancel.
Chapter 2 Using CommandPost 1 3 4 2 5 1. Choose the keyset you want to use from the Keyset Name menu. 2. Select the component you want to program in the Controller Options section or the Trigger/Function Name list. To program one of the buttons, click the one you want to select. CommandPost displays a green glow around that object. To program the Takebar or Jog/Shuttle wheel, click the corresponding image in the Controller Options section. CommandPost displays a large image of the component.
CommandPost Basic Programming If you select an existing function (either in the Controller Options area or the Trigger/Functions List), the name of that function appears in the Function Name box. You can then edit that function by changing its name and/or the key sequence assigned to it. On Macintosh, the name can be up to 32 characters. On Windows, the name can be up to 255 characters. You can also press Tab to move to the different boxes rather than clicking in them. 4.
Chapter 2 Using CommandPost stroke followed by Option+Control+R (Mac), Alt+Cntl+R (Win). A multiple key sequence has no practical limit on the number of key sequences it can contain. You enter a multiple key sequence in much the same way as a single key sequence (described above) except you must remain in the Keystroke Entry Box after entering each sequence—as described below. To create a multiple keystroke sequence: 1.
CommandPost Basic Programming On Windows, you do not need to press Return or Enter. 4. Click Command (Mac) or Control (Win) then Shift in the Keyboard Options section. 5. Type the letter A to complete the first keystroke sequence followed by pressing Return. 6. To enter the next sequence, start by clicking the Option button, then the Control (Mac) or Alt (Win)button. 7 8 7. Type the letter R to complete the final sequence. 8.
Chapter 2 Using CommandPost 2. Click Pause in the Keyboard Options section. CommandPost displays the Pause value dialog. 3 3. Enter the length of time you want for the pause (in this example, the pause is 3.5 seconds), then click OK. 4. Press Return. 5. Enter the final keystroke sequence—Option+Control+R (Mac) or Alt+Control+R (Win). 5 6. Click outside the Keystroke Entry Box or press Tab to finish the multiple keystroke sequence with inserted 3.5 second pause. 7.
CommandPost Programming the Takebar gram various commands to invoke at a position. The Takebar may also carry out some custom functions in certain applications. Check the FOCUS Enhancements website for more information (http://www.FOCUSinfo.com). To program the Takebar: 1. Click the Takebar button in the Controller Options section. CommandPost displays an enlarged view of the Takebar with its eight programmable key positions. 3 1 2 5 4 2. Select the position (or, button) you want to program.
Chapter 2 Using CommandPost On Macintosh, press Return to activate the Keystroke Entry Box and the Keyboard Options. On Windows, you do not need to press Return or Enter. 5. Use the Keyboard Options and your keyboard keys to construct a keystroke sequence. Refer to “Single Keystroke Sequences” on page 21 for detailed instructions.
CommandPost Programming the Jog Wheel tons. The left button controls the wheel in the counter-clockwise direction: the right button controls it in the clockwise direction. The Jog Wheel has two programmable buttons 2. Program the Jog Wheel using the procedures you learned in the preceding sections. To create multiple keystroke sequences and pauses, use the procedures described earlier in “Multiple Key Sequences” on page 23 and “Inserting a Pause in a Multiple Keystroke Sequence” on page 25. 3.
Chapter 2 Using CommandPost PROGRAMMING THE SHUTTLE WHEEL The Macintosh and Windows Shuttle Wheels have the same set of controls and options. Figure 2: Programmable Shuttle Options Macintosh (Jog Wheel Controls) Shuttle Wheel Controls Windows (Jog Wheel Controls) Shuttle Wheel Controls The Shuttle Wheel has eight programmable positions. Each position has two buttons—an Entry and an Exit control. You can program these separate from one another. Each position also has a Repeat check box.
CommandPost Programming the Shuttle Wheel Entry—actions you program for this position occur when the shuttle wheel enters that position. Exit—actions you program for this position occur when the shuttle wheel leaves that position. Repeat—when selected, CommandPost repeats the programming assigned to the Entry button until you specifically terminate it—that is, you move the shuttle wheel to some other position. To program the Shuttle Wheel: 1.
Chapter 2 Using CommandPost 4. If you are returning to the application you have just edited a keyset for, it is necessary to choose File|Save Keyset on Macintosh only. If you are returning to a different application or another keyset, it is not necessary to save the keyset. The Shuttle Wheel may also carry out some custom functions in certain applications. Check the FOCUS Enhancements website for more information (http:// www.FOCUSinfo.com).
Chapter 2 34 Using CommandPost CommandPost
CHAPTER 3 OTHER OPERATIONS This chapter explains how to perform various operations that you might find necessary from time-to-time, including: • Setting Preferences • Adjusting System Volume • Recalibrating the Joystick 31
Chapter 3 Other Operations SETTING PREFERENCES Use Preferences to control various aspects of the way CommandPost operates in conjunction with your system. To set preferences: ☞ Choose Edit|Preferences to display the following dialog. Macintosh Dialog Windows Dialog CommandPost does not save your preferences until you click OK.
Focus CommandPost Setting Preferences CommandPost Control Active Select this option to make the CommandPost controller active. Deselect the option to deactivate the controller buttons and other components. If you deactivate the controller, then reactivate it with a different controller plugged in than originally calibrated, you must re-calibrate the unit. To do this, press the Recalibrate button (located at the bottom of the Preferences dialog) or the Edit|Recalibrate command to recalibrate the joystick.
Chapter 3 Other Operations Press joystick for mouse Use this option to specify the result of pressing down on the joystick. You have slightly different options for Macintosh and Windows. On Macintosh: If you select Single Click, you must press down twice in succession to enter a double-click action. If you select Double Click, you cannot enter a single click action using the joystick—you must use the mouse button for this action.
Focus CommandPost Adjusting System Volume ADJUSTING SYSTEM VOLUME Note This feature is available only on Macintosh. You can use the Takebar to control the master volume on your computer system. You can easily turn this feature on and off as your needs require. To use the system volume controls: 1. Select the check box immediately below the Takebar in the CommandPost window. Increase Volume Decrease Volume Select to activate System Volume control— deselect to deactivate the feature. 2.
Chapter 3 Other Operations RECALIBRATING THE JOYSTICK AND T-BAR. You might find it necessary at some time or another to recalibrate the joystick on the CommandPost controller. This must be done when the CommandPost is first installed on Macintosh and Windows systems. If the mouse pointer moves erratically or fails to move at all, it might require recalibration. To recalibrate the joystick: 1.