Ti200, Ti300, Ti400 Thermal Imagers Users Manual PN 4281773 September 2013 © 2013 Fluke Corporation. All rights reserved. Specifications are subject to change without notice. All product names are trademarks of their respective companies.
LIMITED WARRANTY AND LIMITATION OF LIABILITY Each Fluke product is warranted to be free from defects in material and workmanship under normal use and service. The warranty period is two years and begins on the date of shipment. Parts, product repairs, and services are warranted for 90 days.
Table of Contents Title Page Introduction ................................................................................ How to Contact Fluke ................................................................. Safety Information ...................................................................... Radio Frequency Data ............................................................... Accessories ................................................................................ Before You Start ..............
Ti200, Ti300, Ti400 Users Manual Menus ......................................................................................... Measurement Menu ................................................................ Range .................................................................................. Level/Span .......................................................................... Emissivity Adjustment ..........................................................
List of Tables Table 1. 2. 3. 4. 5. Title Page Symbols ..................................................................................... Accessories ................................................................................ Features and Controls ................................................................ Overview of Controls .................................................................. Palettes ......................................................................................
Ti200, Ti300, Ti400 Users Manual iv
Introduction The Fluke Ti200, Ti300, and Ti400 Thermal Imagers (the Product or Imager) are handheld, infrared imaging cameras for use in many applications. These applications include equipment troubleshooting, preventive and predictive maintenance, building diagnostics, and research and development. All Imagers display thermal images on a high-visibility, industrial-quality 640 x 480 LCD touch screen and can save images to a removable memory card.
Ti200, Ti300, Ti400 Users Manual How to Contact Fluke To contact Fluke, call one of the following telephone numbers: • USA: 1-800-760-4523 • Canada: 1-800-36-FLUKE (1-800-363-5853) • Europe: +31 402-675-200 • Japan: +81-3-6714-3114 • Singapore: +65-6799-5566 • Anywhere in the world: +1-425-446-5500 Or, visit Fluke's website at www.fluke.com. To register your Product, visit http://register.fluke.com. To view, print, or download the latest manual supplement, visit http://us.fluke.
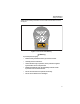
Thermal Imagers Safety Information Additional laser warning information is on the inside of the Product lens cover, see Figure 1. FLUKE CORPORATION EVERETT, WA USA www.patentlabel.com/fluke hie05.eps Figure 1. Lens Cover Laser Warning Warning To prevent personal injury: • Read all safety information before you use the Product. • Carefully read all instructions. • Use the Product only as specified, or the protection supplied by the Product can be compromised.
Ti200, Ti300, Ti400 Users Manual • See emissivity information for actual temperatures. Reflective objects result in lower than actual temperature measurements. These objects pose a burn hazard. • Do not use the Product around explosive gas, vapor, or in damp or wet environments. • Do not put battery cells and battery packs near heat or fire. Do not put in sunlight. Table 1 is a list of symbols used on the Imager and in this manual. Table 1.
Thermal Imagers Radio Frequency Data Radio Frequency Data See page 39 for instructions on how to access digital copies of the radio licenses on the Imager. Accessories Table 2 is a list of the accessories available for the Imager. Table 2.
Ti200, Ti300, Ti400 Users Manual hie08.eps Figure 2.
Thermal Imagers Before You Start Before You Start Carefully unpack the items in the shipment box: • Thermal Imager • AC Power Supply with Mains Adapters • Two-Bay Battery Charge Base • 2 Lithium-ion Smart Batteries • Hard Carrying Case • USB Cable • HDMI Cable • Removable Memory Card • Soft Transport Bag • Adjustable Hand Strap (Left-hand or Right-hand use) • Users Manuals in print (English, Spanish, French, German, Chinese) • Users Manuals on CD [1] [2] [2] ® • SmartView Softw
Ti200, Ti300, Ti400 Users Manual Battery Before you use the Imager for the first time, charge the battery for a minimum of two and one-half hours. The battery status shows on the five-segment charge indicator. Warning To prevent personal injury, do not put battery cells and battery packs near heat or fire. Do not put in sunlight. Note New batteries are not fully charged. Two to ten charge/discharge cycles are necessary before the battery charges to its maximum capacity.
Thermal Imagers Before You Start On-Imager AC Power Socket 1. Connect the ac power adapter into an AC wall outlet and connect the dc output to the Imager’s ac power socket. flashes on the display while the battery charges with the ac power adapter. 2. Charge until the charge indicator on the display does not flash. 3. Disconnect ac power adapter when the smart battery is fully charged. Note Make sure that the Imager is near room temperature before you connect it to the charger.
Ti200, Ti300, Ti400 Users Manual Optional 12 V Vehicle Charger 1. Connect the 12 V adapter into the 12 V accessory socket of the vehicle. 2. Connect the output to the ac power socket of the Imager. 3. Charge until the indicator shows full on the screen. 4. Disconnect the 12 V adapter and Imager when battery is fully charged. Caution To prevent damage to the Imager, remove it from the DC car charger before you start or jump start the vehicle.
Thermal Imagers Features and Controls Features and Controls Table 3 shows the Imager features and controls. Table 3. Features and Controls 3 2 4 5 Ti200 IR FUSION TECHNOLOGY 1 6 11 7 12 8 10 9 13 hie01.
Ti200, Ti300, Ti400 Users Manual Table 3. Features and Controls (cont.) Item Description Hand Strap Manual Focus Control 2-Bay Battery Charging Base AC Power Supply with Mains Adapters 17 19 18 16 20 15 Ti200 IR FUSION TECHNOLOGY 14 21 22 23 24 hie06.
Thermal Imagers Primary and Secondary Triggers Primary and Secondary Triggers The two-part trigger is located in the standard trigger position for a pistol-grip device. The larger, green trigger is the primary trigger. The smaller, black trigger is the secondary trigger. In normal operation, the function of the primary trigger is to capture a thermal image for possible storage to memory by the user. The secondary trigger operates the LaserSharp™ Auto Focus System and laser pointer.
Ti200, Ti300, Ti400 Users Manual Note The user is able to use the advanced manual focus as a manual override of the LaserSharp™ Auto Focus System. Control Buttons Three function buttons ( ) and four arrow buttons ( and ) are the primary controls. These buttons move the cursor through the menu structure to set the features. Table 4 is an overview of the buttons and their actions. In live Manual Mode, the arrow buttons are always active to adjust Level and Span.
Thermal Imagers How to Use the Menus How to Use the Menus The menus, coupled with the three function buttons (, , ) and arrow buttons, are the access for thermal image display, camera features, measurement, advanced functions, memory review, and settings for date, time, language, units, file format, and Imager information. To open the primary menu, push . The primary menu shows five secondary menus for Measurement, Image, Camera, Memory, and Settings.
Ti200, Ti300, Ti400 Users Manual IR-PhotoNotes™ The IR-PhotoNotes™ photo annotation system allows the user to capture and add up to five visible (digital) images of various objects, text, or other information that is related to the analysis and reporting of an infrared image. Examples of possible annotations include motor name plates, printed information or warning signs, larger views of the environment or room, and related equipment or objects.
Thermal Imagers Image Capture i Voice Annotation (Recording) To add a voice (audio) recording: 1. With an infrared image in the buffer, push to open the EDIT IMAGE menu. 2. Push / to highlight Add Audio. 3. Push to record up to 60 seconds of audio. The display updates to show the recorded time. 4. Push to pause the recorder. 5. Push when done. 6. Push to review the audio file or to save the audio with the image. Voice annotation is only available in the .
Ti200, Ti300, Ti400 Users Manual Edit Captured Infrared Image Before saving a file, you can edit or modify the image. To edit: 1. With an image in the buffer, go to EDIT IMAGE > Edit Image. 2. Push / to highlight an option. 3. Push to save the changes with the file. Save Captured Infrared Image To save an image as a data file: 1. Focus on the object of interest or inspection area. 2. Pull the trigger to capture the image. The image is now in the buffer and you can save or edit. 3.
Thermal Imagers Micro SD Memory Card Micro SD Memory Card To eject a Micro SD memory card, push in on the exposed edge of the card and then release. The card should pop partially out after you release it. Carefully pull the card out of the slot. To use the Micro SD memory card, make sure that the write-protect lock is open. See Figure 3. Push the card in until it catches. The Micro SD memory card comes with an SD adapter for insertion into a PC or multi-function card reader if desired. hie03.
Ti200, Ti300, Ti400 Users Manual Temperature Measurement All objects radiate infrared energy. The quantity of energy radiated is based on the actual surface temperature and the surface emissivity of the object. The Imager senses the infrared energy from the surface of the object and uses this data to calculate an estimated temperature value.
Thermal Imagers Menus Menus The menus, together with the three function buttons (, , ) and arrow buttons, are access for thermal image display, camera features, memory setup, and settings for date, time, language, units, file format, and Imager information. Measurement Menu The Measurement Menu has settings for the calculation and display of radiometric temperature measurement data related to the thermal images.
Ti200, Ti300, Ti400 Users Manual Fast Auto/Manual Range Toggle When NOT in a menu mode, push and release to toggle between Auto Range and Manual Range. The icon in the upper right-hand corner of the LCD screen will indicate the change by saying Auto or Manual. Fast Auto Rescale (in Manual Mode) When in Manual Range and NOT in a menu mode, push and release to automatically rescale the level and span range for objects in the thermal field of view.
Thermal Imagers Menus Total Imager Range Level Span hie07.eps Figure 4. Level and Span Settings Temperature Span for Manual Operation Mode When in manual mode, the span setting contracts or expands in a selected palette in a temperature range within the total range. See Figure 4. In the live manual mode, the arrow buttons are always available to adjust the level and span. To adjust the temperature span: 1. Push to increase or widen the temperature span. 2.
Ti200, Ti300, Ti400 Users Manual If you set a value that is <0.60, shows on the Imager display with this caution: Caution: Emissivity <0.6 (see Manual) Note Surfaces with an emissivity of <0.60 make reliable and consistent determination of actual temperatures problematic. The lower the emissivity, the more potential error is associated with the Imager's temperature measurement calculations.
Thermal Imagers Menus Background (Reflected Background Temperature Compensation) Compensation for reflected background temperature is set in the Background tab. Very hot objects or very cold objects can affect the apparent temperature and measurement accuracy of the target or object of interest, especially when surface emissivity is low. Adjustment of the reflected background temperature can make the temperature measurement better in many situations. For more information, see Emissivity Adjustment.
Ti200, Ti300, Ti400 Users Manual Spot Temperatures The Spot Temperatures are floating HI and LO temperature indicators that move on the display as the temperature measurements of the image fluctuate. To turn on/off the hot and cold spot indicators: 1. Go to Measurement > Spot Temp. 2. Push / to highlight ON or OFF. 3. Push or to set the new value. Note If the Display is set to Display All, you see the information about current transmission correction as τ = xxx%.
Thermal Imagers Menus Center Box The Center Box feature is an adjustable temperature measurement zone (box) that you can center on the infrared image. This zone (box) expands and contracts to different levels within the infrared image. The zone lets the user see an approximate maximum (MAX), average (AVG), and minimum (MIN) temperature measurement in that area.
Ti200, Ti300, Ti400 Users Manual Image Menu The Image menu has controls for different features used in the presentation of the infrared image on the Imager's LCD and some saved image files. Note Data saved as .is2 or .is3 formats can easily be modified within SmartView software. Still images saved in .bmp or .jpg format, as well as video saved in .avi format will retain image settings at the time of capture and save.
Thermal Imagers Menus To switch between palettes: 1. Go to Image > Palette > Standard or Ultra Contrast. 2. Push / to highlight a palette. 3. Push to set the new palette. To change the palette color: 1. Go to Image > Palette > Set Palette. 2. Push / to highlight the palette color. 3. Push to set the new palette color. Saturation Colors is an option that you can choose as off, standard, red/blue, or white/black.
Ti200, Ti300, Ti400 Users Manual Color Alarms The Imager has various apparent temperature color alarms. The hightemperature color alarm shows a full visible image and only shows infrared information on objects or areas that are above the set apparent temperature alarm level. The low-temperature (or dew point) color alarm shows a full visible image and only shows infrared information on objects or areas that are below the set apparent temperature (or set dew point) color alarm level.
Thermal Imagers Menus Outside/Inside Alarm If you set values for the high-temperature color alarm and a low-temperature color alarm, the Imager will have the options for inside or outside isotherm color alarms. To set an outside/inside isotherm color alarm: 1. Go to Image > Color Alarm > Outside or Inside. 2. Push: to set the change and go back to the live view. to set the change and go back to the previous menu. to cancel the change and go back to the live view.
Ti200, Ti300, Ti400 Users Manual Camera Menu The Camera menu has controls and options for secondary camera features such as auto focus, backlight level, and torch. LaserSharp™ Auto Focus System The laser pointer on the Imager is both a sighting aid and a part of the LaserSharp™ Auto Focus System. In addition, the advanced manual focus of the Imager works both when the auto focus system is enabled or disabled. Warning To prevent eye damage and personal injury, do not look into the laser.
Thermal Imagers Menus Backlight The backlight level control is set to low, medium, and high. To set the backlight: 1. Go to Camera > Backlight. 2. Push / to highlight high, medium, or low. 3. Push to set a new value. Torch The torch illuminates darker work areas. To set: 1. Go to Camera > Torch. 2. Push to toggle the torch between on and off.
Ti200, Ti300, Ti400 Users Manual Memory Menu The Memory Menu allows the user to review captured images, as well as audio annotations and photos from the IR-PhotoNotes™ photo annotation system in a thumbnail view format. An icon shows to indicate any additional items saved with the infrared image or IR-Fusion technology image: IR-PhotoNotes photos Voice annotation Review Image Files To view stored images on the memory card: 1. Go to Memory. 2.
Thermal Imagers Menus Settings Menu The Settings menu has adjustments for user preferences such as units of temperature measurement, file format of stored data, “save to” location choice, auto off settings, WiFi and Bluetooth settings, date, time, and language. This menu also has a section that displays information about the Imager such as model number, serial number, and firmware versions. Certificates and licenses are available from this menu. Units To change the temperature units: 1.
Ti200, Ti300, Ti400 Users Manual For situations where a smaller file size with maximum resolution is needed and modification is not, choose the .bmp file format. For the smallest file size where modification is not needed and image quality and resolution are not as important, choose the .jpg file format. The .bmp and .jpg files can be emailed and then opened on most PC and MAC systems without special software. These formats do not allow full analysis capabilities or modification. The .
Thermal Imagers Menus Date The date can be displayed in one of two formats: MM/DD/YY or DD/MM/YY. To set the date: 1. Go to Settings > Date. 2. Push / to highlight the date format. 3. Push to set a new format. 4. Push / to highlight Set Date. 5. Push to open the Set Date menu. 6. Push to select highlight day, month, or year. 7. Push to change the settings. 8. Push to set the date and exit the menu. To set the time: 1. Go to Settings > Time.
Ti200, Ti300, Ti400 Users Manual Language To change the display to a different language: 1. Go to Settings > Language. 2. Push or to highlight the setting. 3. Push to set a new language. Wireless Connectivity Your Imager is equipped with several wireless connectivity options to enhance your ability to work more efficiently and better communicate results. WiFi™ Hotspot You can wirelessly send a picture from the Imager to a PC, an iPhone, and an iPad through the WiFi connection.
Thermal Imagers Menus Advanced Settings Filename Prefix The default filename starts with IR_. You have the option to change this prefix to a different 3-character name with the touch screen keyboard. Reset Filename You can reset the file number to 00001. Factory Defaults Erases all user-set preferences and restores all of the factory default settings. Imager Information You can access information about the version, certifications, and licenses for the Imager from the Settings Menu.
Ti200, Ti300, Ti400 Users Manual To display the license information: 1. Go to Settings > Advanced > Imager Info. 2. Push / to highlight Licenses. 3. Push to view the information screen with a list of Open Source Software Licenses. 4. Push / to scroll to a specific license. 5. Touch the license name on the screen to view the information screen with the specific license agreement. 6. Push to close the information screen.
Thermal Imagers Remote Control (Ti400) Remote Control (Ti400) The Ti400 Imager can be remotely controlled with a PC that has SmartView software installed. To remotely control the Imager: 1. If not installed, install the latest version of SmartView software on your PC. 2. Attach the included USB cable to the USB port on the Imager. 3. Connect the other end of the cable to a USB port on the PC. appears in the SmartView workspace. 4. Select Remote Display from the drop down menu. 5.
Ti200, Ti300, Ti400 Users Manual Battery Care Warning To prevent personal injury and for safe operation of the Product: • Do not put battery cells and battery packs near heat or fire. Do not put in sunlight. • Do not disassemble or crush battery cells and battery packs. • Remove batteries to prevent battery leakage and damage to the Product if it is not used for an extended period. • Connect the battery charger to the mains power outlet before the charger.
Thermal Imagers General Specifications General Specifications Temperature Operating ............................................................ -10 °C to 50 °C (14 °F to 122 °F) Storage ............................................................... -20 °C to 50 °C (-4 °F to 122 °F) without batteries Relative Humidity.................................................. 10 % to 95 % non-condensing Altitude Operating ............................................................ 2,000 m Storage ................
Ti200, Ti300, Ti400 Users Manual AC Operation ......................................................AC operation with included power supply: 110 – 220 Vac, 50/60 Hz, ac mains adapters included Power Save .........................................................User-selectable Sleep and Power Off modes Safety Standards CE Directive ........................................................IEC/EN 61010-1 2nd Edition Pollution Degree 2 CAN/CSA ............................................................C22.2 No.
Thermal Imagers Detailed Specifications Detailed Specifications Temperature Measurements Temperature Range (not calibrated below -10 °C) Ti200, Ti300 .................................................... -20 °C to +650 °C Ti400 ............................................................... -20 °C to +1200 °C Accuracy ............................................................. ±2 °C or 2 % (whichever is greater) at 25 °C ambient On-screen emissivity correction..........................
Ti200, Ti300, Ti400 Users Manual Optional telephoto infrared lens Field of View ........................................................12 ° x 9 ° Spatial Resolution (IFOV) Ti400 ...............................................................0.65 mRad Ti300 ...............................................................0.87 mRad Ti200 ...............................................................1.05 mRad Minimum Focus Distance ....................................
Thermal Imagers Detailed Specifications Image and Data Storage Image Capture, Review, Save Mechanism ........ One-handed image capture, review, and save capability Storage Medium Micro SD Memory Card .................................. includes 4 GB memory card to store at least 2000 fully radiometric (.is2) IR and linked visual images each with 60 seconds voice annotations or 5000 basic (.bmp or .jpg) images Internal on-board flash memory ...................... 4 GB available for storage USB ...............
Ti200, Ti300, Ti400 Users Manual 48