Fluidmesh 4200 FIBER Installation and Configuration Manual Edition 1.6 (Firmware V8.
Fluidmesh 4200 FIBER Table of Contents 1. HAZARDOUS CONDITION WARNINGS ........................................................... 6 1.1. Water Ingress Hazard ............................................................................. 6 1.2. Radio-Frequency Transmission Hazard .................................................... 7 1.3. Optical Radiation Hazard ........................................................................ 8 1.4. Hot Surfaces Hazard ..............................................
Fluidmesh 4200 FIBER Device Firmware Reboot ................................................................. Resetting The Unit To Factory Settings ............................................. 4.1.5. Suitability For Outdoor Installation ................................................. 4.2. Connecting The Fluidmesh Fluidmesh 4200 FIBER To A Network And Antennas .................................................................................................... 4.2.1.
Fluidmesh 4200 FIBER Interpreting Device Warnings And Wireless Link Warnings ........... 86 Using The Address Summary Table ............................................ 86 Adding An Aerial Map To The FMQuadro View ............................ 87 6.5.3. Fluidity Quadro™ ......................................................................... 89 Fluidity Quadro For Mesh-End Devices ............................................. 89 Plotting And Interpreting Static And Mobile Device Information .....
Fluidmesh 4200 FIBER 7.2.2. Deactivating An Active Plug-In .................................................... 7.2.3. Reactivating A Deactivated Plug-In ............................................. 7.2.4. Exporting And Uploading Multiple Activation Codes ...................... 7.2.5. Sharing License Codes And Accepting Shared License Codes ...... 8. Troubleshooting .......................................................................................... 8.1. I Cannot Get The Log-In Screen ..............
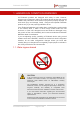
Fluidmesh 4200 FIBER 1. HAZARDOUS CONDITION WARNINGS All Fluidmesh products are designed with safety in mind. However, improper use of electronic and/or RF-emitting devices and/or their control software has potential to cause serious injury and/or property damage. To avoid such injury and damage, install, configure and operate Fluidmesh products only if you are properly qualified to do so.
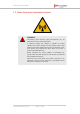
Fluidmesh 4200 FIBER 1.2. Radio-frequency transmission hazard WARNING Non-ionizing radio frequency (RF) transmissions can be hazardous to human and animal health. In sufficient quantity, RF radiation is capable of causing radiation burns, tissue damage and other injuries. Keep a safe distance from all RF-radiating devices such as antennas, when such devices are powered ON. Never stand in line with a powered RF-radiating device.
Fluidmesh 4200 FIBER 1.3. Optical radiation hazard WARNING If any Fluidmesh hardware device is equipped with one or more fiber-optic transceiver modules, it is classified as a Class 1 laser product. It may use laser-emitting components and/or very high-intensity light sources. Do not look directly at the input/output end of the unit's SFP connector, or at the input/output end of any fiber-optic cable.
Fluidmesh 4200 FIBER 1.4. Hot surfaces hazard WARNING The outer surfaces of transceiver and gateway unit enclosures may become hot during normal operation. During normal operation, do not touch or handle the unit enclosure without personal protective equipment.
Fluidmesh 4200 FIBER 2. REPORTING MISTAKES AND RECOMMENDING IMPROVEMENTS You can help improve this manual. If you find any mistakes, or if you know of a way to improve the procedures that are given, please let us know by E-mailing your suggestions to documentation@fluidmesh.com.
Fluidmesh 4200 FIBER 3. GETTING STARTED 3.1. Introduction 3.1.1. Fluidmesh 4200 FIBER The Fluidmesh 4200 FIBER radio transceiver Introduction The Fluidmesh 4200 FIBER is designed to operate in the sub-6 GHz range as a static-mount wireless data link. In non-technical terms, this means it is designed to function as an intermediate radio link between a core wired and/or fiber-optic data network, and a sub-network.
Fluidmesh 4200 FIBER IMPORTANT XCO-standard transceiver modules and XCO-type duplex fiber-optic connectors can easily be sourced as off-the-shelf parts. If you experience difficulty in sourcing or ordering fiber-optic parts or accessories, please contact your local Fluidmesh Networks representative for assistance. Unit function and throughput speed The unit is designed to handle mission-critical video, voice, and data with extremely high reliability.
Fluidmesh 4200 FIBER time-division multiple access (TDMA), or carrier sense multiple access (CSMA) protocols. Environmental rating The unit is certified for outdoor usage, equipped with vibration-proof connectors, and designed for fast installation and enhanced reliability in harsh environments. Product specifications For detailed product specifications, refer to the product data sheet for the Fluidmesh 4200 FIBER.
Fluidmesh 4200 FIBER Unit series Minimum power consumption Nominal power consumption (typical conditions) Maximum power consumption (realistic systemdesign assumption) FM 4500series 8 Watts 10 to 12 Watts 15 Watts FM 4800 13 Watts 15 to 17 Watts 20 Watts Table 2. Power consumption figures (gateway units) Unit Maximum power consumption (realistic system-design assumption) FM 1000 60 Watts FM 10000 275 Watts (redundant AC power supply) 250 Watts (non-redundant AC power supply) 3.2.
Fluidmesh 4200 FIBER FluidMAX™ enables high-performance deployments of outstanding flexibility. The following section shows how to build point-to-point, point-tomultipoint and mesh networks using Fluidmesh products. 3.2.2. Fluidmesh technologies Prodigy Prodigy is Fluidmesh's proprietary implementation of the Multi-ProtocolLabel-Switching (MPLS) standard. IMPORTANT A Fluidmesh device only features Prodigy selection if the installed Prodigy engine includes the selection feature.
Fluidmesh 4200 FIBER IMPORTANT Prodigy 1.0 and Prodigy 2.0 are not compatible with each other. Do not implement the two protocol versions within the same network. If you are expanding an existing network using new Fluidmesh hardware components, make sure that all components are compatible with each other by: 1. Upgrading all network components within the same network to firmware version 6.5 or higher, and: 2. Configuring all network components within the same network to operate using either Prodigy 1.
Fluidmesh 4200 FIBER Figure 1. Point-to-point network architecture All network activity that takes place on wireless bridges is 'transparent' to the network hosts. In other words, a wireless bridge forwards packets from one network segment to another according to a 'Forwarding table'. The forwarding table is built by learning the network topology from analysis of incoming traffic. In this configuration, no explicit interaction takes place between the wireless bridge and the network hosts.
Fluidmesh 4200 FIBER Figure 2. Fluidmesh Mesh Networking Architecture 3.2.5. Point-to-multipoint architecture with FluidMAX FluidMAX™ is Fluidmesh's proprietary and patented communications coordination protocol for wireless mesh networks. The FluidMAX protocol is based on the concept of point-to-multipoint network architecture (Figure 3 (page 19)) with improved features and capabilities that allow the technology to meet or exceed the needs of the security and industrial automation industries.
Fluidmesh 4200 FIBER Figure 3. Typical point-to-multipoint networking architecture FluidMAX is based on a centralized Media Access Control (MAC) protocol. It allows point-to-multipoint networks to be created by facilitating quick, reliable communications between Fluidmesh radio transceiver units that are part of the same network.
Fluidmesh 4200 FIBER 3.3. Fluidmesh Network Addressing 3.3.1. Bridge IP addressing If needed, the Fluidmesh 4200 FIBER can be operated in Bridge mode. This creates a single point-to-point connection between two network segments. A simplified example of a Bridge mode connection is shown in Figure 4 (page 20). As shipped from the factory, the wired ethernet ports of all Fluidmesh hardware components are assigned the same default IP address of 192.168.0.10/24.
Fluidmesh 4200 FIBER 5.a.b.c The triplet a.b.c uniquely identifies the individual physical hardware unit, and cannot be changed. The unit ID number is used to identify the physical hardware units within the configurator interface that is used for configuration of the unit. A simplified diagram demonstrating the relationship between a wired LAN, and a linked mesh radio network containing a mesh end unit and mesh point units, is shown in Figure 5 (page 21). Figure 5.
Fluidmesh 4200 FIBER • Mesh Point Mode: This is the default operating mode. Each radio transceiver unit that is part of the network, but is not connected to the wired LAN backbone, must be set in Mesh Point mode. • Mesh End Mode: Each radio transceiver unit that is part of the network and is connected to the wired LAN backbone must be set in Mesh End Mode. A Mesh End transceiver unit is always the junction point between the wireless network and any IP-based wired network.
Fluidmesh 4200 FIBER Connecting and configuring an Ethernet edge device Ethernet edge devices such as IP cameras and Wi-Fi access points can be connected to the Ethernet ports of the Fluidmesh 4200 FIBER. Such edge devices must be configured using the IP subnet scheme defined for the broadcast domain. The default IP subnet mask for all Fluidmesh devices is 192.168.0.0 / 255.255.255.0. The default IP address for all Fluidmesh devices is 192.168.0.10 / 255.255.255.0.
Fluidmesh 4200 FIBER 4. HARDWARE INSTALLATION 4.1. Fluidmesh Hardware Installation 4.1.1. Installing the Fluidmesh 4200 FIBER Environmental rating and unit roles The Fluidmesh 4200 FIBER (part number FM4200F-HW) is a wireless radio transceiver unit. The hardware is contained in an outdoor-rated metal enclosure that can be easily mounted on poles or walls.
Fluidmesh 4200 FIBER • Power: The Fluidmesh 4200 FIBER is receiving power. • LAN1: Network activity on Ethernet port 1. • LAN2: Network activity on Ethernet port 2. • SIGNAL STRENGTH (red): Signal strength very poor. • SIGNAL STRENGTH (yellow): Signal strength inadequate. • SIGNAL STRENGTH (green): Signal strength acceptable. • SIGNAL STRENGTH (green): Signal strength excellent.
Fluidmesh 4200 FIBER IMPORTANT The radio transceiver package does not include a DC IN power source (devices capable of accepting DC IN power only), a PoE injector, or a powered Ethernet switch. A suitable power source must be ordered separately. For technical data on which power sources are compatible with the Fluidmesh 4200 FIBER, refer to “Electrical power requirements” (page 165). The Fluidmesh 4200 FIBER can be provided with power using the following methods: • A standard IEEE 802.
Fluidmesh 4200 FIBER • The DC IN connection is a 5-pin M12A port, exclusively designed to accept passive 48 Vdc power. • The LAN connection is an 8-pin M12X port, designed to connect the unit to a local area network (LAN) switch and/or to an IEEE 802.3 48 Vdc power source. • The SFP connection is a small form-factor pluggable (SFP) port, exclusively designed to connect the unit to a duplex fiber-optic data link.
Fluidmesh 4200 FIBER 2. Insert a long tool with a thin shaft, such as a screwdriver, into the RESET button port until the tool touches the bottom. 3. Press the RESET button for one second, then release the button immediately. • The unit will reboot. 4. Replace the Phillips-head screw at the bottom of the unit. Resetting the unit to factory settings CAUTION Do not do a factory reset unless the unit needs to be reconfigured using its factory configuration as a starting point.
Fluidmesh 4200 FIBER outdoor environments, and under severe conditions such as water spray, salt, and extreme fluctuations in cold and heat. The Fluidmesh 4200 FIBER has successfully passed stringent environmental certification tests, including the European Committee for Standardization EN 50155 (electronic equipment used on rolling stock for railway applications) and EN 45545 (fire protection on railway vehicles) tests.
Fluidmesh 4200 FIBER Terminal 1: V1+ (Brown wire) Terminal 2: Not used Terminal 3: V1- (Blue wire) Terminal 4: Not used Terminal 5: Ground / Earth (Gray wire) NOTE The radio trasceiver does not make use of a dual-redundant power supply. Therefore, terminals 2 and 4 are not used. M12 A-coded eight-pin (pre-September 2016 only) Female M12 A-coded eight-pin connectors (below) are used only on Fluidmesh 4200-series and 4500-series units manufactured before September 2016.
Fluidmesh 4200 FIBER When splicing a female M12 A-coded eight-pin connector to one end of an Ethernet cable, and a male RJ45 Ethernet connector to the other end of the Ethernet cable, the terminal assignments are as follows: • Terminal 1 of M12A (Blue wire with white tracer) to terminal 5 of RJ45. • Terminal 2 of M12A (Brown wire with white tracer) to terminal 7 of RJ45. • Terminal 3 of M12A (Brown wire) to terminal 8 of RJ45. • Terminal 4 of M12A (Orange wire) to terminal 2 of RJ45.
Fluidmesh 4200 FIBER • Terminal 4 of M12A (Orange wire) to terminal 2 of M12X. • Terminal 5 of M12A (Green wire with white tracer) to terminal 3 of M12X. • Terminal 6 of M12A (Orange wire with white tracer) to terminal 1 of M12X. • Terminal 7 of M12A (Blue wire) to terminal 8 of M12X. • Terminal 8 of M12A (Green wire) to terminal 4 of M12X. M12 X-coded M12 X-coded connectors are used on all Fluidmesh 4200-series and 4500-series units manufactured after September 2016.
Fluidmesh 4200 FIBER • Terminal 8 of M12X (Blue wire) to terminal 4 of RJ45. XCO / SFP WARNING If a Fluidmesh device is fitted with an XCO-type fiber-optic module, it is a Class 1 laser product. It makes use of fiber-optic technology, including laser-emitting components. Do not look directly at the input/output end of any XCO / SFP connector, or at the input/output end of any fiber-optic cable. Fiber-optic systems frequently use high-intensity laser light that may cause temporary or permanent blindness.
Fluidmesh 4200 FIBER Connecting fiber-optic connectors to SFP modules Fiber-optic components are extremely sensitive to water, dirt and dust. In particular, the optical interfaces of these components must not be contaminated by foreign matter under any circumstances. Ensure optimal performance of a fiber-optic network by connecting fiberoptic connectors to XCO-type SFP modules only as shown below: 1.
Fluidmesh 4200 FIBER 6. Slide the duplex fiber-optic cable connector (3, above) into the SFP module until you hear a positive Click sound. 7. Slide the round threaded tube forward along the fiber-optic cable. Screw the tube onto the port connector by hand (below). 4.2.2. Connecting a DC IN power source to the unit NOTE If the unit must be powered using an IEEE 802.3at-compliant network switch or PoE injector, disregard this section and proceed to “Connecting LAN cables to the unit” (page 36).
Fluidmesh 4200 FIBER 2. Make sure that the terminal pin assignments for the M12A plug comply with the accepted standard for M12A connectors. Next, proceed to the steps in the following table: 3. Remove the protective plastic cover from the port labelled DC IN. 4. Wrap PTFE thread-sealing tape around the threads of the M12A connector on the unit. Use enough tape to ensure a watertight seal. 5. Insert the M12A connector leading from the power source into the port labelled DC IN. 6.
Fluidmesh 4200 FIBER When the Fluidmesh 4200 FIBER is mounted in its final location, connect the unit to LAN connection(s) and/or a PoE power supply by doing the following steps: 1. Only use a shielded CAT5/6 cable that terminates in an M12X connector to connect any LAN cable to the unit. 2. Make sure that the terminal pin assignments for the M12X plug(s) comply with the accepted standard for M12X LAN/PoE connectors. Next, proceed to the steps in the following table: 3.
Fluidmesh 4200 FIBER 4.2.4. Connecting an XCO-standard duplex fiber-optic cable to the unit WARNING If a Fluidmesh 4200 FIBER transceiver is fitted with an XCO / SFP fiber-optic module, it is a Class 1 laser product. It makes use of fiber-optic technology, including laser-emitting components. Do not look directly at the input/output end of the unit's SFP connector, or at the input/output end of any fiberoptic cable.
Fluidmesh 4200 FIBER • The mylar tab-type module has a tab that is pulled to remove the module (below). • The actuator button-type module has a button that is pushed to remove the module (below).
Fluidmesh 4200 FIBER • The slide tab-type module has a sliding tab underneath its front end that is used to remove the module (below). CAUTION SFP modules are static-sensitive devices. Always use an ESD wrist strap or similar individual grounding device when handling an SFP module. To install an XCO-type SFP module in the Fluidmesh 4200 FIBER, do the following steps: 1. Wear an ESD-preventive wrist or ankle strap, and follow its instructions for use. 2.
Fluidmesh 4200 FIBER 4. Line up the module with the port. 5. Slide the module into the port. If the module is an actuator-button type, do not press the actuator button as you insert the module, as this might stop the module from seating correctly inside the port. 6. Push gently but firmly on the outer face of the module. If the module is correctly aligned, you will hear a click as the slide pin at the bottom of the module snaps into place.
Fluidmesh 4200 FIBER 7. Screw the protective plastic SFP module cover securely over the SFP port. 8. Clean the optic surfaces of the fiber-optic cable before connecting the cable to the optical port of another SFP module. 9. Protect the interface ports of the SFP module against dust, dirt and water. The optics will not work correctly if they are obstructed or contaminated. 10. Only use a duplex fiber-optic cable with a connector conforming to the SFP standard.
Fluidmesh 4200 FIBER Fluidmesh uses copper-tin-zinc-plated female QMA connectors. These connectors are capable of corrosion resistance that exceeds the demands imposed by ASTM B117 salt spray testing. The connectors are virtually immune to corrosion, provided that they do not remain in contact with standing salt water for long periods of time. In the opinion of Fluidmesh engineers, certain brands of QMA plug have shown outstanding performance.
Fluidmesh 4200 FIBER 3. Check the round, knurled nuts of the QMA connectors for tightness (above). If any round nuts are loose, tighten them by hand. 4. Slide a section of Nylon heat-shrinkable tubing over each unconnected antenna cable (above). 5. Push the male QMA plug of the antenna cable into the female QMA plug of the unit. 6. Screw the threaded sleeve of the male plug onto the female plug. Tighten the connection by hand. 7. Slide the Nylon heat-shrinkable tube over the tightened QMA connectors. 8.
Fluidmesh 4200 FIBER 5. USING THE FLUIDMESH PARTNER PORTAL The Fluidmesh Partner Portal is the main web-based portal through which the following activities are done: 1. Participating in Fluidmesh E-learning 2. Using and sharing plug-in license codes for Fluidmesh devices 3. Using the RACER™ radio configuration interface 4. Viewing the technical documentation for your Fluidmesh devices 5.1.
Fluidmesh 4200 FIBER Version Computer operating systems Compatibility Reason Microsoft Internet Explorer 11 onward Windows 7, 8 and 10 Full - Microsoft Edge 13 onward Windows 7, 8 and 10 Full - Apple Safari 8 onward OS X Yosemite or later Full - 5.2. Enabling Two-Factor Authentication for security To enhance cyber-security on the Partner Portal, Fluidmesh uses twofactor authentication (2FA).
Fluidmesh 4200 FIBER Figure 11. Partner Portal (Two Factor Auth. icon) • The Two Factor Authentication page will be shown. • The current two-factor authentication status of your portal account will be shown near the top of the page. 5. Click the Set Up Two Factor Authentication button. • A two-factor authentication dialog will ask to confirm your identity. If the name and E-mail address shown in the dialog are yours, enter your current portal password and click the Validate identity button. 6.
Fluidmesh 4200 FIBER the Download button, or print a hard copy of the codes by clicking the Print button. 5.3.
Fluidmesh 4200 FIBER 1. Log in to the Fluidmesh Partners Portal using your login credentials. 2. Click this link. 3. All documents are arranged by category. Browse the folders for the documentation you need.
Fluidmesh 4200 FIBER 6. DEVICE CONFIGURATION USING THE CONFIGURATOR INTERFACE Fluidmesh radio devices that are capable of operating as part of a mesh network, including each Fluidmesh 4200 FIBER, are shipped from the factory in Mesh Point mode. All Fluidmesh radio transceiver devices are shipped with IP address 192.168.0.10, and Netmask 255.255.255.0. The Fluidmesh 4200 FIBER can be configured by using: • The RACER™ Radio Configuration interface, or • The on-board Configurator interface.
Fluidmesh 4200 FIBER IMPORTANT The RACER Radio Configuration interface and command-line interface (CLI) contain device configuration parameters that are not available in the on-board Configurator interface. Note that some configuration features may not be applicable to your specific Fluidmesh device. Configuration parameters and control tabs that are exclusive to RACER and the CLI include: • Project name (The device has been assigned to the Project listed in this field.
Fluidmesh 4200 FIBER • FLUIDITY FREQUENCY SCAN tab (Used where mobile Fluidity units are configured with different frequencies.) • SPANNING TREE tab (Allows you to build a logical topology for Ethernet networks, including backup links to provide fault tolerance if an active link fails.) • QOS tab (Contains controls for Quality of Service and Class of Service settings.) • MPLS tab (Contains controls for adjustment of the unit's multiprotocol label switching settings.
Fluidmesh 4200 FIBER • By connecting a control device directly to the Fluidmesh device using an Ethernet cable (Local access) • By connecting a control device to the Fluidmesh device through an internet connection (Internet access) 6.2.1. Local access and login for initial configuration NOTE If your computer has a wireless WiFi card, you may have to disable the card to avoid routing issues between the computer's wired and wireless network interfaces.
Fluidmesh 4200 FIBER Figure 13. 'Connection Not Private' warning (Google Chrome) IMPORTANT Due to rising levels of cyber crime, most modern web browsers are built to alert you to possible threats, such as hacking, spoofing and identity theft. Because the Fluidmesh 4200 FIBER is connected to the computer using an unsecured connection (in this case, a CAT5/6 cable), the web browser may show you security warnings like the one above. This is normal and expected.
Fluidmesh 4200 FIBER Figure 14. Security certificate warning (Google Chrome) 2. Click Proceed to [the URL] (unsafe). • The device login window will be shown: Figure 15. Fluidmesh device login window 8. The factory-set login details are as follows: • Username: admin • Password: admin 9. Enter the correct username and password. Press 'Enter'. If your browser shows a time-out or similar message, the computer may be trying to access the Fluidmesh device through a proxy server.
Fluidmesh 4200 FIBER 2. Disable proxy connections by un-checking the check boxes for the following options: • Automatically detect settings • Use automatic configuration script • Use a proxy server for your LAN 3. Click the OK button. 4. Enter your user name and password in the device login window, and press 'Enter'. 10. To ensure system security, change the default password when the installation is completed.
Fluidmesh 4200 FIBER • If the unit successfully connects to the internet, you can do a centralized configuration of the unit using the RACER interface, or do a local configuration using the Configurator interface. • If the unit fails to connect to the internet, you must do a local configuration using the Configurator interface. NOTE By default, the local IP address of the unit is set as 192.168.0.10, and the subnet mask is set as 255.255.255.0 (as shown in the Current IP Configuration section).
Fluidmesh 4200 FIBER Figure 17. RACER dialog • The unit’s Local IP address will be set to 169.254.a.b, where a and b are the last two parts of the unit's unique unit identification (ID) number. For example, if the unit ID number is 5.12.34.56, the unit's IP address will be set as 169.254.34.56. • The unit can also be reached using the DHCP fallback IP address (192.168.0.10/24).
Fluidmesh 4200 FIBER Figure 18. RACER™ Cloud connection info status (Connected) Configure the unit using either of the following methods: • To do a centralized (online) configuration of the unit using the RACER interface, refer to the Fluidmesh Networks RACER User Manual. • To do a local (offline) configuration using the Configurator interface, refer to “Device configuration using the configurator interface” (page 50).
Fluidmesh 4200 FIBER If the unit cannot connect to the internet in Provisioning Mode, try to connect to the internet by doing the following steps: 1. Enter alternative Local IP, Local Netmask, Default Gateway, Local Dns 1 and Local Dns 2 values as needed, using the RACER™ dialog. 2. Click the Save fallback IP button (Figure 17 (page 58)). • The web browser will show the unit reboot dialog (Figure 19 (page 60)). Figure 19. Unit reboot dialog (typical) 3.
Fluidmesh 4200 FIBER 2. Do a local (offline) configuration using the Configurator interface. For further information, refer to “Device configuration using the configurator interface” (page 50). For a quick overview of the initial configuration process, refer to the flowchart below. NOTE Each individual Fluidmesh radio transceiver unit has a factoryset mesh identification number that takes the form 5.w.x.y. If the unit's IP address is set to 169.254.x.
Fluidmesh 4200 FIBER 6.3. Switching between offline and online modes The Configurator interface may not be in the needed mode when you log in. To switch between Offline and Online modes, do the steps that follow: 1. Log in to the Configurator interface as shown in “Accessing the Fluidmesh 4200 FIBER for device configuration” (page 52). • The Configurator landing page will be shown (Figure 21 (page 63)).
Fluidmesh 4200 FIBER Figure 21. Fluidmesh Configurator (landing page) 2. The lower section of the RACER™ Configuration Mode box has two radio buttons that show whether the unit is in Online (CloudManaged) mode, or Offline mode. 3. If the unit is not in the correct mode, click the Online (CloudManaged) or Offline radio button as needed. • A confirmation dialog will be shown, asking if you want to switch the unit to the chosen mode. 4. To switch the radio to the chosen mode, click the Confirm button.
Fluidmesh 4200 FIBER RACER configuration files use the *.FMCONF file extension. If the unit is not connected to the Internet, you can still use the RACER configuration interface to define a configuration file, then upload it to the unit. This can be done in either of two different ways: • A range of ready-made configuration templates are available from the RACER interface. Each template caters to a particular configuration scenario, and can be copied and modified to your needs.
Fluidmesh 4200 FIBER 6.4. General settings 6.4.1. The General Mode window The General Mode window contains controls to monitor and/or change the following settings: • The unit's operational mode. • The version of Prodigy currently being used by the unit. • The unit's LAN parameters. • If the local unit is in Bridge Mode, the Bridge ID of the remote unit to which the local unit must be linked.
Fluidmesh 4200 FIBER Changing the operational mode Changing the operational mode on a mesh network-capable unit The General Mode box (below) contains the operational mode controls. Fluidmesh radio transceiver units that are capable of operating within a mesh radio network are shipped from the factory in Mesh End mode. IMPORTANT When designing the required network layout, remember that the wireless network must always connect to the wired LAN through a unit configured to be a Mesh End unit.
Fluidmesh 4200 FIBER Figure 24. Configurator window heading block If the unit has been set to Bridge Mode, you must set the Bridge ID of the remote unit to which the local unit must be linked. Set the Bridge ID by doing the following steps: 1. Click the Remote [Unit model] Bridge ID: drop-down (Figure 25 (page 67)). Figure 25. General Mode window (Remote Bridge Unit section) 2.
Fluidmesh 4200 FIBER Remember that all Fluidmesh devices within a network must use the same Prodigy version. IMPORTANT Prodigy 2.0 is not compatible with Prodigy 1.0. Do not implement the two protocol versions within the same network. If you are expanding an existing network using new Fluidmesh hardware components, make sure that all components are compatible with each other by: 1. Upgrading all network components within the same network to firmware version 6.5 or higher. 2.
Fluidmesh 4200 FIBER NOTE When the General Mode window is opened for the first time, the Local IP and Local Netmask LAN parameters will be factory-set default values. The information needed is self-explanatory. To enter a parameter, click the field and type the parameter. If needed, enter the local primary DNS address in the Dns 1 field, and enter the local secondary DNS address in the Dns 2 field. Save the LAN settings by clicking the Save button.
Fluidmesh 4200 FIBER Figure 26. Configurator GUI (Wireless Radio dialog) 2. Enter a defined network passphrase in the Shared Passphrase field. IMPORTANT If a shared passphrase is defined, the same passphrase must be used for all Fluidmesh units in the same network. The shared passphrase can be composed of any ASCII characters except the following: '`"\$= 3. Specify the country in which the unit is installed by selecting the correct option from the Country drop-down menu.
Fluidmesh 4200 FIBER operating in the same area. The frequencies shown on the Frequency (MHz) selector are the carrier frequencies. • Operation in the 4.9 GHz band must be enabled using a Fluidmesh software plug-in. Refer to “Plug-In management” (page 140) for details. Note that the 4.9 GHz band is not available in Brazil and Canada. 5. If Advanced configuration mode was selected, choose the required channel bandwidth from the Channel Width (MHz) drop-down.
Fluidmesh 4200 FIBER NOTE If a unit is configured as a Slave, you can still enable manual frequency selection by disabling the Autoscan setting on the ADVANCED RADIO SETTINGS page. Refer to “Advanced radio settings” (page 97) for more information. Co-location considerations To avoid radio interference caused by unit co-location, set the frequencies of co-located transceivers as far apart as practically possible.
Fluidmesh 4200 FIBER Table 4. Available Radio Channel Widths Channel width Max.modulation speed Max. throughput 5 MHz 37 Mb/s 8 Mb/s 10 MHz 75 Mb/s 16 Mb/s 20 MHz 150 Mb/s 90 Mb/s 40 MHz 300 Mb/s 150 Mb/s Dynamic frequency selection considerations To ensure that commercial and military flight operations proceed without interference to terminal doppler weather radar (TDWR), operation of the unit in the 5.250 GHz-to-5.350 GHz band (known as U-NII Mid or UNII-2A) and the 5.470 GHz-to-5.
Fluidmesh 4200 FIBER Every Fluidmesh unit uses a proprietary distributed-channel switching algorithm. If the UNII2 plug-in is installed, and a TDWR radar transmission is detected: • The algorithm will attempt to switch communicating Fluidmesh units to the next radar-free channel, allowing uninterrupted communications with no radar interference. • The number of detected radars is reported in the command-line interface (CLI).
Fluidmesh 4200 FIBER The window shows a list of wireless links to other Fluidmesh units that have been detected by the local unit, and the relative strength of each wireless link in decibel-milliwatts (dBm). To do an accurate alignment of a local antenna for a specific wireless link, do the following steps: 1. Click the -antenna alignment and stats link under GENERAL SETTINGS in the left-hand settings menu. • The ANTENNA ALIGNMENT AND STATS window will be shown (Figure 27 (page 75)). Figure 27.
Fluidmesh 4200 FIBER Figure 28. Antenna alignment and stats tool 4. The tool consists of: • A graph that reports average signal strength over the last 30 strength-sampling periods. • A bar that reports the quality of the signal currently being detected at the local unit receiver. 5. Do the physical antenna alignment by manually adjusting the location and direction of the relevant antenna. During the alignment, use the graph and bar readings to monitor variations in signal strength. 6.
Fluidmesh 4200 FIBER 6.4.4. Spectral analysis The Spectrum Graph window contains a static graph readout and controls to detect radio-frequency interference that exists between local Fluidmesh units transmitting and receiving in a specified frequency band. The window can be used make the most efficient choice of center frequency and channel width for radio links between units. To use the Spectrum Graph window, do the following steps: 1.
Fluidmesh 4200 FIBER signal quality. Yellow indicates falling quality. If the signal display is red, there is excessive signal noise. IMPORTANT If you are scanning a network with overlapping communication channels, the number of detected Fluidmesh units may be larger than the actual number of deployed units. 4. To view a specific part of the graph, roll the mouse wheel forward to zoom into the window, then click-and-drag the window left or right. 5.
Fluidmesh 4200 FIBER TIP As well as being a fail-safe mechanism to monitor network connectivity, the constant ping can also be used as a 'keepalive' message to devices that need uninterrupted connectivity, such as VoIP telephones. To use the constant ping and automatic reboot functions, do the following steps: 1. Click the -ping softdog link under NETWORK CONTROL in the left-hand settings menu. • The PING SOFTDOG dialog will be shown (Figure 30 (page 79)). Figure 30.
Fluidmesh 4200 FIBER 6.5.2. FMQuadro FMQuadro™ for mesh network-capable devices IMPORTANT The FMQuadro tool is only available if the Fluidmesh 4200 FIBER is set to Mesh End mode or Bridge mode. If the unit is set to Mesh Point mode, the -FMQuadro menu option will not be available. The FMQuadro window contains controls to do the following functions: • Plot all wireless links within a network. • Show important information about each device and link. • Diagnose problems with wireless links.
Fluidmesh 4200 FIBER Figure 31. FMQuadro graphical view (Mesh End only) • Fluidmesh radio transceiver devices are shown as dots. Mesh End devices are shown as blue dots, while Mesh Point devices are shown as red dots. If an abnormal condition is detected on any unit, its device icon changes to a yellow dot. • Wireless links are shown as lines. Primary wireless links are shown as double-pointed solid red lines. If the network includes mesh radio links, these are shown as doublepointed dashed lines.
Fluidmesh 4200 FIBER Figure 32. FMQuadro (unit information) 3. When an information panel is shown for a Fluidmesh device: • The list of plug-ins currently installed on the device is shown. • You can activate any Fluidmesh software plug-in on the device by entering the correct activation code in the Plugin Activation Code field and clicking the Add button. • The device's maximum Ethernet capacity and current data throughput are shown.
Fluidmesh 4200 FIBER • To show all possible routes of transmission between wireless devices in a mesh network, check the Links check-box. • To show the current operating frequency of every wireless link, check the Frequencies check-box. • To show the current data error rate of every wireless link, check the Error Rate check-box. 5. All Fluidmesh devices represented by dots can be placed in any position on the map view. To move any dot, click-and-drag the dot to the needed position. 6.
Fluidmesh 4200 FIBER Figure 33. FMQuadro (Basic wireless link information display) 3. Relevant statistical information will be shown as follows: • Current TX Rate: The current link transmission rate, in Mb/s. • Packet Error Rate: The percentage of packets dropped due to excessive transmission errors. • Link Error Rate: The percentage of packet retransmissions due to transmission errors. • Signal Strength: The current signal level being received, in dBm.
Fluidmesh 4200 FIBER Figure 34. FMQuadro wireless link information display (History Stats window) 5. To view time-based information using the History Stats window, do the steps that follow: 1. Set the time period for which statistics must be viewed by entering the number of days in the Data record: (last days) field. NOTE By default, statistics are recorded for the previous two days, at a sampling interval of five minutes. The statistical recording time can be set at a maximum of 24 days.
Fluidmesh 4200 FIBER 3. Fine-tune the statistical displays by clicking-and-dragging the Zoom period sliders to adjust the period that must be viewed. 4. Check any or all of the information category check-boxes in the View: section of the window. Depending on the check-box selections, relevant statistical information will be shown as follows: • TX Rate: Current link transmission rate, in Mb/s. • Throughput: Rate of successful message delivery over the wireless link.
Fluidmesh 4200 FIBER Figure 35. FMQuadro (Address summary table) To use the address summary table, do the following steps: 1. Extend the table by clicking the + button at the upper right-hand corner of the table. • The Unit ID and IP Address details for all Fluidmesh units in the network will be shown. 2. Enter a unique reference name for each Fluidmesh unit by clicking the Name field for the unit and entering the text of the name. 3. Collapse the table by clicking the + button again.
Fluidmesh 4200 FIBER Figure 36. FMQuadro (Aerial map added) To add an aerial terrain map to the FMQuadro view, do the following steps: 1. Get an aerial image of the area in which the wireless network and LAN are installed. The image must conform to the following requirements: • Image format: *.JPG or *.JPEG only. • File size: Less than or equal to 100 Kilobytes. TIP Suitable aerial images can be created and downloaded using Google Earth. Basic instructions on how to use Google Earth are available here.
Fluidmesh 4200 FIBER 4. Click-and-drag the aerial image to the needed position on the map view. Release the mouse button to drop the map. 5. Use the on-screen dialog to confirm the image placement, or to continue dragging. 6. Adjust the scale and transparency of the aerial image by using the Scale: and Transparency: sliders. 7. Click the Save Layout button to save the aerial image as part of the FMQuadro window. 8.
Fluidmesh 4200 FIBER • Show the exact physical positions of all static Fluidmesh components and approximate physical positions of all mobile Fluidmesh components, against the background of an aerial map. Plotting and interpreting static and mobile device information To plot and interpret information on all static and mobile wireless devices shown by the window, do the following steps: 1. Click the -Fluidity Quadro link under NETWORK CONTROL in the left-hand settings menu.
Fluidmesh 4200 FIBER device. A typical example of a data connection between a single mobile device and a static device is shown in Figure 39 (page 91). Figure 39. Fluidity Quadro (single mobile device linked to static device) • If more than one mobile device is within range of a static device, and a data connection is established between the mobile devices and the static device, the connected mobile devices are shown as colored border segments around the dot representing the static device.
Fluidmesh 4200 FIBER • The device's maximum Ethernet capacity and current Ethernet throughput are shown. This allows you to monitor Ethernet utilization and determine whether the Ethernet port is overutilized (particularly if the Fluid Throttle plug-in is installed). • If a Fluidmesh device is not performing as expected, the dot representing the unit turns yellow. If a yellow dot is clicked, the warning details for the unit will be shown. 4.
Fluidmesh 4200 FIBER • The assigned Unit ID and IP Address details for all Fluidmesh units in the network will be shown. NOTE A user-assigned name can be given to each unit in the network. For instructions on how to re-name units, refer to “FMQuadro” (page 80). 2. Choose a unique color to represent each mobile Fluidmesh device by clicking the colored tile to the right of the device’s mesh ID number (5.a.b.c), and clicking the chosen color from the color palette. 3.
Fluidmesh 4200 FIBER • In the additional-information display below: a. Every graded point on the horizontal scale, from the left-hand side of the graph onwards, represents the passage of one additional second from the current point in time. b. -45 is a typical value representing the instantaneous signal strength in Decibelmilliwatts (dBm) at the specified point in time. c. 11 is a typical value representing the link error rate percentage (in this case, 11%) at the specified point in time. Figure 43.
Fluidmesh 4200 FIBER view, refer to the Adding an aerial map to the FMQuadro view section in “FMQuadro” (page 80) 6.5.4. Advanced tools The Advanced Tools window contains tools to diagnose the condition of the wireless network. • The Ping test tool sends pings to a user-specified IP address. • The Bandwidth test tool tests the bandwidth capacity of the wireless link between the Fluidmesh unit and a user-specified IP address. • The Path MTU tool tests the size of the maximum transmission unit.
Fluidmesh 4200 FIBER 3. Click the Run button to the right of the IP address field. • The ping test result will be shown below the test controls. Using the Bandwidth Test tool The Bandwidth test can be run with the network under load (to test operational performance), or with the network unloaded (to test installed capacity). The test tool generates a stream of packets at a rate of 4 Mbits/sec to test available network path throughput.
Fluidmesh 4200 FIBER • The bandwidth test result will be shown below the test controls. Using the Path MTU discovery tool The Path MTU discovery tool tests the size of the maximum transmission unit (in other words, the largest protocol data unit that can be communicated in a single network layer transaction). To use the Path MTU discovery tool, do the following steps: 1. Determine what wireless link is to be tested between the Fluidmesh unit and another unit in the wireless network.
Fluidmesh 4200 FIBER • The device's FluidMAX operating mode • The FluidMAX cluster identification code • The maximum radio transmission power level • The AES data encryption setting • The maximum distance over which the unit is capable of transmitting To open the Advanced Radio Settings dialog, click the -advanced radio settings link under ADVANCED SETTINGS in the left-hand settings menu (below). Figure 47.
Fluidmesh 4200 FIBER • If the unit's firmware is equipped with the FluidMAX engine. • If the unit is currently being operated as part of a point-to-multipoint network topology. To use the FluidMAX Management menu, do the following steps: 1. Click the Radio Mode drop-down menu. 2. Choose the correct FluidMAX operating mode from the following list of options: • AUTO: The FluidMAX engine is enabled, and the unit role is set automatically.
Fluidmesh 4200 FIBER Transmission Power Control (TPC) algorithm. The algorithm tries to obtain an optimal link signal strength of approximately -55 dBm on both sides of the radio link while not exceeding the user-defined maximum transmission power threshold. NOTE if Max TX Power is set to AUTO, the maximum transmission power may vary at any moment depending on the operating frequency of the unit, atmospheric conditions, and other factors.
Fluidmesh 4200 FIBER IMPORTANT The Data Packet Encryption setting must be the same on all Fluidmesh units that are part of the same network. In Fluidmesh devices, AES is applied using a proprietary encoding algorithm, enabling industry-grade network security. IMPORTANT The AES feature must be enabled using a software plug-in (Fluidmesh part number FM-AES). Contact your Fluidmesh Networks representative for details. To use the Data Packet Encryption setting, do the following steps: 1.
Fluidmesh 4200 FIBER To let the system choose the optimal Maximum link length setting and MAC layer timeouts automatically, check the Automatic check-box. 6.6.2. SFP settings IMPORTANT The Fluidmesh 4200 FIBER is shipped from the factory with no fiber-optic transceiver installed. For the unit to have fiber-optic capability, the SFP port must be equipped with a separately-available XCO-type fiber-optic transceiver.
Fluidmesh 4200 FIBER 6.6.3. Static routes The Static routes window is used to set static routing rules (in other words, manually-configured routing entries, as opposed to routing instructions from a dynamic routing table) for a Fluidmesh unit.
Fluidmesh 4200 FIBER 6.6.4. Whitelists and Blacklists IMPORTANT The Whitelist/Blacklist feature is only available if the Fluidmesh 4200 FIBER is set to Mesh Point mode or Mesh End mode mode. If the unit is set to Bridge mode, the –whitelist / blacklist menu option will not be available. The Whitelist/Blacklist function is a security feature that prevents fake IP addresses from intercepting or intruding on the network. A Whitelist is a group of Fluidmesh transceivers, described as a list of linked pairs.
Fluidmesh 4200 FIBER IMPORTANT Source and destination values are always unit ID numbers. Do not enter a unit's IP address as a source or destination value. The unit ID number is printed on the identification label of each unit. This number always takes the following form: 5.a.b.c • The smaller the routing priority value, the greater the routing priority. • Blacklist syntax is the same as shown above, except for one additional rule: Blacklists do not include routing priority numbers.
Fluidmesh 4200 FIBER • Cell A2 of the *.CSV file would contain the parameter 5.29.252.213, 5.2.22.136,0 • Cell A3 of the *.CSV file would contain the parameter 5.29.252.213,5.155.105.128,1 • Cell A4 of the *.CSV file would contain the parameter 5.155.105.128,5.29.252.213,1 Figure 51. Sample Whitelist (Example 2) 5. Example 3: If you want to create a simple Blacklist that includes the links between unit ID numbers 5.2.22.136 and 5.29.252.213 (Figure 52 (page 106)): • Cell A1 of the *.
Fluidmesh 4200 FIBER Figure 53. Configurator (WHITELIST / BLACKLIST dialog) • The WHITELIST / BLACKLIST dialog will be shown (Figure 53 (page 107)). 2. Choose the type of list to be uploaded by clicking the correct List Type: radio button. 3. Click the Choose File button. Upload the saved *.CSV file using the upload dialog. • The contents of the uploaded *.CSV file will be shown in the Whitelist / Blacklist Status section. To apply the list settings contained in the *.
Fluidmesh 4200 FIBER However, depending on network configuration, it may be convenient to forward multicast traffic from one Mesh Point unit to another Mesh Point unit, to allow such tasks as remote recording of the video data flow. By default, units operating in Mesh End mode do not forward multicast traffic to a wireless network. The only exceptions to this rule are universal plug and play (UPnP) and Internet Group Management Protocol (IGMP) traffic.
Fluidmesh 4200 FIBER Figure 54. Multicast dialog (Mesh End mode) 4. Compile the needed multicast rule. Use the following syntax rules to create the rule: • A multicast rule consists of two parts: a multicast group designator and a destination address. • Define the multicast group designator. For example, the designator 224.1.1.0/24 indicates all multicast groups in the range 224.1.1.1 through 224.1.1.254. • The destination address consists of one or more Fluidmesh unit ID numbers, in the form 5.a.b.c.
Fluidmesh 4200 FIBER Figure 55. Multicast dialog (Bridge mode) • The unit ID number of the local unit is shown as the LOCAL BRIDGE ID (Figure 56 (page 110)). • The unit ID number of the Bridge unit to which the local unit is linked is shown to the right of 'ASSOCIATED WITH REMOTE BRIDGE ID'. Figure 56. Configurator interface (Unit ID information) 3. Choose the Enabled or Disabled option from the Multicast Forwarding: drop-down menu. 4. Save the multicast settings by clicking the Save button.
Fluidmesh 4200 FIBER • Click the -snmp mode link under ADVANCED SETTINGS in the left-hand settings menu. • The default SNMP dialog will be shown (Figure 57 (page 111)). Figure 57. SNMP dialog (SNMP disabled) NOTE By default, Fluidmesh units are shipped from the factory with SNMP disabled. Using SNMP v2c To change the unit's SNMP mode to v2c and configure the unit accordingly, do the following steps: 1. Click the SNMP mode drop-down, and click the v2c option.
Fluidmesh 4200 FIBER IMPORTANT The same community identity value must be set for all Fluidmesh units in the wireless network. 3. SNMP traps can be enabled for significant system-related events. If needed, enable SNMP event traps by checking the Enable SNMP event trap: check-box, and enter the name of the network management station (NMS) host in the NMS hostname: field. IMPORTANT The NMS host to which traps are sent must have an SNMP agent that is configured to collect SNMP v2c traps. 4.
Fluidmesh 4200 FIBER Figure 59. SNMP dialog (v3 selected) 2. Enter an SNMP v3 user name in the SNMP v3 username: field. IMPORTANT The same SNMP v3 user name must be set for all Fluidmesh units in the wireless network. 3. To change the current SNMP v3 password, enter a new password in the SNMP v3 password: field. The default password is fluidmesh. To show the password as it is being typed, check the Show SNMP v3 password: check-box. 4.
Fluidmesh 4200 FIBER 5. If needed, choose the correct encryption protocol from the SNMP v3 encryption: drop-down. The available options are No Encryption, DES (Data Encryption Standard) and AES (Advanced Encryption Standard). IMPORTANT The same encryption protocol must be set for all Fluidmesh units in the wireless network. 6. To change the current encryption passphrase, enter a new passphrase in the SNMP v3 encryption passphrase: field. The default encryption passphrase is fluidmesh.
Fluidmesh 4200 FIBER IMPORTANT To minimize impact on overall system performance, wireless AP bandwidth is limited to 5 Mb/s. This is sufficient for maintenance purposes, but is not sufficient to support normal wireless carrier operations. To enable the wireless AP feature on the Fluidmesh 4200 FIBER, do the following steps: 1. Make sure that the FM-AP software plug-in is installed on the radio unit. For instructions on how to install the FM-AP plug-in, refer to “Plug-in management procedures” (page 155).
Fluidmesh 4200 FIBER 2. If you want to prevent the radio unit from broadcasting its access point SSID, check the Disable SSID Broadcasting check-box. If the box is not checked, the radio unit will broadcast the SSID shown in the WLAN SSID field. 3.
Fluidmesh 4200 FIBER If the routed Network Mode option was chosen, do the following additional steps: 1. Specify the IP address and netmask of the subnet the radio unit is part of by entering the correct addresses in the WLAN IP address and WLAN netmask fields. 2. To allow the radio unit to automatically assign any of a pre-defined range of IP addresses to wireless clients that connect to the radio unit, do the following steps: a. Choose a continuous, unbroken range of IP addresses (for example, 100.0.0.
Fluidmesh 4200 FIBER 2. To enable network address translation, check the Network Address Translation check-box. 3. Choose the encryption protocol that will be used to encrypt communication to and from connected clients by clicking the WLAN Security drop-down, and choosing a suitable security option. 4. The radio unit will broadcast the SSID shown in the WLAN SSID field. If needed, change the SSID manually. 5.
Fluidmesh 4200 FIBER 2. Specify the default gateway and designated name server by entering the correct configuration data in the WLAN Default Gateway and WLAN Name Server fields. To access a Fluidmesh radio transceiver through the transceiver's wireless access point, you will need a laptop computer, tablet computer or similar device equipped with the following: • Wi-Fi capability. • A current version of Mozilla Firefox or Google Chrome.
Fluidmesh 4200 FIBER 1. Enable and configure network time protocol (NTP) as shown in “NTP Configuration” (page 122). 2. Click the -radius link under ADVANCED SETTINGS in the lefthand settings menu. • The RADIUS dialog will be shown (Figure 60 (page 120)). Figure 60. Configurator GUI (RADIUS dialog) 3. Choose the RADIUS mode for the device by clicking the RADIUS Mode drop-down and selecting one of the following options: • Disabled: RADIUS functionality will be disabled.
Fluidmesh 4200 FIBER 5. By default, the RADIUS port number is 1812. Do not change the port number unless there is a specific need to do so. 6. Enter the RADIUS access password in the Secret field. To read the password as it is typed, check the show check-box. 7. By default, the RADIUS inactivity Expiration (s) period is 28 800 seconds (8 hours). Do not change the expiration period unless there is a specific need to do so. 8.
Fluidmesh 4200 FIBER Authentication Method PEAP Available Inner Authentication Methods • MSCHAPV2 • MD5 • GTC 12. Save the RADIUS settings by clicking the Save button. Alternatively, clear the settings by clicking the Reset button. 6.6.9. NTP Configuration All Fluidmesh radio transceiver units have a built-in clock. No manual time-setting controls are provided.
Fluidmesh 4200 FIBER 2. Enable NTP synchronization by checking the Enable NTP checkbox. 3. Enter the host name of a chosen primary NTP server in the NTP server hostname: field. IMPORTANT The NTP server host names shown in Figure 61 (page 122) are for reference purposes only. Your company policy may dictate that you use one or more specific time servers. 4. If needed, enter the host name of a chosen secondary NTP server in the Secondary NTP server (optional): field. 5.
Fluidmesh 4200 FIBER Figure 62. Configurator GUI (L2TP Configuration dialog) • The L2TP Configuration dialog will be shown (Figure 62 (page 124)). 2. To enable L2TP functionality for the unit, check the L2TP checkbox. • The L2TP configuration settings window will be shown. 3. When the L2TP configuration has been set, save the settings by clicking the Save button. Alternatively, clear the settings by clicking the Reset button.
Fluidmesh 4200 FIBER obeying predefined rules for management of incoming and outgoing data packets. IMPORTANT For detailed information on the predefined rules for smart VLAN packet management, refer to the “Rules for packet management” (page 126) table at the bottom of this section. To connect the unit to a VLAN that is part of the local wireless network, do the following steps: 1. Click the -vlan settings link under ADVANCED SETTINGS in the left-hand settings menu.
Fluidmesh 4200 FIBER 6. Save the VLAN settings by clicking the Save button. Alternatively, clear the settings by clicking the Reset button.
Fluidmesh 4200 FIBER Parameter Default value Tagged with valid VID (1 – 4095), not NVID Packet passed (tagged) Tagged with null VID (0) or NVID Packet passed (untagged) Access port rules for incoming packets with unit in Bridge Mode (Case and Action) The Native VLAN enable setting is used to control whether the Management VLAN should be tagged or not.
Fluidmesh 4200 FIBER • The FLUIDITY dialog will be shown (Figure 64 (page 128)). Figure 64. Configurator GUI (FLUIDITY dialog for transceiver devices) 2. Fluidmesh radio transceivers are shipped from the factory with Fluidity functionality disabled. Enable Fluidity functionality by checking the Fluidity check-box. 3.
Fluidmesh 4200 FIBER IMPORTANT If a unit is set to Infrastructure (wireless relay) mode, do not connect the unit to the wired LAN. • Vehicle: Choose this setting if the unit is installed on or in a moving vehicle. 4. If the Unit Role has been set as Vehicle, assign the unit a vehicle identity using either of the methods below: • Allow the unit to automatically generate a unique vehicle identity by checking the Enable check-box to the right of the Automatic Vehicle ID: heading.
Fluidmesh 4200 FIBER Handoff logic and rate adaptation settings CAUTION The following settings are intended for use by qualified network engineers. Do not change these settings unless there is a specific need to do so. For detailed information on how to set Handoff logic and Rate adaptation, refer to the Fluidmesh Networks Fluidity Configuration Manual. The Handoff Logic setting controls the unit's choice of infrastructure point with which to connect.
Fluidmesh 4200 FIBER 6.6.13. Miscellaneous settings IMPORTANT Support for FIPS, CANBUS, PROFINET and QNET are only available if the corresponding plug-ins are installed. If the corresponding plug-in is not installed, the check-box for the relevant option will not be available. The following plug-ins are needed to activate these features: • FIPS: FM-FIPS • CANBUS: FM-CANBUS • PROFINET: FM-PROFINET • QNET: FM-QNET Note that FIPS support is not available for the FM 1000 and FM 10000.
Fluidmesh 4200 FIBER Figure 65. Configurator GUI (MISC SETTINGS dialog) 2. Set the device name by typing it in the Name: field. NOTE It is not essential to specify the device name, but it is strongly recommended. Failure to specify the device name may make the unit difficult to recognize in situations where more than one unit is being dealt with at the same time (for example, when using utilities such as the FMQuadro network map). 3.
Fluidmesh 4200 FIBER • Factory: The hardware Reset button functionality will be set to its factory default configuration (enabled). 4. To enforce FIPS 140-2 compliance for data transmitted by the unit, make sure the FM-FIPS plug-in is installed, then check the Enable FIPS: check-box. 5. To enable CANBUS support for the unit, make sure the FMCANBUS plug-in is installed, then check the Enable CANBUS: check-box. 6.
Fluidmesh 4200 FIBER IMPORTANT Changing the default password to a strong password is an extremely important step in preventing security breaches. If you have logged into the configurator interface using default login credentials, you will see a notification banner at the bottom of the screen (Figure 66 (page 134)). Figure 66. Default credentials notification banner Click the banner to change the view mode credentials. You will be taken to the VIEW MODE SETTINGS section.
Fluidmesh 4200 FIBER NOTE The new password must be a minimum of eight characters, and include at least one capital letter and one number. 4. To show the password as it is being typed, check the Show Password check-box. 5. Save the Viewmode Credentials settings by clicking the Change button. Alternatively, clear the settings by clicking the Reset button. To change the View Mode settings, do the following steps: 1. Log in to the unit's Configurator GUI with Administrator credentials.
Fluidmesh 4200 FIBER 3. To allow or prohibit access to any device-configuration settings, click the relevant drop-down, and click the Disabled or Enabled setting: • If the Disabled option is selected for a device-configuration setting, the setting for that category will be visible but not accessible to ordinary users. • If the Enabled option is selected for a device-configuration setting, the setting can be modified by ordinary users.
Fluidmesh 4200 FIBER 1. Click the -remote access link under MANAGEMENT SETTINGS in the left-hand settings menu. • The CHANGE USERNAME AND PASSWORD dialog will be shown (Figure 70 (page 137)). Figure 70. Management Settings dialog (Change Username and Password) 2. Enter the new administrator user name in the Username: field. 3. Enter the current password in the Old password: field. 4. Enter the new password in the New password: field. 5.
Fluidmesh 4200 FIBER Enabling remote access to the unit by Telnet The TELNET ACCESS section contains controls to enable remote access to the unit using Telnet. IMPORTANT The Telnet protocol suffers from serious security weaknesses that limit its usefulness in environments where the network cannot be fully trusted. Telnet is used at your own risk. To enable Telnet access to the unit, do the following steps: 1. Click the -remote access link under MANAGEMENT SETTINGS in the left-hand settings menu.
Fluidmesh 4200 FIBER 1. Navigate to the Documentation section of the Fluidmesh Partner Portal. 2. Find and open the device sub-folder for your specific Fluidmesh device in the FIRMWARE AND TOOLS folder. 3. Download the firmware image (*.BIN) file to your computer. CAUTION Make sure that you download the specific *.BIN file for your device type. Uploading incorrect firmware for the device type will cause the firmware overwrite to fail, and may damage the unit.
Fluidmesh 4200 FIBER Figure 71. Configurator GUI (typical FIRMWARE UPGRADE dialog) 7. Upload the firmware image file to the unit by clicking the Choose File button and following the software prompts. • The Upgrade button will become available. 8. Click the Upgrade button. Follow the software prompts until the firmware overwrite is complete. • When the overwrite is complete, the unit will automatically reboot.
Fluidmesh 4200 FIBER • Deactivate uploaded software plug-ins so they can be used on other Fluidmesh units. • Activate a non-repeatable Demo mode that allows full 4.9 GHz, AES and unlimited plug-in functionality for an 8-hour trial period. IMPORTANT The 4.9 GHz band is not available in Brazil or Canada. • Show and erase the log files for plug-in installation.
Fluidmesh 4200 FIBER Figure 72.
Fluidmesh 4200 FIBER To activate Plug-in Demo mode, do the following steps: 1. Click the Demo Mode button at the bottom of the MANAGE PLUG-INS dialog. • The Demo Mode activation dialog will be shown (Figure 73 (page 143)). A countdown timer shows how much Demo time remains. Figure 73. MANAGE PLUG-INS dialog (Demo Mode activated) 2. To leave Demo mode before expiry of the 8-hour trial period, click the Exit Demo Mode button. • Demo mode will be deactivated, and the unit will reboot. 3.
Fluidmesh 4200 FIBER 2. If needed, erase the log files for plug-in installation by clicking the Clear Logs button in the Plug-in Installation Logs: section. 6.7.5. The device status view The device status window The device status window contains information on basic Fluidmesh device settings (including the unit's MAC address), and controls that allow you to download diagnostic data files and view device-event logs.
Fluidmesh 4200 FIBER • Status information on the unit's basic characteristics, device settings and wireless settings is shown in the upper part of the window. To download and forward the current diagnostic file for the unit, do the following steps: 1. Click the Download Diagnostics button. 2. Follow the software prompts to download the *.FM diagnostic file to your computer. 3. Log a support call with the Fluidmesh Help desk. Ask for a reference number. 4. Attach the *.
Fluidmesh 4200 FIBER 6.7.6. Saving and restoring the unit settings IMPORTANT Note that transceiver software configuration (*.CONF) files are not interchangeable with RACER configuration setup (*.FMCONF) files. The LOAD OR RESTORE SETTINGS window contains controls that allow you to: • Save the unit's existing software configuration as a configuration (*.CONF) file. • Upload and apply a saved configuration file to the current unit.
Fluidmesh 4200 FIBER To upload a saved configuration file to the Fluidmesh unit, do the following steps: 1. Find the configuration (*.CONF) file that must be uploaded to the unit by clicking the Browse... button and following the software prompts. • The name of the configuration file to be uploaded will be shown to the right of the Browse... button. 2. Apply the configuration settings to the unit by clicking the Restore button. • The configuration will be applied, and the unit will reboot. 6.7.7.
Fluidmesh 4200 FIBER 2. Reset the unit to its factory defaults by clicking the YES link. Alternatively, abort the factory reset by clicking the NO link. • If the YES link was clicked, the unit will do a factory reset, and will reboot. 3. If you have previously saved a device configuration file for the unit, you can restore the saved configuration settings to the unit as shown in “Saving and restoring the unit settings” (page 146).
Fluidmesh 4200 FIBER Figure 78. Web browser (Authentication Required dialog) 6.7.9. Viewing the end-user license agreement The License Agreement window contains the Fluidmesh end-user license agreement for the Fluidmesh 4200 FIBER, its firmware and control software. To view the terms and conditions of the license agreement, click the License Agreement link under MANAGEMENT SETTINGS in the lefthand settings menu. • The license agreement dialog will be shown (Figure 79 (page 150)).
Fluidmesh 4200 FIBER Figure 79. Configurator GUI (End-user license agreement) To read the end-user license agreement as an *.HTML web page in your browser, left-click the Download the License Agreement link. • The end-user license agreement will be shown under a new tab in your web browser. To download the end-user license agreement as a standard text (*.TXT) file, do the following steps: 1. Right-click the Download the License Agreement link. 2. Click the Save Link as...
Fluidmesh 4200 FIBER 7. SOFTWARE PLUG-INS 7.1. Available plug-ins Like other Fluidmesh radio transceivers, the Fluidmesh 4200 FIBER is able to take advantage of plug-in software upgrades that add features and enhance the performance of the unit. The following table lists all available software plug-ins for all Fluidmesh hardware devices, their specific functions, and their plug-in part numbers. The tables that follow this table describe which plug-ins are compatible with specified Fluidmesh devices.
Fluidmesh 4200 FIBER Plug-in FluidityBandwidth (Mobile) FluidityBandwidth (Trackside) Is the plugin package removable and reinstallable? Yes Function Enables Fluidity capability for mobile Fluidmesh devices. Allows traffic forwarding up to and including the amount of bandwidth specified in the part number. Yes Enables Fluidity capability for static-mount Fluidmesh devices. Allows traffic forwarding up to and including the amount of bandwidth specified in the part number. 4.
Fluidmesh 4200 FIBER Plug-in Is the plugin package removable and reinstallable? Function Part number PROFINET Yes Enables process field net capability. FM-PROFINET QNET Yes Enables Neutrino Qnet capability. FM-QNET FIPS Yes Enables Federal Information Processing Standards capability. FM-FIPS TITAN Yes Enables fast fail-over capability on networks where redundant (backup) units are installed.
Fluidmesh 4200 FIBER Plugin FM 1000 Gateway FM PONTE 50 FM 1200 VOLO FM 1300 OTTO FM 10000 Gateway World frequencies Not available Not available Available Not available AES Not available Not available Available Available Fluidmesh Access Points Not available Not available Available Not available VLAN Firmware embedded Available Available Not available Virtual Gigabit Not available Not available Available Not available L2TP Firmware embedded Not available Available Not avai
Fluidmesh 4200 FIBER Plugin FM 3200 BASE FM 3500 ENDO FM 3200 ENDO FM 4200 FIBER FM 4500 FIBER FM 4200 MOBI FM 4500 MOBI FM 4800 Fluidmesh Access Points Available Not available Available Not available Not available VLAN Available Available Available Available Available Virtual Gigabit Not available Not available Not available Not available Not available L2TP Available Available Available Available Available PROFINET Available Available Available Available Available QN
Fluidmesh 4200 FIBER • When you purchase a generic 16-digit License code, the License code and corresponding plug-in will be listed on the Plug-ins page (Figure 80 (page 156)). Figure 80. Partner Portal Plug-ins page (License code plug-in) • When the generic License code was purchased, you will have received an E-mail from plugins@fluidmesh.com containing the License code.
Fluidmesh 4200 FIBER • The Plug-in Activation dialog will be shown. Check that the given E-mail address is correct, and click the Activate button. • You will receive an E-mail from plugins@fluidmesh.com containing the Activation code. • The Activation Code and Activation Date will be shown in the relevant fields on the Plug-ins web page. • The plug-in Status will change from available to active. 6. Use the Activation code to activate the plug-in. Refer to “Plug-In management” (page 140) for details.
Fluidmesh 4200 FIBER 2. Click the red REMOVE link to the right of the correct plug-in listing. • The web browser will inform you that deactivating the plugin will reboot the unit, and ask for confirmation that you want to deactivate. 3. Confirm the deactivation. • The unit will reboot. • The Deactivation code for the plug-in will be shown to the right of the plug-in listing, in the Plug-in Deactivation Codes section (see below). Figure 82. MANAGE PLUG-INS DIALOG (Plug-in Deactivation Codes section) 4.
Fluidmesh 4200 FIBER • The plug-in control buttons will be shown at the bottom of the web page. 8. Enter the Deactivation code for the plug-in in the Deactivation Code field (Figure 84 (page 159)). Figure 84. Partner Portal Plug-ins page (deactivation code entry) 9. Click the Deactivate button at the bottom of the web page. • The PLUG-IN DEACTIVATION dialog will be shown. 10. To do a normal deactivation, click the Deactivate button.
Fluidmesh 4200 FIBER 1. Log on to the Fluidmesh Partner Portal. 2. Click the Plug-ins link. • The Plug-ins web page will be shown (Figure 85 (page 160)). Figure 85. Partner Portal (Plug-ins web page) 3. Check the selection check-box to the left of the relevant plug-in listing. • The plug-in control buttons will be shown at the bottom of the web page. 4. Enter the unit identification number (5.a.b.c) or the unit serial number of the Fluidmesh unit in the Mesh ID - Serial Number field. 5.
Fluidmesh 4200 FIBER the *.CSV file, then click the Export selected button. Alternatively, export all Activation codes by clicking the Export All button (Figure 86 (page 161)). IMPORTANT If all Activation codes are exported, only the Activation codes that are linked to the unit identification number (5.a.b.c), or the unit serial number of the target unit, will be assigned to the unit. All codes that are not relevant to the unit will remain unused. Figure 86. Plug-ins web page (code export controls) 5.
Fluidmesh 4200 FIBER 7.2.5. Sharing License codes and accepting shared License codes If needed, you can share license codes with other Fluidmesh device users, and also have other Fluidmesh device users share their license codes with you. To share one or more license codes with another Fluidmesh device user, do the steps that follow: 1. Log on to the Fluidmesh Partner Portal. 2. Click the Plug-ins link. • The Plug-ins web page will be shown. 3.
Fluidmesh 4200 FIBER 8. TROUBLESHOOTING The troubleshooting section will allow you to solve the most common problems encountered when configuring and installing Fluidmesh products. 8.1.
Fluidmesh 4200 FIBER 1. Physically access the unit. 2. Use the hardware Reset button to reset the unit to its factory default settings. Refer to “Resetting the unit to factory defaults” (page 147) for more information. 8.4.
Fluidmesh 4200 FIBER 9. ELECTRICAL POWER REQUIREMENTS The following table describes: • The electrical power requirements for each Fluidmesh hardware device type. • Which Fluidmesh hardware devices are capable of receiving power through an IEEE 802.3 Ethernet port (whether from a powersupplying device like a compatible network switch, or from a powerover-Ethernet (PoE) injector), or through a DC IN power supply port, or both.
Fluidmesh 4200 FIBER IEEE 802.3at PoE X X X X X X (voltage range at PD: 42.5V to 57V) DC IN Permanent DC power, min. 24V max. 60V X EN 50155 compliance X X X X X at 48V Table 11. Individual power requirements (FM FM 4200 MOBI+GPS to FM 4800) PoE FM 4200 MOBI +GPS FM 4200 FIBER FM 3500 ENDO FM 4500 MOBI FM 4500 FIBER FM 4800 48V passive PoE X X X X X X IEEE 802.
Fluidmesh 4200 FIBER 10. HEAT RADIATION DATA When in use, all Fluidmesh gateway units and radio transceivers generate heat as a by-product of electrical activity.
Fluidmesh 4200 FIBER 11. FEDERAL COMMUNICATIONS COMMISSION (FCC) RADIO INTERFERENCE STATEMENT This equipment has been tested and found to comply with the limits for a Class A digital device, pursuant to part 15 of the FCC Rules. These limits are designed to provide reasonable protection against harmful interference when the equipment is operated in a commercial environment.
Fluidmesh 4200 FIBER (1) l'appareil ne doit pas produire de brouillage, et, and (2) l'utilisateur de l'appareil doit accepter tout brouillage radioelectrique subi, meme si le brouillage est susceptible d'en compromettre le fonctionnement. IC RF Radiation Exposure Statement: This equipment complies with IC radiation exposure limits set forth for an uncontrolled environment. This equipment should be installed and operated with minimum distance 21cm between the radiator & your body.
Fluidmesh 4200 FIBER publque a l’exterieur de batiments, une licence de l’IBPT est requise. Pour les enregistrements et licences, veuillez contacter l’IBPT. France Vous pouvez contacter l’Autorite de Regulation des Telecommunications (http://www.art-telecom.fr) pour de plus amples renseignements.
Fluidmesh 4200 FIBER 12. NOTICES AND COPYRIGHT WARNING Installation of Fluidmesh hardware devices and their supporting infrastructure must be done by suitably qualified personnel only. In some countries, installation by a certified electrician may be required. Fluidmesh hardware installations must comply with all applicable local legislation. WARNING Never disassemble a Fluidmesh hardware device to any extent that is not described in the relevant device user's manual.
Fluidmesh 4200 FIBER information. In no event shall Fluidmesh Networks LLC be held liable for any incidental, consequential or special damages, whether based on tort, contract or otherwise, arising out of or in connection with this manual, the software or other information contained herein, or use thereof. Fluidmesh Networks LLC, reserves the right to make any modification to this manual or the information contained herein at any time, without notice.
Fluidmesh 4200 FIBER 13. FLUIDMESH END-USER LICENSE AGREEMENT 13.1. Preamble This License Agreement strictly prohibits you from using the Fluidmesh Firmware on any device other than a Fluidmesh Device. You are also prohibited from removing or modifying any Fluidmesh copyright notice, trademark or user interface of the Fluidmesh Firmware or any Fluidmesh Device. The Fluidmesh Firmware is copyright-protected material under United States and international copyright and other applicable laws.
Fluidmesh 4200 FIBER 'Fluidmesh Firmware' means the firmware in object code form made available by Fluidmesh for Fluidmesh Devices; and 'You' and 'Your' mean the company, entity or individual who owns or otherwise rightfully acquires the Fluidmesh Device into which the Fluidmesh Firmware will be incorporated. 13.4.
Fluidmesh 4200 FIBER (f) remove any Fluidmesh copyright notice or Fluidmesh branding from the Fluidmesh Firmware or modify any user interface of the Fluidmesh Firmware or Fluidmesh Device. Fluidmesh Devices must be properly installed and they are sold for installation by a professional installer only. Fluidmesh Devices must be installed by a professional installer of wireless networking products certified by Fluidmesh and they are not designed for installation by the general public.
Fluidmesh 4200 FIBER 13.7. Termination This license will continue until terminated. Unauthorized copying of the Fluidmesh Firmware or failure to comply with the above restrictions will result in automatic termination of this Agreement and will make other legal remedies available to Fluidmesh.
Fluidmesh 4200 FIBER in accordance with Fluidmesh’s Privacy Policy.
Fluidmesh 4200 FIBER exceed five hundred United States dollars (US$500). You acknowledge that this provision reflects a reasonable allocation of risk. 13.12. Exclusion of liability for emergency services Fluidmesh does not support, nor are the services intended to support or carry, emergency calls to any emergency services, including but not limited to 911 dialing.
Fluidmesh 4200 FIBER undertakings (including obtaining any necessary export license or other governmental approval), prior to operating the Fluidmesh Devices and Fluidmesh Firmware, or exporting, re-exporting, releasing or otherwise making the Fluidmesh Devices and Fluidmesh Firmware available outside the U.S.
Fluidmesh 4200 FIBER 14. CONTACT US Worldwide Headquarters: Fluidmesh Networks LLC 81 Prospect Street Brooklyn, New York 11201 United States of America Tel. +1 (617) 209 -6080 Fax. +1 (866) 458-1522 info@fluidmesh.com Technical Support desk: support@fluidmesh.com www.fluidmesh.com Regional headquarters for Europe, the Middle East and Africa: Tel. +39 02 0061 6189 Regional headquarters for the United Kingdom: Tel. +44 2078 553 132 Regional headquarters for France: Tel.