
User Guide


Modules
Grouped Items
Sometimes front panel items are grouped together. This is determined by the way that the modules are constructed. We’ll talk about how this
comes about later on so for now we’ll just talk about what happens when it occurs.
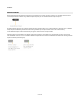
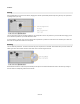
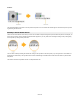
Grouped items are indicated by a thin dotted line around the items. The only way that grouped items behave differently from those that are
not grouped is that they are constrained to appear in the same draw order relative to each other. For example, if you send one item in the
group backwards, all the other items in the group will move backwards too.
Client Area
On occasions you may need to change the size of a front panel without changing the size of the module. This can happen when the number
of module inputs or outputs imposes a minimum size on the module but you want the height of front panel to be smaller.
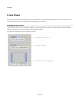
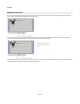
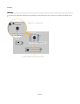
When the front panel is unlocked you’ll see a thick dark grey border around the panel edge. This defines the client area. You can drag the
borders around to change the size of the client area. When an edge is moved from it’s standard position it changes to a darker grey colour. Note
that when this happens the edge becomes detached from the module boundary and will not resize when the module resizes unless it is forced to
do so. You can reattach an edge to the module by dragging it back to it’s original position
Hiding the Front Panel
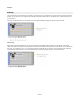
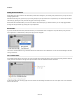
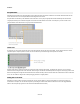
Sometimes you want a module to have a front panel but you don’t want to display it. This may be because it is too big and you want your
schematic to be compact. You can hide the front panel by minimizing the module. First select the module then click on the Toggle Minimize
button on the front panel (or right-click on the module and select Minimize Front Panel).
59 of 212