
User Guide


Components & Links
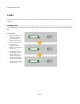
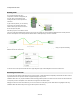
3. The Wireless Input and Output must have the same connector type
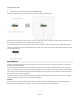
When a link is established the connection indicators on the Wireless Input and Output will light up.
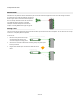
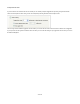
Wireless links only work down the module hierarchy, you can’t link back upwards. Also, the range of a wireless output only extends as far as
the next wireless output below it which has the same label and connector type.
The same wireless output can connect to multiple wireless inputs and vice-versa so long as they conform to the 3 criteria described above.
There is another wireless component called a Module Wireless Output. This is used to make a wireless module. See the Modules section for
more information about this.
Follow Wireless
Wireless links are great for keeping your schematics tidy but they have one downside: they can be quite difficult to follow. To help with this
we have the Follow Wireless feature.
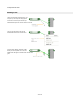
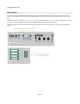
To use this simply select a Wireless Input or Wireless Output and either right-click and select Follow Wireless from the menu or press the
TAB key. The schematic will jump to the first connecting wireless Output or Input. The path of the link will also be indicated on the Navigator.
The connecting wireless component will be highlighted and a label below it will show how many matching wireless components there are and
the index of the one that is currently highlighted.
You can then right-click on an area of empty schematic and select Next Wireless Component or press TAB again. Eventually you will TAB
back to the component you started with – the source Wireless component.
EXAMPLE
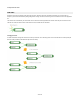
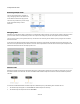
Below we have one of the standard toolbox modules. We've moved into a sub module called MinMax. We want to see what the Module
Wireless Out component called Max is connecting to. All we do is select the component and press the TAB key.
40 of 212