
User Guide

User Interface
Tagging Components
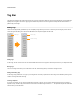
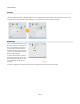
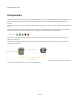
Once you have some tags you can then add them to components in the toolbox. To change the tags for a component click the tag button for
that component. This is located at the bottom-right corner of each component in the toolbox.
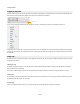
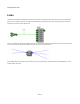
A pop-up menu will appear with all the tags on the tag bar. Click on an unchecked tag to add it or a checked tag to remove it.
Components can have more than one tag. This means that you don't have to pigeon hole components based on one particular characteristic.
For example, the Float Array Abs component could have an Array tag and a Maths tag. The tags for each component are shown to the left of
the tag button.
Using Tags
Now that you have your tag bar set up and your tags applied to components you can use the tag bar to filter the toolbox and help you locate
components more quickly.
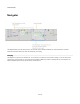
Filtering by a Tag
To filter by a single tag, just click on it. The tag will show as selected and the toolbox will filter accordingly. Tags are applied in combination
with any filters set on the Filter Pane.
If you click on a different tag the previous one will automatically be deselected. To filter by more than one tag, hold SHIFT as you click.
Locking Tags
It may be that you only want to work with a particular set of components. In this case you can lock a tag in place by double-clicking on it. The
tag will remain selected until you click on it again.
Clearing Tags
You can clear tags by clicking on them or you can clear all tags in one go by right-clicking anywhere on the tag bar.
12 of 212
Tag Button