
User Guide

Ruby Component
Interaction
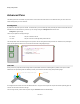
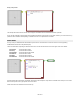
In the previous section we saw how you can draw to a front panel using a Ruby Component. In this section we'll talk about handling mouse
events from a front panel.
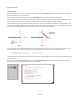
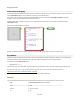
You'll need a View input set up in exactly the same way as for the drawing. Alternatively, if you just want to handle mouse event input you
can create a Mouse connector instead of the View. The way you handle events within the Ruby component is exactly the same in both
cases.
Overview
You will recall from the previous section that for drawing FlowBotics Studio looked for a draw method in the Ruby component. Mouse events
are handled in a very similar way. For each type of event FlowBotics Studio looks for a particular method in your Ruby component. If it finds it
then the details of the event are passed to that method so that it can respond.
There are ten methods that FlowBotics Studio looks for. They all take the same set of input parameters. There is an option first parameter
which is the input connector reference (an integer or label string). You only need this if you have multiple Views connected to your Ruby
component. In the vast majority of cases this will not be so and so you don't need to worry about the connector reference parameter.
The main parameters are the x and y coordinates. These are both Floats and are in grid square units.
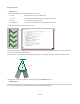
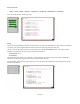
For example, to define the method to handle left mouse clicks:
def mouseLDown x,y
end
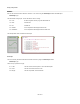
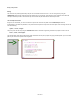
If you had more than one View or Mouse connector then you can add the connector reference so that you can differentiate between arriving
events:
def mouseLDown i,x,y
end
We'll now look at all 10 methods in detail.
Handling Mouse Events
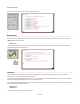
The most important method you need to define is isInMousePoint because this is what tells FlowBotics Studio that you accept mouse
events. Without this you'll get no mouse events whatsoever.
The method needs to return either true or false to tell FlowBotics Studio whether it handles mouse events or not (you can also return 1 or 0).
148 of 212