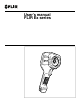
User’s manual FLIR Ex series
User’s manual FLIR Ex series #T559828; r.
Table of contents 1 Disclaimers ........................................................................................1 1.1 Legal disclaimer ......................................................................... 1 1.2 Usage statistics .......................................................................... 1 1.3 Changes to registry ..................................................................... 1 1.4 U.S. Government Regulations........................................................ 1 1.
Table of contents 8.4 8.5 8.6 8.7 8.8 8.9 8.10 8.11 8.12 8.13 8.14 8.15 8.16 8.17 8.18 8.19 8.3.3 Naming convention......................................................... 18 8.3.4 Procedure .................................................................... 18 Recalling an image.................................................................... 18 8.4.1 General........................................................................ 18 8.4.2 Procedure .....................................
Table of contents 8.20 8.21 8.22 8.23 Performing a non-uniformity correction (NUC) ................................. 27 8.20.1 What is a non-uniformity correction?................................... 27 8.20.2 When to perform a non-uniformity correction? ...................... 27 8.20.3 Procedure .................................................................... 27 Configuring Wi-Fi ...................................................................... 27 8.21.
Table of contents 13.5 13.4.2 Figure.......................................................................... 67 Draft ...................................................................................... 68 13.5.1 General........................................................................ 68 13.5.2 Figure.......................................................................... 68 14 About FLIR Systems .......................................................................... 70 14.
1 Disclaimers 1.1 Legal disclaimer All products manufactured by FLIR Systems are warranted against defective materials and workmanship for a period of one (1) year from the delivery date of the original purchase, provided such products have been under normal storage, use and service, and in accordance with FLIR Systems instruction.
1 Disclaimers 1.9 EULA Terms Qt4 Core and Qt4 GUI, Copyright ©2013 Nokia Corporation and FLIR Systems AB. This Qt library is a free software; you can redistribute it and/or modify it under the terms of the GNU Lesser General Public License as published by the Free Software Foundation; either version 2.1 of the License, or (at your option) any later version. This library is distributed in the hope that it will be useful, #T559828; r.
2 Safety information WARNING Applicability: Class B digital devices. This equipment has been tested and found to comply with the limits for a Class B digital device, pursuant to Part 15 of the FCC Rules. These limits are designed to provide reasonable protection against harmful interference in a residential installation.
2 Safety information WARNING Applicability: Cameras with one or more batteries. Only use the correct equipment to remove the electrical power from the battery. If you do not use the correct equipment, you can decrease the performance or the life cycle of the battery. If you do not use the correct equipment, an incorrect flow of current to the battery can occur. This can cause the battery to become hot, or cause an explosion. Injury to persons can occur.
2 Safety information CAUTION Applicability: Cameras with one or more batteries. Do not put the batteries in or near a fire, or into direct sunlight. When the battery becomes hot, the built-in safety equipment becomes energized and can stop the battery charging procedure. If the battery becomes hot, damage can occur to the safety equipment and this can cause more heat, damage or ignition of the battery. CAUTION Applicability: Cameras with one or more batteries.
2 Safety information CAUTION Applicability: Cameras with one or more batteries. The temperature range through which you can remove the electrical power from the battery is -15°C to +50°C (+5°F to +122°F), unless other information is specified in the user documentation or technical data. If you operate the battery out of this temperature range, it can decrease the performance or the life cycle of the battery. CAUTION Applicability: Cameras with one or more batteries.
3 Notice to user 3.1 User-to-user forums Exchange ideas, problems, and infrared solutions with fellow thermographers around the world in our user-to-user forums. To go to the forums, visit: http://forum.infraredtraining.com/ 3.2 Calibration We recommend that you send in the camera for calibration once a year. Contact your local sales office for instructions on where to send the camera. 3.
3 Notice to user 3.7 Important note about this manual FLIR Systems issues generic manuals that cover several cameras within a model line. This means that this manual may contain descriptions and explanations that do not apply to your particular camera model. 3.8 Note about authoritative versions The authoritative version of this publication is English. In the event of divergences due to translation errors, the English text has precedence. Any late changes are first implemented in English.
4 Customer help 4.1 General For customer help, visit: http://support.flir.com 4.2 Submitting a question To submit a question to the customer help team, you must be a registered user. It only takes a few minutes to register online. If you only want to search the knowledgebase for existing questions and answers, you do not need to be a registered user. When you want to submit a question, make sure that you have the following information to hand: • The camera model #T559828; r.
4 Customer help • The camera serial number • The communication protocol, or method, between the camera and your device (for example, SD card reader, HDMI, Ethernet, USB, or FireWire) • Device type (PC/Mac/iPhone/iPad/Android device, etc.) • Version of any programs from FLIR Systems • Full name, publication number, and revision number of the manual 4.
5 Quick Start Guide 5.1 Procedure Follow this procedure: 1. Charge the battery. You can do this in three different ways: • Charge the battery using the FLIR stand-alone battery charger. • Charge the battery using the FLIR power supply. • Charge the battery using a USB cable connected to a computer. Note Charging the camera using a USB cable connected to a computer takes considerably longer than using the FLIR power supply or the FLIR stand-alone battery charger. 2. 3. 4. 5.
6 List of accessories and services Product name Part number Battery T198530 Battery charger incl power supply T198531 Car charger T198532 FLIR Tools+ (license only) T198583 Hard transport case FLIR Ex-series T198528 One year extended warranty for Ex or ix series T199806 Pouch FLIR Ex and ix series T198529 Power supply USB-micro T198534 Tool belt T911093 USB cable Std A <-> Micro B T198533 Note FLIR Systems reserves the right to discontinue models, parts or accessories, and other item
7 Description 7.1 Camera parts 7.1.1 Figure 7.1.2 Explanation 1. 2. 3. 4. 5. Digital camera lens. Infrared lens. Lever to open and close the lens cap. Trigger to save images. Battery. #T559828; r.
7 Description 7.2 Keypad 7.2.1 Figure 7.2.2 Explanation 1. Camera screen. 2. Archive button Function: . • Push to open the image archive. 3. Navigation pad. Function: • Push left/right or up/down to navigate in menus, submenus, and dialog boxes. • Push the center to confirm. 4. Cancel button Function: . • Push to cancel a choice. • Push to go back into the menu system. 5. On/off button Function: • Push the button to turn on the camera.
7 Description 7.3 Connectors 7.3.1 Figure 7.3.2 Explanation The purpose of this USB mini-B connector is the following: • Charging the battery using the FLIR power supply. • Charging the battery using a USB cable connected to a computer. Note Charging the camera using a USB cable connected to a computer takes considerably longer than using the FLIR power supply or the FLIR stand-alone battery charger. • Moving images from the camera to a computer for further analysis in FLIR Tools. Note 7.
7 Description 3. 4. 5. 6. Spotmeter. Result table. Status icons. Temperature scale. #T559828; r.
8 Operation 8.1 Charging the battery WARNING Make sure that you install the socket-outlet near the equipment and that it is easy to get access to. 8.1.1 Charging the battery using the FLIR power supply Follow this procedure: 1. Connect the power supply to a wall outlet. 2. Connect the power supply cable to the USB connector on the camera. NOTE The charging time for a fully depleted battery is 2 hours. 8.1.2 Charging the battery using the FLIR stand-alone battery charger. Follow this procedure: 1.
8 Operation 8.2 Turning on and turning off the camera • Push the button to turn on the camera. • Push and hold the button for less than 5 seconds to put the camera in standby mode. The camera then automatically turns off after 48 hours. • Push and hold the 8.3 button for more than 10 seconds to turn off the camera. Saving an image 8.3.1 General You can save multiple images to the internal camera memory. 8.3.2 Image capacity Approximately 500 images can be saved to the internal camera memory. 8.3.
8 Operation 4. To return to live mode, push the Cancel button ton 8.5 repeatedly or push the Archive but- . Deleting an image 8.5.1 General You can delete one or more images from the internal camera memory. 8.5.2 Procedure Follow this procedure: 1. 2. 3. 4. Push the Archive button . Push the navigation pad left/right or up/down to select the image you want to view. Push the center of the navigation pad. This displays the selected image. Push the center of the navigation pad. This displays a toolbar.
8 Operation 8.8 Measuring the hottest temperature within an area 8.8.1 General You can measure the hottest temperature within an area. This displays a moving spotmeter that indicates the hottest temperature. 8.8.2 Procedure Follow this procedure: 1. Push the center of the navigation pad. This displays a toolbar. 2. On the toolbar, select Measurement 3. On the toolbar, select Hot spot . This displays a toolbar. . 8.9 Measuring the coldest temperature within an area 8.9.
8 Operation 3. On the toolbar, select a new color palette. 8.12 Working with color alarms 8.12.1 General By using color alarms (isotherms), anomalies can easily be discovered in an infrared image. The isotherm command applies a contrasting color to all pixels with a temperature above or below the specified temperature level. 8.12.2 Image examples This table explains the different color alarms (isotherms). Image Color alarm Below alarm Above alarm 8.12.3 Procedure Follow this procedure: 1.
8 Operation 8.13 Changing image mode 8.13.1 General The camera can operate in five different image modes: • Thermal MSX (Multi Spectral Dynamic Imaging): The camera displays an infrared image where the edges of the objects are enhanced. • Thermal: The camera displays a fully thermal image. • Picture-in-picture: The camera displays a digital camera image with a superimposed infrared image frame.
8 Operation • Digital camera: The camera displays a digital camera image. To display a good fusion image (Thermal MSX, Picture-in-picture, and Thermal blending modes), the camera must make adjustments to compensate for the small difference in position between the digital camera lens and the infrared lens. To adjust the image accurately, the camera requires the alignment distance (i.e., the distance to the object). 8.13.2 Procedure Follow this procedure: 1. Push the center of the navigation pad.
8 Operation analysis difficult. You can analyze the building in more detail if you change the temperature scale to values close to the temperature of the building. Automatic 8.14.2.2 Manual Example 2 Here are two infrared images of an isolator in a power line. To make it easier to analyze the temperature variations in the isolator, the temperature scale in the right image has been changed to values close to the temperature of the isolator. Automatic 8.14.
8 Operation 8.15 Setting the emissivity as a surface property 8.15.1 General To measure temperatures accurately, the camera must know what kind of surface you are measuring. You can choose between the following surface properties: • Matt. • Semi-matt. • Semi-glossy. For more information about emissivity, see section 16 Thermographic measurement techniques, page 75. 8.15.2 Procedure Follow this procedure: 1. Push the center of the navigation pad. This displays a toolbar. 2. 3. 4. 5.
8 Operation 8.17 Changing the emissivity as a custom value 8.17.1 General For very precise measurements, you may need to set the emissivity, instead of selecting a surface property or a custom material. You also need to understand how emissivity and reflectivity affect measurements, rather than just simply selecting a surface property. Emissivity is a property that indicates how much radiation originates from an object as opposed to being reflected by it.
8 Operation 8.19 Changing the distance between the object and the camera 8.19.1 General To measure temperatures accurately, the camera requires the distance between the camera and the object. 8.19.2 Procedure Follow this procedure: 1. Push the center of the navigation pad. This displays a toolbar. 2. On the toolbar, select Settings . This displays a dialog box. 3. In the dialog box, select Measurement parameters. This displays a dialog box. 4. In the dialog box, select Distance.
8 Operation 8.21.1 Setting up a peer-to-peer connection (most common use) Follow this procedure: 1. Push the center of the navigation pad. This displays a toolbar. 2. 3. 4. 5. 6. On the toolbar, select Settings . This displays a dialog box. Select Device settings and push the center of the navigation pad. Select Wi-Fi and push the center of the navigation pad. Select Share and push the center of the navigation pad. (Optional step.
8 Operation 8.22.1.2 Save options • Photo as separate JPEG: When this menu command is selected, the digital photo from the visual camera is saved at its full field of view as a separate JPEG image. 8.22.1.3 Device settings • Language, time & units: ◦ ◦ ◦ ◦ ◦ Language. Temperature unit. Distance unit. Date & time. Date & time format. • Wi-Fi ◦ Off ◦ Share ◦ Connect to network – Networks • Reset options: ◦ Reset default camera mode. ◦ Reset device settings to factory default.
8 Operation 8.23.2 Procedure Follow this procedure: 1. 2. 3. 4. 5. Start FLIR Tools. Start the camera. Connect the camera to the computer using the USB cable. On the Help menu in FLIR Tools, click Check for updates. Follow the on-screen instructions. #T559828; r.
9 Technical data Table of contents 9.1 Online field-of-view calculator............................................................. 31 9.2 Note about technical data................................................................... 31 9.3 Note about authoritative versions........................................................ 31 9.4 FLIR E4 ............................................................................................ 32 9.5 FLIR E4 (incl. Wi-Fi) ...................................
9 Technical data 9.4 FLIR E4 P/N: 63901-0101 Rev.: 41166 General description The FLIR Ex series cameras are point-and-shoot infrared cameras that give you access to the infrared world. A FLIR Ex series camera is an affordable replacement for an infrared thermometer, providing a thermal image with temperature information in every pixel. The new MSX and visual formats make the cameras incomparably easy to use.
9 Technical data Measurement analysis Spotmeter Center spot Emissivity correction Variable from 0.1 to 1.
9 Technical data Physical data Camera weight, incl. battery 0.575 kg (1.27 lb.) Camera size (L × W × H) 244 × 95 × 140 mm (9.6 × 3.7 × 5.5 in.) Color Black and gray Certifications Certification UL, CSA, CE, PSE and CCC Shipping information Packaging, type List of contents Cardboard box • • • • • • Infrared camera Hard transport case Battery (inside camera) USB cable Power supply/charger with EU, UK, US and Australian plugs Printed documentation Packaging, weight 2.9 kg (6.4 lb.
9 Technical data 9.5 FLIR E4 (incl. Wi-Fi) P/N: 63906-0604 Rev.: 41166 General description The FLIR Ex series cameras are point-and-shoot infrared cameras that give you access to the infrared world. A FLIR Ex series camera is an affordable replacement for an infrared thermometer, providing a thermal image with temperature information in every pixel. The new MSX and visual formats make the cameras incomparably easy to use.
9 Technical data Measurement analysis Spotmeter Center spot Area Box with max./min. Isotherm Above/below/interval Emissivity correction Variable from 0.1 to 1.
9 Technical data Environmental data EMC Radio spectrum • • • • • • WEEE 2012/19/EC RoHs 2011/65/EC C-Tick EN 61000-6-3 EN 61000-6-2 FCC 47 CFR Part 15 Class B • • • ETSI EN 300 328 FCC 47 CSR Part 15 RSS-247 Issue 1 Encapsulation IP 54 (IEC 60529) Shock 25 g (IEC 60068-2-27) Vibration 2 g (IEC 60068-2-6) Drop 2 m (6.6 ft.) Physical data Camera weight, incl. battery 0.575 kg (1.27 lb.) Camera size (L × W × H) 244 × 95 × 140 mm (9.6 × 3.7 × 5.5 in.
9 Technical data 9.6 FLIR E5 P/N: 63905-0501 Rev.: 41166 General description The FLIR Ex series cameras are point-and-shoot infrared cameras that give you access to the infrared world. A FLIR Ex series camera is an affordable replacement for an infrared thermometer, providing a thermal image with temperature information in every pixel. The new MSX and visual formats make the cameras incomparably easy to use.
9 Technical data Measurement analysis Spotmeter Center spot Area Box with max./min. Emissivity correction Variable from 0.1 to 1.
9 Technical data Environmental data Vibration 2 g (IEC 60068-2-6) Drop 2 m (6.6 ft.) Physical data Camera weight, incl. battery 0.575 kg (1.27 lb.) Camera size (L × W × H) 244 × 95 × 140 mm (9.6 × 3.7 × 5.5 in.
9 Technical data 9.7 FLIR E5 (incl. Wi-Fi) P/N: 63909-0904 Rev.: 41166 General description The FLIR Ex series cameras are point-and-shoot infrared cameras that give you access to the infrared world. A FLIR Ex series camera is an affordable replacement for an infrared thermometer, providing a thermal image with temperature information in every pixel. The new MSX and visual formats make the cameras incomparably easy to use.
9 Technical data Measurement analysis Spotmeter Center spot Area Box with max./min. Isotherm Above/below/interval Emissivity correction Variable from 0.1 to 1.
9 Technical data Environmental data EMC Radio spectrum • • • • • • WEEE 2012/19/EC RoHs 2011/65/EC C-Tick EN 61000-6-3 EN 61000-6-2 FCC 47 CFR Part 15 Class B • • Standard: 802.11 b/g/n Frequency range: ◦ ◦ • 2400–2480 MHz 5150–5260 MHz Max. output power: 15 dBm Encapsulation IP 54 (IEC 60529) Shock 25 g (IEC 60068-2-27) Vibration 2 g (IEC 60068-2-6) Drop 2 m (6.6 ft.) Physical data Camera weight, incl. battery 0.575 kg (1.27 lb.) Camera size (L × W × H) 244 × 95 × 140 mm (9.6 × 3.
9 Technical data • T198583; FLIR Tools+ (download card incl. license key) • T199233; FLIR Atlas SDK for .NET • T199234; FLIR Atlas SDK for MATLAB #T559828; r.
9 Technical data 9.8 FLIR E6 P/N: 63902-0202 Rev.: 41166 General description The FLIR Ex series cameras are point-and-shoot infrared cameras that give you access to the infrared world. A FLIR Ex series camera is an affordable replacement for an infrared thermometer, providing a thermal image with temperature information in every pixel. The new MSX and visual formats make the cameras incomparably easy to use.
9 Technical data Measurement analysis Spotmeter Center spot Area Box with max./min. Emissivity correction Variable from 0.1 to 1.
9 Technical data Environmental data Vibration 2 g (IEC 60068-2-6) Drop 2 m (6.6 ft.) Physical data Camera weight, incl. battery 0.575 kg (1.27 lb.) Camera size (L × W × H) 244 × 95 × 140 mm (9.6 × 3.7 × 5.5 in.
9 Technical data 9.9 FLIR E6 (incl. Wi-Fi) P/N: 63907-0704 Rev.: 41166 General description The FLIR Ex series cameras are point-and-shoot infrared cameras that give you access to the infrared world. A FLIR Ex series camera is an affordable replacement for an infrared thermometer, providing a thermal image with temperature information in every pixel. The new MSX and visual formats make the cameras incomparably easy to use.
9 Technical data Measurement analysis Spotmeter Center spot Area Box with max./min. Isotherm Above/below/interval Emissivity correction Variable from 0.1 to 1.
9 Technical data Environmental data EMC Radio spectrum • • • • • • WEEE 2012/19/EC RoHs 2011/65/EC C-Tick EN 61000-6-3 EN 61000-6-2 FCC 47 CFR Part 15 Class B • • • ETSI EN 300 328 FCC 47 CSR Part 15 RSS-247 Issue 1 Encapsulation IP 54 (IEC 60529) Shock 25 g (IEC 60068-2-27) Vibration 2 g (IEC 60068-2-6) Drop 2 m (6.6 ft.) Physical data Camera weight, incl. battery 0.575 kg (1.27 lb.) Camera size (L × W × H) 244 × 95 × 140 mm (9.6 × 3.7 × 5.5 in.
9 Technical data 9.10 FLIR E8 P/N: 63903-0303 Rev.: 41166 General description The FLIR Ex series cameras are point-and-shoot infrared cameras that give you access to the infrared world. A FLIR Ex series camera is an affordable replacement for an infrared thermometer, providing a thermal image with temperature information in every pixel. The new MSX and visual formats make the cameras incomparably easy to use. The FLIR Ex series cameras are user-friendly, compact, and rugged, for use in harsh environments.
9 Technical data Measurement analysis Spotmeter Center spot Area Box with max./min. Emissivity correction Variable from 0.1 to 1.
9 Technical data Environmental data Vibration 2 g (IEC 60068-2-6) Drop 2 m (6.6 ft.) Physical data Camera weight, incl. battery 0.575 kg (1.27 lb.) Camera size (L × W × H) 244 × 95 × 140 mm (9.6 × 3.7 × 5.5 in.
9 Technical data 9.11 FLIR E8 (incl. Wi-Fi) P/N: 63908-0805 Rev.: 41166 General description The FLIR Ex series cameras are point-and-shoot infrared cameras that give you access to the infrared world. A FLIR Ex series camera is an affordable replacement for an infrared thermometer, providing a thermal image with temperature information in every pixel. The new MSX and visual formats make the cameras incomparably easy to use.
9 Technical data Measurement analysis Spotmeter Center spot Area Box with max./min. Isotherm Above/below/interval Emissivity correction Variable from 0.1 to 1.
9 Technical data Environmental data EMC Radio spectrum • • • • • • WEEE 2012/19/EC RoHs 2011/65/EC C-Tick EN 61000-6-3 EN 61000-6-2 FCC 47 CFR Part 15 Class B • • • ETSI EN 300 328 FCC 47 CSR Part 15 RSS-247 Issue 1 Encapsulation IP 54 (IEC 60529) Shock 25 g (IEC 60068-2-27) Vibration 2 g (IEC 60068-2-6) Drop 2 m (6.6 ft.) Physical data Camera weight, incl. battery 0.575 kg (1.27 lb.) Camera size (L × W × H) 244 × 95 × 140 mm (9.6 × 3.7 × 5.5 in.
9 Technical data • T199234; FLIR Atlas SDK for MATLAB #T559828; r.
10 Mechanical drawings [See next page] #T559828; r.
© 2012, FLIR Systems, Inc. All rights reserved worldwide. No part of this drawing may be reproduced, stored in a retrieval system, or transmitted in any form, or by any means, electronic, mechanical, photocopying, recording, or otherwise, without written permission from FLIR Systems, Inc. Specifications subject to change without further notice. Dimensional data is based on nominal values. Products may be subject to regional market considerations. License procedures may apply.
© 2012, FLIR Systems, Inc. All rights reserved worldwide. No part of this drawing may be reproduced, stored in a retrieval system, or transmitted in any form, or by any means, electronic, mechanical, photocopying, recording, or otherwise, without written permission from FLIR Systems, Inc. Specifications subject to change without further notice. Dimensional data is based on nominal values. Products may be subject to regional market considerations. License procedures may apply.
11 CE Declaration of conformity [See next page] #T559828; r.
12 Cleaning the camera 12.1 Camera housing, cables, and other items 12.1.1 Liquids Use one of these liquids: • Warm water • A weak detergent solution 12.1.2 Equipment A soft cloth 12.1.3 Procedure Follow this procedure: 1. Soak the cloth in the liquid. 2. Twist the cloth to remove excess liquid. 3. Clean the part with the cloth. CAUTION Do not apply solvents or similar liquids to the camera, the cables, or other items. This can cause damage. 12.2 Infrared lens 12.2.
12 Cleaning the camera CAUTION • • Be careful when you clean the infrared lens. The lens has a delicate anti-reflective coating. Do not clean the infrared lens too vigorously. This can damage the anti-reflective coating. #T559828; r.
13 Application examples 13.1 Moisture & water damage 13.1.1 General It is often possible to detect moisture and water damage in a house by using an infrared camera. This is partly because the damaged area has a different heat conduction property and partly because it has a different thermal capacity to store heat than the surrounding material. Many factors can come into play as to how moisture or water damage will appear in an infrared image.
13 Application examples 13.2.2 Figure The image below shows a connection of a cable to a socket where improper contact in the connection has resulted in local temperature increase. 13.3 Oxidized socket 13.3.1 General Depending on the type of socket and the environment in which the socket is installed, oxides may occur on the socket's contact surfaces. These oxides can lead to locally increased resistance when the socket is loaded, which can be seen in an infrared image as local temperature increase.
13 Application examples 13.4 Insulation deficiencies 13.4.1 General Insulation deficiencies may result from insulation losing volume over the course of time and thereby not entirely filling the cavity in a frame wall. An infrared camera allows you to see these insulation deficiencies because they either have a different heat conduction property than sections with correctly installed insulation, and/or show the area where air is penetrating the frame of the building.
13 Application examples 13.5 Draft 13.5.1 General Draft can be found under baseboards, around door and window casings, and above ceiling trim. This type of draft is often possible to see with an infrared camera, as a cooler airstream cools down the surrounding surface. When you are investigating draft in a house, there should be sub-atmospheric pressure in the house. Close all doors, windows, and ventilation ducts, and allow the kitchen fan to run for a while before you take the infrared images.
13 Application examples #T559828; r.
14 About FLIR Systems FLIR Systems was established in 1978 to pioneer the development of high-performance infrared imaging systems, and is the world leader in the design, manufacture, and marketing of thermal imaging systems for a wide variety of commercial, industrial, and government applications.
14 About FLIR Systems manufacturing plant in Tallinn, Estonia. Direct sales offices in Belgium, Brazil, China, France, Germany, Great Britain, Hong Kong, Italy, Japan, Korea, Sweden, and the USA— together with a worldwide network of agents and distributors—support our international customer base. FLIR Systems is at the forefront of innovation in the infrared camera industry. We anticipate market demand by constantly improving our existing cameras and developing new ones.
14 About FLIR Systems 14.2 Sharing our knowledge Although our cameras are designed to be very user-friendly, there is a lot more to thermography than just knowing how to handle a camera. Therefore, FLIR Systems has founded the Infrared Training Center (ITC), a separate business unit, that provides certified training courses. Attending one of the ITC courses will give you a truly hands-on learning experience.
15 Terms, laws, and definitions Term Absorption and Definition emission2 The capacity or ability of an object to absorb incident radiated energy is always the same as the capacity to emit its own energy as radiation Apparent temperature uncompensated reading from an infrared instrument, containing all radiation incident on the instrument, regardless of its sources3 Color palette assigns different colors to indicate specific levels of apparent temperature.
15 Terms, laws, and definitions Term Definition Qualitative thermography thermography that relies on the analysis of thermal patterns to reveal the existence of and to locate the position of anomalies12 Quantitative thermography thermography that uses temperature measurement to determine the seriousness of an anomaly, in order to establish repair priorities12 Radiative heat transfer Heat transfer by the emission and absorption of thermal radiation Reflected apparent temperature apparent temperatu
16 Thermographic measurement techniques 16.1 Introduction An infrared camera measures and images the emitted infrared radiation from an object. The fact that radiation is a function of object surface temperature makes it possible for the camera to calculate and display this temperature. However, the radiation measured by the camera does not only depend on the temperature of the object but is also a function of the emissivity. Radiation also originates from the surroundings and is reflected in the object.
16 Thermographic measurement techniques 16.2.1.1.1 Method 1: Direct method Follow this procedure: 1. Look for possible reflection sources, considering that the incident angle = reflection angle (a = b). Figure 16.1 1 = Reflection source 2. If the reflection source is a spot source, modify the source by obstructing it using a piece if cardboard. Figure 16.2 1 = Reflection source #T559828; r.
16 Thermographic measurement techniques 3. Measure the radiation intensity (= apparent temperature) from the reflection source using the following settings: • Emissivity: 1.0 • Dobj: 0 You can measure the radiation intensity using one of the following two methods: Figure 16.3 1 = Reflection source Figure 16.4 1 = Reflection source You can not use a thermocouple to measure reflected apparent temperature, because a thermocouple measures temperature, but apparent temperatrure is radiation intensity. 16.2.
16 Thermographic measurement techniques 5. Measure the apparent temperature of the aluminum foil and write it down. The foil is considered a perfect reflector, so its apparent temperature equals the reflected apparent temperature from the surroundings. Figure 16.5 Measuring the apparent temperature of the aluminum foil. 16.2.1.2 Step 2: Determining the emissivity Follow this procedure: 1. Select a place to put the sample. 2.
16 Thermographic measurement techniques Note • Avoid forced convection • Look for a thermally stable surrounding that will not generate spot reflections • Use high quality tape that you know is not transparent, and has a high emissivity you are certain of • This method assumes that the temperature of your tape and the sample surface are the same. If they are not, your emissivity measurement will be wrong. 16.
17 About calibration 17.1 Introduction Calibration of a thermal camera is a prerequisite for temperature measurement. The calibration provides the relationship between the input signal and the physical quantity that the user wants to measure. However, despite its widespread and frequent use, the term “calibration” is often misunderstood and misused. Local and national differences as well as translation-related issues create additional confusion.
17 About calibration measurement capability is carried out during both production and service. Cooled cameras with photon detectors are often calibrated by the user with special software. With this type of software, in theory, common handheld uncooled thermal cameras could be calibrated by the user too. However, as this software is not suitable for reporting purposes, most users do not have it. Non-measuring devices that are used for imaging only do not need temperature calibration.
17 About calibration For instance, one has to ensure that the distance between the blackbody and the camera as well as the diameter of the blackbody cavity are chosen so as to reduce stray radiation and the size-of-source effect. To summarize: a validated protocol must comply with the physical laws for radiance, and not only those for temperature.
18 History of infrared technology Before the year 1800, the existence of the infrared portion of the electromagnetic spectrum wasn't even suspected. The original significance of the infrared spectrum, or simply ‘the infrared’ as it is often called, as a form of heat radiation is perhaps less obvious today than it was at the time of its discovery by Herschel in 1800. Figure 18.1 Sir William Herschel (1738–1822) The discovery was made accidentally during the search for a new optical material.
18 History of infrared technology Moving the thermometer into the dark region beyond the red end of the spectrum, Herschel confirmed that the heating continued to increase. The maximum point, when he found it, lay well beyond the red end – in what is known today as the ‘infrared wavelengths’. When Herschel revealed his discovery, he referred to this new portion of the electromagnetic spectrum as the ‘thermometrical spectrum’.
18 History of infrared technology Figure 18.4 Samuel P. Langley (1834–1906) The improvement of infrared-detector sensitivity progressed slowly. Another major breakthrough, made by Langley in 1880, was the invention of the bolometer. This consisted of a thin blackened strip of platinum connected in one arm of a Wheatstone bridge circuit upon which the infrared radiation was focused and to which a sensitive galvanometer responded.
19 Theory of thermography 19.1 Introduction The subjects of infrared radiation and the related technique of thermography are still new to many who will use an infrared camera. In this section the theory behind thermography will be given. 19.2 The electromagnetic spectrum The electromagnetic spectrum is divided arbitrarily into a number of wavelength regions, called bands, distinguished by the methods used to produce and detect the radiation.
19 Theory of thermography 19.3 Blackbody radiation A blackbody is defined as an object which absorbs all radiation that impinges on it at any wavelength. The apparent misnomer black relating to an object emitting radiation is explained by Kirchhoff’s Law (after Gustav Robert Kirchhoff, 1824–1887), which states that a body capable of absorbing all radiation at any wavelength is equally capable in the emission of radiation. Figure 19.
19 Theory of thermography 19.3.1 Planck’s law Figure 19.3 Max Planck (1858–1947) Max Planck (1858–1947) was able to describe the spectral distribution of the radiation from a blackbody by means of the following formula: where: Wλb Blackbody spectral radiant emittance at wavelength λ. c Velocity of light = 3 × 10⁸ m/s h Planck’s constant = 6.6 × 10⁻³⁴ Joule sec. k Boltzmann’s constant = 1.4 × 10⁻²³ Joule/K. T Absolute temperature (K) of a blackbody. λ Wavelength (μm).
19 Theory of thermography Figure 19.4 Blackbody spectral radiant emittance according to Planck’s law, plotted for various absolute temperatures. 1: Spectral radiant emittance (W/cm2 × 103(μm)); 2: Wavelength (μm) 19.3.
19 Theory of thermography At room temperature (300 K) the peak of radiant emittance lies at 9.7 μm, in the far infrared, while at the temperature of liquid nitrogen (77 K) the maximum of the almost insignificant amount of radiant emittance occurs at 38 μm, in the extreme infrared wavelengths. Figure 19.6 Planckian curves plotted on semi-log scales from 100 K to 1000 K. The dotted line represents the locus of maximum radiant emittance at each temperature as described by Wien's displacement law.
19 Theory of thermography Using the Stefan-Boltzmann formula to calculate the power radiated by the human body, at a temperature of 300 K and an external surface area of approx. 2 m2, we obtain 1 kW. This power loss could not be sustained if it were not for the compensating absorption of radiation from surrounding surfaces, at room temperatures which do not vary too drastically from the temperature of the body – or, of course, the addition of clothing. 19.3.
19 Theory of thermography For highly polished materials ελ approaches zero, so that for a perfectly reflecting material (i.e. a perfect mirror) we have: For a graybody radiator, the Stefan-Boltzmann formula becomes: This states that the total emissive power of a graybody is the same as a blackbody at the same temperature reduced in proportion to the value of ε from the graybody. Figure 19.8 Spectral radiant emittance of three types of radiators.
19 Theory of thermography 19.4 Infrared semi-transparent materials Consider now a non-metallic, semi-transparent body – let us say, in the form of a thick flat plate of plastic material. When the plate is heated, radiation generated within its volume must work its way toward the surfaces through the material in which it is partially absorbed. Moreover, when it arrives at the surface, some of it is reflected back into the interior.
20 The measurement formula As already mentioned, when viewing an object, the camera receives radiation not only from the object itself. It also collects radiation from the surroundings reflected via the object surface. Both these radiation contributions become attenuated to some extent by the atmosphere in the measurement path. To this comes a third radiation contribution from the atmosphere itself.
20 The measurement formula 2. Reflected emission from ambient sources = (1 – ε)τWrefl, where (1 – ε) is the reflectance of the object. The ambient sources have the temperature Trefl. It has here been assumed that the temperature Trefl is the same for all emitting surfaces within the halfsphere seen from a point on the object surface. This is of course sometimes a simplification of the true situation.
20 The measurement formula actual case. The two temperatures are normally less of a problem provided the surroundings do not contain large and intense radiation sources. A natural question in this connection is: How important is it to know the right values of these parameters? It could though be of interest to get a feeling for this problem already here by looking into some different measurement cases and compare the relative magnitudes of the three radiation terms.
20 The measurement formula Figure 20.2 Relative magnitudes of radiation sources under varying measurement conditions (SW camera). 1: Object temperature; 2: Emittance; Obj: Object radiation; Refl: Reflected radiation; Atm: atmosphere radiation. Fixed parameters: τ = 0.88; Trefl = 20°C (+68°F); Tatm = 20°C (+68°F). Figure 20.3 Relative magnitudes of radiation sources under varying measurement conditions (LW camera).
21 Emissivity tables This section presents a compilation of emissivity data from the infrared literature and measurements made by FLIR Systems. 21.1 References 1. Mikaél A. Bramson: Infrared Radiation, A Handbook for Applications, Plenum press, N. Y. 2. William L. Wolfe, George J. Zissis: The Infrared Handbook, Office of Naval Research, Department of Navy, Washington, D.C. 3. Madding, R. P.: Thermographic Instruments and systems.
21 Emissivity tables Table 21.1 T: Total spectrum; SW: 2–5 µm; LW: 8–14 µm, LLW: 6.5–20 µm; 1: Material; 2: Specification; 3: Temperature in °C; 4: Spectrum; 5: Emissivity: 6:Reference (continued) 1 2 3 4 5 6 Aluminum anodized, black, dull 70 SW 0.67 9 Aluminum anodized, black, dull 70 LW 0.95 9 Aluminum anodized, light gray, dull 70 SW 0.61 9 Aluminum anodized, light gray, dull 70 LW 0.97 9 Aluminum as received, plate 100 T 0.
21 Emissivity tables Table 21.1 T: Total spectrum; SW: 2–5 µm; LW: 8–14 µm, LLW: 6.5–20 µm; 1: Material; 2: Specification; 3: Temperature in °C; 4: Spectrum; 5: Emissivity: 6:Reference (continued) 1 2 Asbestos powder Asbestos slate Asphalt paving 3 4 5 6 T 0.40–0.60 1 20 T 0.96 1 4 LLW 0.967 8 Brass dull, tarnished 20–350 T 0.22 1 Brass oxidized 100 T 0.61 2 Brass oxidized 70 SW 0.04–0.09 9 Brass oxidized 70 LW 0.03–0.
21 Emissivity tables Table 21.1 T: Total spectrum; SW: 2–5 µm; LW: 8–14 µm, LLW: 6.5–20 µm; 1: Material; 2: Specification; 3: Temperature in °C; 4: Spectrum; 5: Emissivity: 6:Reference (continued) 1 2 3 4 5 6 Brick waterproof 17 SW 0.87 5 Bronze phosphor bronze 70 SW 0.08 9 Bronze phosphor bronze 70 LW 0.06 9 Bronze polished 50 T 0.1 1 Bronze porous, rough 50–150 T 0.55 1 Bronze powder T 0.76–0.80 1 Carbon candle soot T 0.95 2 Carbon charcoal powder T 0.
21 Emissivity tables Table 21.1 T: Total spectrum; SW: 2–5 µm; LW: 8–14 µm, LLW: 6.5–20 µm; 1: Material; 2: Specification; 3: Temperature in °C; 4: Spectrum; 5: Emissivity: 6:Reference (continued) 1 2 Copper dioxide Copper oxide 3 4 5 6 powder T 0.84 1 red, powder T 0.70 1 Ebonite Emery coarse Enamel T 0.89 1 80 T 0.85 1 20 T 0.9 1 Enamel lacquer 20 T 0.85–0.95 1 Fiber board hard, untreated 20 SW 0.85 6 Fiber board masonite 70 SW 0.
21 Emissivity tables Table 21.1 T: Total spectrum; SW: 2–5 µm; LW: 8–14 µm, LLW: 6.5–20 µm; 1: Material; 2: Specification; 3: Temperature in °C; 4: Spectrum; 5: Emissivity: 6:Reference (continued) 1 2 3 4 5 6 Iron and steel oxidized 100 T 0.74 1 Iron and steel oxidized 1227 T 0.89 4 Iron and steel oxidized 125–525 T 0.78–0.82 1 Iron and steel oxidized 200 T 0.79 2 Iron and steel oxidized 200–600 T 0.80 1 Iron and steel oxidized strongly 50 T 0.
21 Emissivity tables Table 21.1 T: Total spectrum; SW: 2–5 µm; LW: 8–14 µm, LLW: 6.5–20 µm; 1: Material; 2: Specification; 3: Temperature in °C; 4: Spectrum; 5: Emissivity: 6:Reference (continued) 1 2 3 4 5 6 Iron, cast unworked 900–1100 T 0.87–0.95 1 Krylon Ultra-flat black 1602 Flat black Room temperature up to 175 LW ≈ 0.96 12 Krylon Ultra-flat black 1602 Flat black Room temperature up to 175 MW ≈ 0.97 12 Lacquer 3 colors sprayed on Aluminum 70 SW 0.50–0.
21 Emissivity tables Table 21.1 T: Total spectrum; SW: 2–5 µm; LW: 8–14 µm, LLW: 6.5–20 µm; 1: Material; 2: Specification; 3: Temperature in °C; 4: Spectrum; 5: Emissivity: 6:Reference (continued) 1 2 3 4 5 6 Nichrome rolled 700 T 0.25 1 Nichrome sandblasted 700 T 0.70 1 Nichrome wire, clean 50 T 0.65 1 Nichrome wire, clean 500–1000 T 0.71–0.79 1 Nichrome wire, oxidized 50–500 T 0.95–0.98 1 Nickel bright matte 122 T 0.
21 Emissivity tables Table 21.1 T: Total spectrum; SW: 2–5 µm; LW: 8–14 µm, LLW: 6.5–20 µm; 1: Material; 2: Specification; 3: Temperature in °C; 4: Spectrum; 5: Emissivity: 6:Reference (continued) 1 2 Paint Paint Paint oil Paint oil based, average of 16 colors Paint Paint 4 5 6 chrome green T 0.65–0.70 1 cobalt blue T 0.7–0.8 1 17 SW 0.87 5 100 T 0.94 2 oil, black flat 20 SW 0.94 6 oil, black gloss 20 SW 0.92 6 Paint oil, gray flat 20 SW 0.
21 Emissivity tables Table 21.1 T: Total spectrum; SW: 2–5 µm; LW: 8–14 µm, LLW: 6.5–20 µm; 1: Material; 2: Specification; 3: Temperature in °C; 4: Spectrum; 5: Emissivity: 6:Reference (continued) 1 2 3 4 5 6 Plastic polyurethane isolation board 70 SW 0.29 9 Plastic PVC, plastic floor, dull, structured 70 SW 0.94 9 Plastic PVC, plastic floor, dull, structured 70 LW 0.93 9 Platinum 100 T 0.05 4 Platinum 1000–1500 T 0.14–0.18 1 Platinum 1094 T 0.
21 Emissivity tables Table 21.1 T: Total spectrum; SW: 2–5 µm; LW: 8–14 µm, LLW: 6.5–20 µm; 1: Material; 2: Specification; 3: Temperature in °C; 4: Spectrum; 5: Emissivity: 6:Reference (continued) 1 2 3 4 5 6 Stainless steel sheet, polished 70 LW 0.14 9 Stainless steel sheet, untreated, somewhat scratched 70 SW 0.30 9 Stainless steel sheet, untreated, somewhat scratched 70 LW 0.28 9 Stainless steel type 18-8, buffed 20 T 0.
21 Emissivity tables Table 21.1 T: Total spectrum; SW: 2–5 µm; LW: 8–14 µm, LLW: 6.5–20 µm; 1: Material; 2: Specification; 3: Temperature in °C; 4: Spectrum; 5: Emissivity: 6:Reference (continued) 1 2 Water snow Water snow Wood Wood 3 4 5 6 T 0.8 1 –10 T 0.85 2 17 SW 0.98 5 19 LLW 0.962 8 T 0.5–0.7 1 Wood ground Wood pine, 4 different samples 70 SW 0.67–0.75 9 Wood pine, 4 different samples 70 LW 0.81–0.89 9 Wood planed 20 T 0.8–0.
A note on the technical production of this publication This publication was produced using XML — the eXtensible Markup Language. For more information about XML, please visit http://www.w3.org/XML/ A note on the typeface used in this publication This publication was typeset using Linotype Helvetica™ World. Helvetica™ was designed by Max Miedinger (1910–1980) LOEF (List Of Effective Files) T501027.xml; en-US; AL; 42258; 2017-04-27 T505552.xml; en-US; 9599; 2013-11-05 T505469.
Website last page http://www.flir.com Customer support http://support.flir.com Copyright © 2017, FLIR Systems, Inc. All rights reserved worldwide. Disclaimer Specifications subject to change without further notice. Models and accessories subject to regional market considerations. License procedures may apply. Products described herein may be subject to US Export Regulations. Please refer to exportquestions@flir.com with any questions. Publ. No.