
User's Guide
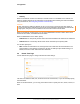
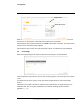


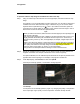
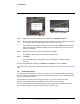
Table Of Contents
- Table of Contents
- Radar Overview
- Installation
- 2.1 Configuring the Radar for Networking
- 2.2 Radar Placement and Orientation
- 2.3 Site Preparation
- 2.4 Installing the Wall Mount Bracket
- 2.5 Connecting the Radar and Installing the Back Box
- 2.6 Installing the Radar Assembly
- 2.7 Uploading a Map Image and Configuring Georeference Settings
- 2.8 Aiming the Radar and Testing Target Detection
- 2.9 Defining Analytics Regions
- 2.10 Pairing a PTZ Camera with the Radar (Optional)
- Operation
- Configuration
- Maintenance and Troubleshooting Tips

427-0101-01-12 Revision 100 September 2020 32
This document does not contain any export-controlled information.
Configuration
Enable or disable digest authentication for the FLIR CGI control interface. The default setting is On
(enabled).
Firewall Settings
For enhanced security, the radar has a firewall that you can enable by clicking On. By default, when
you enable the firewall, the following services are set to Allow, which means they remain enabled
and their default ports remain open:
To disable a service and its default port, click Block.
Caution!
Changes to Services settings do not immediately take effect. To apply changes to these settings,
click Save and then reboot the radar.
4.5 Map Page
On the Map page, you can:
• Upload a reference map image upon which the radar overlays its display and calibrate the radar
to the map.
• Upload a Digital Elevation Model (DEM).
• SSH • Nexus Discovery
• FTP • Nexus SDK
•RTSP •TRK
•UPNP •ICMP
Disabling services and ports can affect product functionality.