
User's Guide
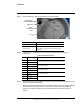
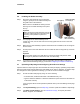
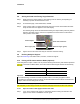
Table Of Contents
- Table of Contents
- Radar Overview
- Installation
- 2.1 Configuring the Radar for Networking
- 2.2 Radar Placement and Orientation
- 2.3 Site Preparation
- 2.4 Installing the Wall Mount Bracket
- 2.5 Connecting the Radar and Installing the Back Box
- 2.6 Installing the Radar Assembly
- 2.7 Uploading a Map Image and Configuring Georeference Settings
- 2.8 Aiming the Radar and Testing Target Detection
- 2.9 Defining Analytics Regions
- 2.10 Pairing a PTZ Camera with the Radar (Optional)
- Operation
- Configuration
- Maintenance and Troubleshooting Tips

427-0101-01-12 Revision 100 September 2020 8
This document does not contain any export-controlled information.
Installation
Step 2 On the login screen, type admin for the user name and the
password for the admin user (default: admin).
When logging in to the radar’s web page for the first time or for the
first time after performing a factory default, specify a new password
for the admin user. Use a strong password consisting of at least 12
characters and at least one uppercase letter, one lowercase letter,
and one number. Passwords can include the following special
characters: |@#~!$&<>+_-.,*?= .
Log back in with the new password. The radar’s View Settings home page opens.
Step 3 Click System Settings, and make
sure the Network page appears.
Step 4 You can click Static IP addressing and
manually specify the radar's
Hostname, IP, Netmask, and
Gateway. You can also specify the
DNS Mode, Name Servers, and MTU
(maximum transmission unit).
For more information about these
settings, see Network Page.
Step 5 Click Save. The radar reboots to
apply the new settings.