
User's Guide
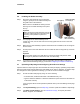
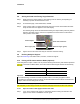
Table Of Contents
- Table of Contents
- Radar Overview
- Installation
- 2.1 Configuring the Radar for Networking
- 2.2 Radar Placement and Orientation
- 2.3 Site Preparation
- 2.4 Installing the Wall Mount Bracket
- 2.5 Connecting the Radar and Installing the Back Box
- 2.6 Installing the Radar Assembly
- 2.7 Uploading a Map Image and Configuring Georeference Settings
- 2.8 Aiming the Radar and Testing Target Detection
- 2.9 Defining Analytics Regions
- 2.10 Pairing a PTZ Camera with the Radar (Optional)
- Operation
- Configuration
- Maintenance and Troubleshooting Tips

427-0101-01-12 Revision 100 September 2020 7
This document does not contain any export-controlled information.
Installation
Step 2 Authenticate the radar.
Right-click the radar and select Login, or click the Login icon in the navigation bar.
In the DNA - Login window, type the password for the admin user (default: admin). Then,
click Login.
In the DNA Discover List, verify that the radar’s status is Online and Authenticated.
Step 3 Configure the radar’s networking settings.
Right-click the radar and select IP Setup, or click the IP Setup icon in the navigation bar.
In the DNA - IP Setup window, you can clear Use DHCP and manually specify the radar’s
IP Address, Mask, and Gateway. Then, click Update and wait for Ok status to appear.
To configure the Elara Radar for networking using its web page:
Step 1 Open the radar’s web page either by double-clicking the radar in the DNA Discover List or
by typing the radar’s IP address in a web browser’s address bar. The radar’s web page
supports the latest versions of popular web browsers.