
Installation Guide


FlexStoneProducts.com - 5 - 5/18
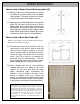
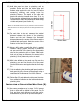
4 INSTALLATION OF BACK WALL TOP TRIM (G)
NOTE: Trim moldings are shaped like an “L”, and the long leg is
designed to overlap panels, with the short leg returning back to the
sheetrock and hiding the panel edge. Be sure to peel protective
masking back from the edges of the panels before adhering the trim
moldings.
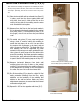
4.1) Note the height of the shower head. Decide if top
trims will be installed above or below shower
head/escutcheon, keeping in mind that trims can
overlap panels from ½” to 2-1/2”. Mark a level line
at desired height of the top of the trim on the back
wall (above the back wall panel).
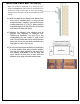
4.2) Measure the distance from plumbing wall to
opposite wall (sheetrock to sheetrock, NOT
FlexStone to FlexStone). Cut item (G) to this
measurement, then cut a notch ¼” wide in both
ends. This will enable the trim to overlap the back
panel and fit over the end panels eliminating any
large gaps or holes in the corners.
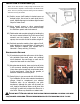
4.3) Dry fit this trim piece and make sure it fits properly
in a level position. Peel away protective masking
from the trim, apply adhesive to the back of the
trim molding, and adhere it over the back wall
panel. Secure the trim piece in place while the
adhesive cures using paint-safe masking tape.
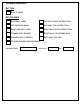
Side
Side
Back Panel