
Installation Guide


FlexStoneProducts.com - 4 - 5/18
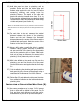
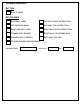
INSTALLATION OF WET / PLUMBING WALL PANEL (B).
2.3) Hold side panel as close to plumbing wall as
possible. Scribe and trim the inside edge and
bottom edge against the tub for best fit
before
measuring, marking, and cutting holes for
plumbing fixtures. The depth of the side wall
panels can also be trimmed down from 32 in. to
fit the opening,
although how you decide to install
vertical trims C and E will influence the width sizing
of side wall panels (see Section 6.)
NOTE: You will be able to fine tune your panel to a more accurate fit
after the holes are cut and your panel can be firmly pushed into the
corner.
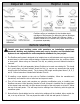
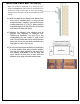
2.4) For each hole to be cut, measure the vertical
distance between the center of the plumbing
fixture and the tub. Measure the horizontal
distance between the center of the fixture and the
installed back wall panel. Mark the center of the
fixtures on the face of the panel.
2.5) Using a drill, make a small pilot hole in marked
locations. Using a jigsaw, hole saw, or paddle bit
cut out each hole in the panel to the appropriate
size for the particular pipe or fixture. Make each
hole only as large as necessary for access to the
plumbing. Cover plates only cover so much!
2.6) With holes drilled so the panel now fits over the
plumbing, you can fine tune the fit of the panel
into the back corner and against the tub from step
3.1.
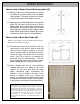
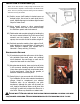
2.7) Prior to adhering the plumbing wall panel, seal the
back panel A to the corner reinforcement using a
small bead of Performance Pro 100% Silicone.
2.8) Follow Step 2.2 and adhere the side panel, but also
form a bead of adhesive on the back around each
plumbing hole.
3 INSTALLATION OF OPPOSITE SIDE WALL PANEL (B).
3.1) Use same procedures as in steps 3.1-3.6 except
that no holes will be drilled in this panel. Dry fit
first, and then apply silicone to seal the corner,
and adhesive as you did on previous side panel.
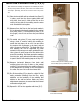
Inside Wall
Shower Base