
FL3DFFGNPRO User Manual


5
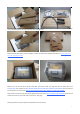
3 Initial Hardware Installation
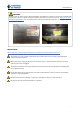
To do this, begin by carefully placing the Creator Pro on one of its sides so that the bottom is exposed. You will see the
Creator Pro’s power supply. Using a flathead screwdriver switch the red power supply switch so that it displays 115v, as
shown below. Now you are ready to install the extruder.
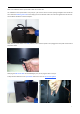
You'll need the two shortest silver screws from the kit found in the accessory box, and the appropriate hex wrench.
First, lower the build platform by using one of the methods described in the previous section. Holding the extruder by
both sides, take it out of the accessory sleeve and position it on the extruder seat with the fan facing forward. Align
the screw holes and fasten with the two short silver screws.
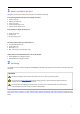
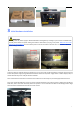
WARNING
Flashforge sets the power supply to default 230v before leaving factory. If voltage in your location is between 90v
to 132v, please switch the power setting from 230v to 115v before you plug in the power. Failure to do so will
damage the motherboard. You can find the power source at the bottom of Creator Pro. The red box is where the
power setting is located: