
Installation Guide
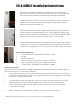

FIX-A-JAMB II Installation Instructions
1. Carefully remove door trim molding around the area of the jamb needing
repair. This is best done with a pry bar or the back end of a claw-foot hammer.
This material can and should be reinstalled upon installation completion.
2. Positioning the Fix-A-Jamb over the jamb so that the holes align with the lock
bolt holes in the doorjamb. When placed properly the edge of the short leg
should be against the door jamb stop.
3. While ensuring the Fix-A-Jamb component remains properly positioned shim
secure it into place with the attached screws. No pre-drilling is required with
the screws for the Interior FIX-A-JAMB piece. For the Exterior FIX-A-JAMB
piece, it may be necessary to pre-drill a hole, using a 11/64” drill bit.
4. Secure the doorjamb with the Fix-A-Jamb attached to the rough frame with the
suppliedscrews.Drivescrewsuntiltheheadsseatushagainsttheframe.Be
careful not to overtighten screws, as doing so may cause the jamb to bow inward.
Recommended Equipment
1 - Variable speed drill, with screwdriver adapter and bits
1 - Pry bar
1 - Flat tip screwdriver
1 - Pair of work gloves per person assisting in installation
1 - Pair of safety glasses per person assisting in installation
1 - 11/64” drill bit - If Installing External FIX-A-JAMB
(Note: It will be easiest if the FIX-A-JAMB components are painted before they are installed. They can
then be touched up as necessary after installation.)
1. Usingplainsteelwoolorveryneemeryclothgentlyroughthesurfaceofthepieceandareato
be painted. Understand that you only want to rough the surface and break the gloss. Do not totally
remove the existing powder coating.
2. Clean the surface with a tack cloth or a cloth with a cleaner on it that will not leave a residue.
Rubbing alcohol will work well for this application. You can also use mineral spirits or
other chemicals but make sure that whatever you use does not cause an adverse reaction
with the power coating.
3. When components are clean and free of debris you are ready to paint your pieces.
©2005-2013 Armor Concepts LLC www.armorconcepts.com 888-582-2294
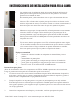
Painting Instructions