
Owner's Guide


38
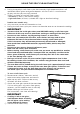
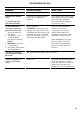
USING THE SELF CLEAN FUNCTION
5 Turn the function knob to SELF CLEAN.
●
The halo will glow red.
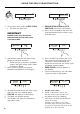
IMPORTANT!
Double ovens only: Ensure the
function knob for the other oven
is turned to OFF.
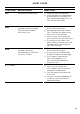
8 oven stops in and the self clean cycle
length will display and flash.
●
There are two cycle times available:
4 hours for light soiling, and 5 hours
for normal soiling.
9 Press PLUS or MINUS to choose
between the different cycle lengths.
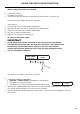
!1 Towards the end of the self clean cycle,
the oven will start cooling down.
●
COOLING will appear in the display.
●
The door will remain locked.
●
The display will show the remaining
cool down time.
●
Double ovens only:
●
While a self clean cycle is set
for one cavity, you cannot use
the other cavity for cooking.
●
Self clean can only be set for one
cavity at a time.
During a self clean cycle, if the
function knob for the other cavity
is turned, a warning will show in the
display for a few seconds.
!0 Press ACCEPT to confirm the cycle
time and start the self clean cycle.
The oven is now locked and the
length of time for the self clean cycle
will begin counting down.
●
DOOR LOCKED will also appear in
the display.
●
The time remaining in the self clean
cycle will show in the display.
6 REMOVE RACK: PRESS PLUS TO
CONTINUE will flash in the display.
7 Press PLUS to confirm that that you
have removed all oven shelves, trays,
and side racks.
14 : 1 5
SELF CLEAN
14 : 1 5
SELF CLEAN
REMOVE RACK
PRESS PLUS TO CONTINUE
14 : 1 5
SELF CLEAN
oven stops in;
5h 00m
18 : 45
DOOR LOCKED
COOLING
0h 30m
14 : 1 5
SELF CLEAN
DOOR LOCKED
oven is not
operational while in
self clean mode
14 : 1 5
DOOR LOCKED
SELF CLEAN
4h 59m