
Owner's manual


40
CONTENTS
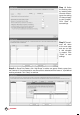
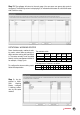
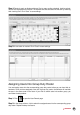
Step 4: Define
the clocking rules
by inserting value
into each column.
Ignore the setting
if it does not apply
to your Company.
Click “Save” to
save settings.
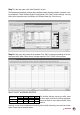
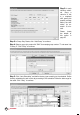
Step 5: The soft-
ware will return
to the main page
and you can see
a new schedule
is created. Click
“Close” to save
settings.
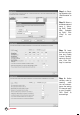
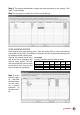
Step 6: In Group Duty Roster, click “Add Group” to add a new group. Select a group from
the checklist. It is recommended to use Group that is attached with the name of a predefined
clocking schedule. Click “Okay” to continue.