
Manual


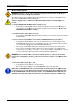


Chapter 5: Power Up and Initial Checks
5.1 Before Powering On
WARNING:
Follow Lockout /
disconnecting
cabling, wiring, and equipment.
Each item below lists the manual Section(s) that will provide a reference for that specific item.
Also refer to Section 4.5
Connection
Caution:
Damage may occur if the 24 VDC and 0 VDC Commons are improperly co
nected.
1. Verify CONTROLLER Un
it DIP switch settings (4.10)
•
Verify that the eight (8) DIP switches visible
each unit are set to indicate the appropriate spindle number and options.
CONTROLLER DIP Switch setting.
2. Confirm
Interface (PLC) connection (4.7)
• Verify that the
CONTROLLER
PLC terminals.
3. Check connections between the tool and the
• Verify that the Single
cable (resolver/ motor and transducer) connecting the tool and
CONTROLLER unit is
secure.
connected to the
appropriate TOOL
•
If the layout contains moveable parts, visually in
there is proper clearance and that cables have sufficient length. If movement would
create any excessive stress on a cable, or create any potential for damage to the system
or other components in the layout, then make a
WARNING:
Do not make motor connections with the power on. Turn off all controller
power before attempting to connect or disconnect any motor cables or tool damage may
occur.
4. Check the input voltage (3.
• Verify inpu
t power is properly connected (4.
•
Ensure input power voltage to the
NOTE:After a CONTROLLER
unit is powered down, the power must not be applied again
for at least five (5) seconds. Repeated power up and power down
ble the CONTROLLER unit
as a safety precaution
disabled, keep the power off for five (5) minutes, then power on again to reset the fault.
Page 5-2
Tag out
and other safety precautions when connecting or
cabling, wiring, and equipment.
Each item below lists the manual Section(s) that will provide a reference for that specific item.
Connection
Diagram.
Damage may occur if the 24 VDC and 0 VDC Commons are improperly co
it DIP switch settings (4.10)
Verify that the eight (8) DIP switches visible
through the rear panel removable plate
each unit are set to indicate the appropriate spindle number and options.
Section 4.10
CONTROLLER DIP Switch setting.
Interface (PLC) connection (4.7)
CONTROLLER
unit I/O Interface wiring is connected to the corresponding
3. Check connections between the tool and the
CONTROLLER unit (section
3.
cable (resolver/ motor and transducer) connecting the tool and
secure.
If using multiple systems, ensure that
the correct
appropriate TOOL
and CONTROLLER unit.
If the layout contains moveable parts, visually in
spect all components to ensure that
there is proper clearance and that cables have sufficient length. If movement would
create any excessive stress on a cable, or create any potential for damage to the system
or other components in the layout, then make a
ppropriate adjustments.
Do not make motor connections with the power on. Turn off all controller
power before attempting to connect or disconnect any motor cables or tool damage may
4. Check the input voltage (3.
1.2, 4.6)
t power is properly connected (4.
6.1).
Ensure input power voltage to the
CONTROLLER Units is 100~230 VAC.
unit is powered down, the power must not be applied again
for at least five (5) seconds. Repeated power up and power down
,
may temporarily dis
as a safety precaution
. If a CONTROLLER
unit does become
disabled, keep the power off for five (5) minutes, then power on again to reset the fault.
and other safety precautions when connecting or
Each item below lists the manual Section(s) that will provide a reference for that specific item.
Damage may occur if the 24 VDC and 0 VDC Commons are improperly co
n-
through the rear panel removable plate
of
Section 4.10
unit I/O Interface wiring is connected to the corresponding
3.
1.2)
cable (resolver/ motor and transducer) connecting the tool and
the correct
cable is
spect all components to ensure that
there is proper clearance and that cables have sufficient length. If movement would
create any excessive stress on a cable, or create any potential for damage to the system
Do not make motor connections with the power on. Turn off all controller
power before attempting to connect or disconnect any motor cables or tool damage may
unit is powered down, the power must not be applied again
may temporarily dis
a-
unit does become
disabled, keep the power off for five (5) minutes, then power on again to reset the fault.